
I’m really excited to be taking part in the Better Photography Blog Hop! I’ve joined some crafty geniuses: Diane from CraftyPod, Haley from The Zen of Making, Michele from Michele Made Me and Megan from Rad Megan’s… and we’re each sharing our great photo tips!
Scroll down to the end of this post to get links to each post this week!
Today, I’m going to show you how to get a seamless white background, with just a white posterboard and photo-editing software.
Why a white background?
When you’re running a handmade business, there are two important considerations for taking quality product photos:
- Each photo needs to clearly show your product
- Your photos should be consistent across your webpage/shop
I find a white background to be the easiest way to meet these criteria. It’s possible to find a lovely, non-distracting fabric as the background, but taking consistent photos with a patterned background requires much more photographic skill than using a white background.
And you know what? I’m not a photographer. I design crochet patterns… so I need something easy! And this is it… so follow along!
A note about software
I’m not going to try to pull the wool over your eyes… I have fancy photo-editing software. (I use Adobe Photoshop CS3) With the number of photos I need to process, it made sense for me to splurge and purchase it.
However, it may not be worth it to you… that’s a personal decision. Fortunately, many of the tricks I’m going to show you use tools that are available on freebie photo editors (PicMonkey is a great one).
So, don’t fret if you don’t have expensive photo-editing software. Follow the key steps on whatever software you’re using, and you’ll still get great white backgrounds!
The setup
Ready for the materials list? Here’s what you’ll need:
- a white piece of posterboard
- your camera
- the thing you want to photograph
- some natural light
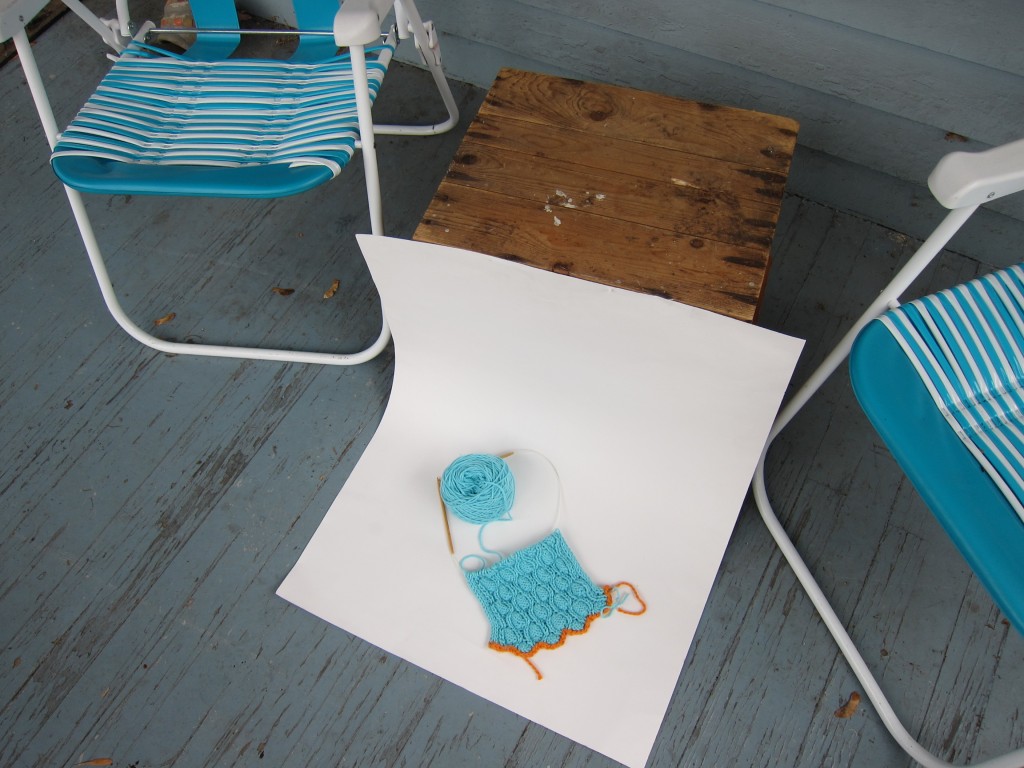
Seriously. That’s all. Here’s the photo of the setup I used for the photo I’ll be editing today:
You can read some more details about setting up the posterboard and snapping the photos in this blog post. I live in a often-cloudy climate where I’m able to get great indirect lighting on my porch. But, if you don’t, you’ll want to read Megan’s post on creating a light box.
Keep in mind: the better your photo is, the less editing you’ll need to do. And there’s no editing that can fix a blurry or way-poorly-lit photo, so snap the best one you can!
Step 1: Change the Exposure
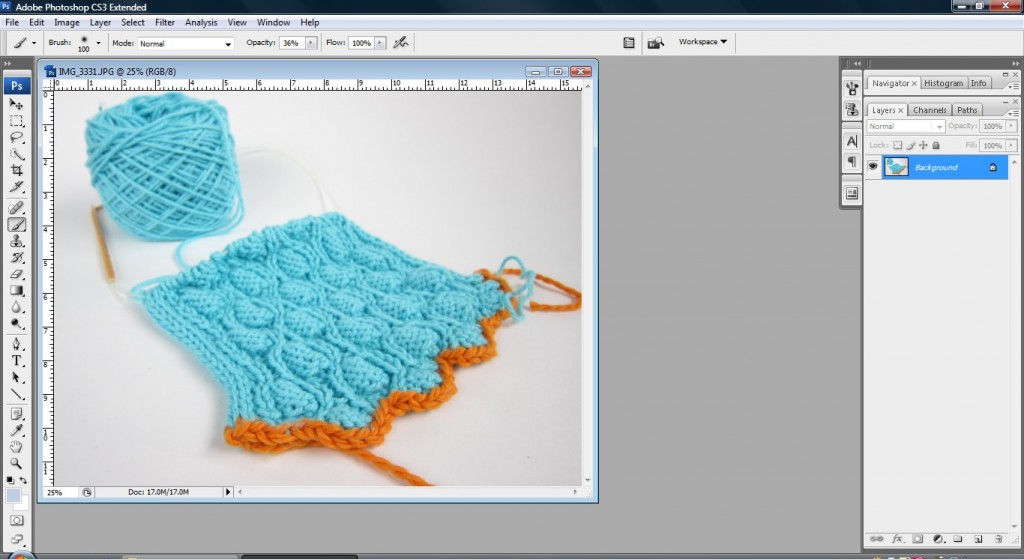
So, you’ve snapped your photo… here’s what mine looked like:
See how the background looks grey? Not good.
Open your picture up in your photo editing software:
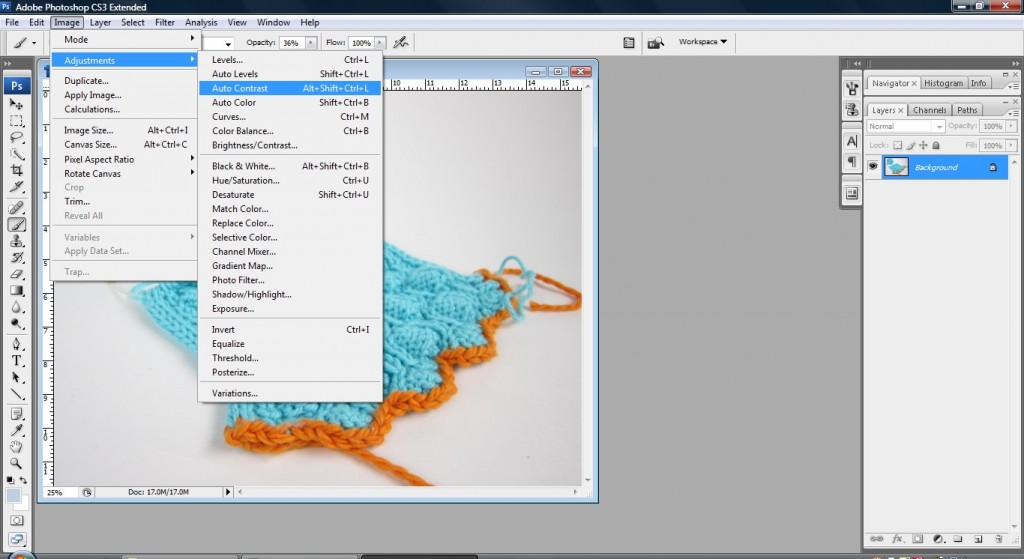
The first thing I like to do is run ‘Auto Contrast’. This isn’t required, but it tends to make the background whiter and the product a little sharper. On Photoshop, it’s under Image>Adjustments>Auto Contrast.
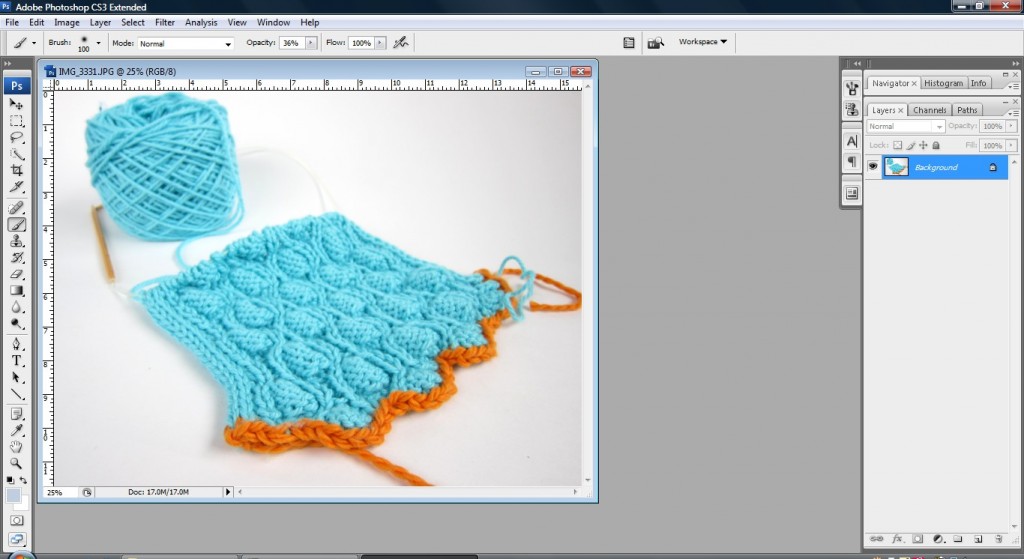
Here’s what my photo looks like after Auto Contrast:
See? The background’s a little whiter. You may also try ‘Auto Levels’, but depending on the color of your item, this tool can significantly alter the color, so it may not be best.
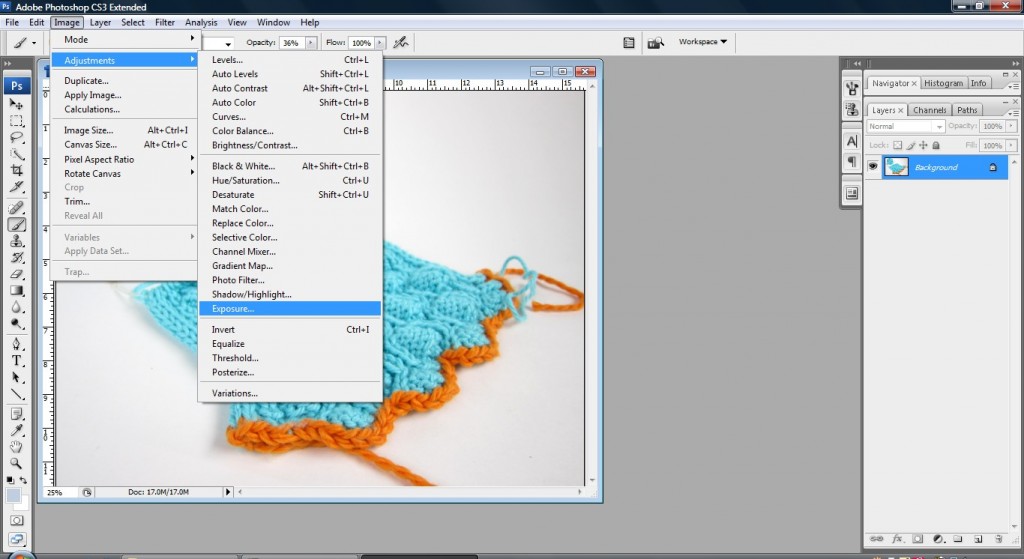
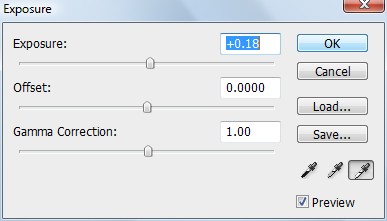
Okay, now we want to make even more of the background white. To do this, we’re going to increase the Exposure, which is under Image>Adjustments>Exposure.
When you click, a little dialog box will come up:
Fiddle with the exposure, increasing it until you get as much background to look white as possible… without making the item look washed-out. Here’s how mine turned out:
This step is an art… there’s no ‘right number’ that’s going to work. Just keep playing with it!
Step 2: Clean up the edges
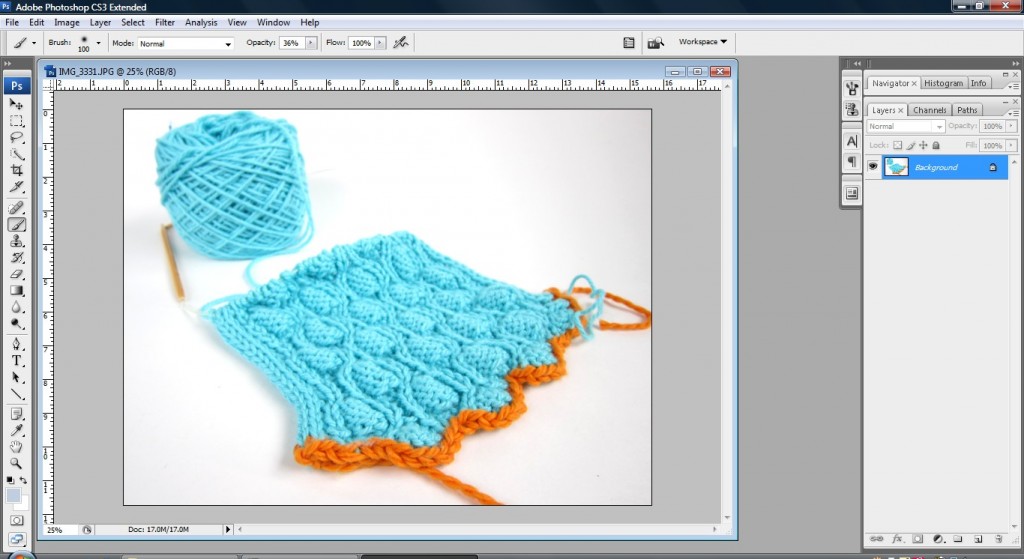
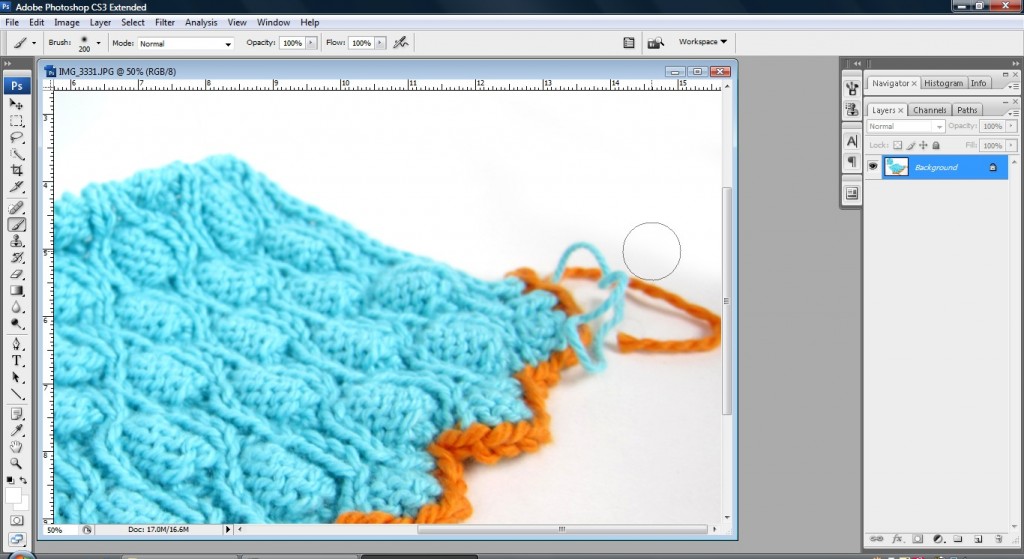
My photo looks pretty good… but we’re not quite at the point where the background is perfectly white. To do this, we’re going to need to do some touch-up with a brush.
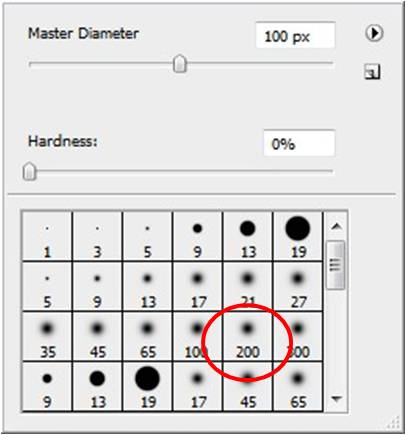
Now, you’ll select the brush (it looks like a paintbrush in the toolbar), set the color to white and pick the features of your brush:
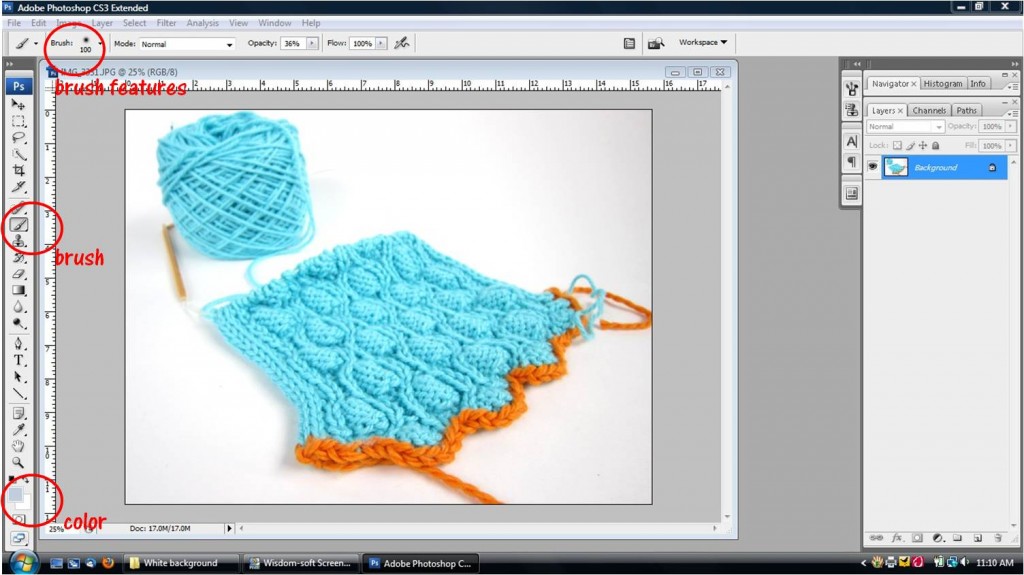
For the ‘brush feature’, I like to pick a brush with a fuzzy edge:
This makes it easier color around the edges of your item and make it look natural.
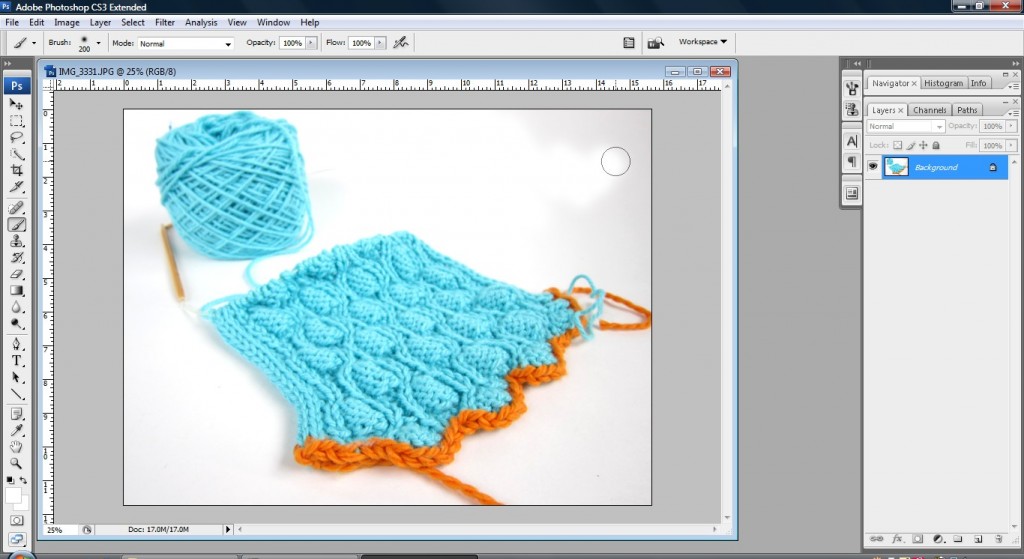
So… go ahead and paint everything in the background to look white!
Some tips:
- Pay particular attention to the corners: these tend to be the darkest parts of the photo
- Be cautious when it comes to shadow: you may want to leave the existing shadow in place. It can be difficult to remove and still have the item look natural.
- If you’re having to do a lot of painting, this might be a clue that the exposure needs to be higher (see step 1).
If you’re painting close to the item, you might want to zoom in and use a smaller brush:
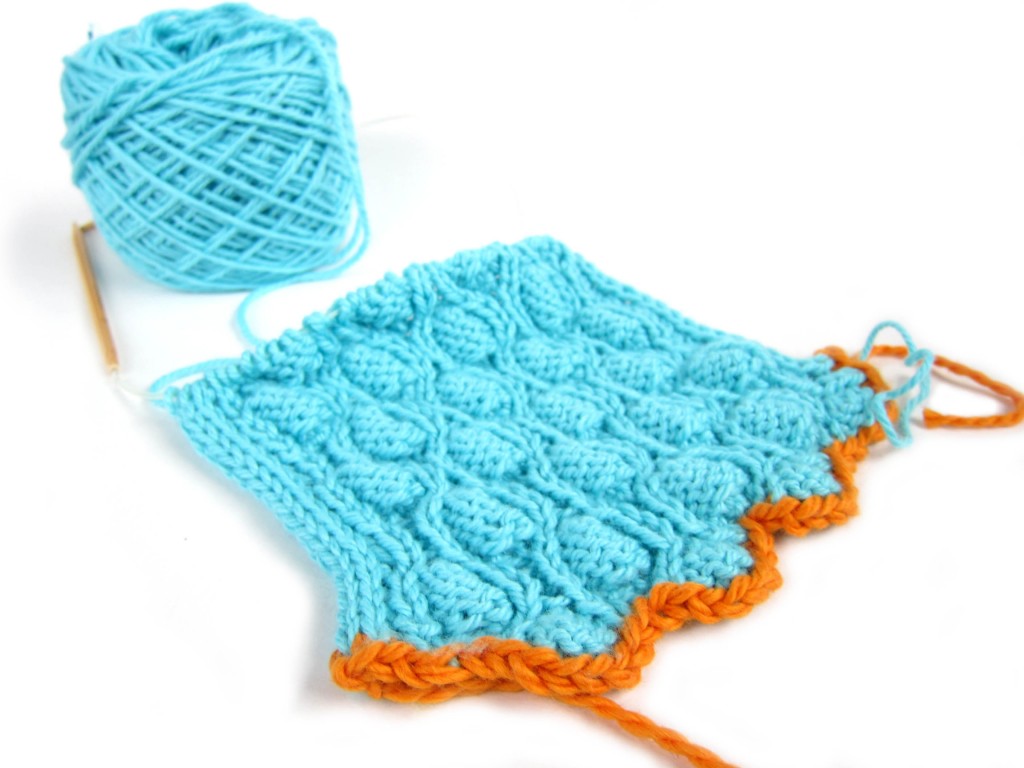
Ta da!
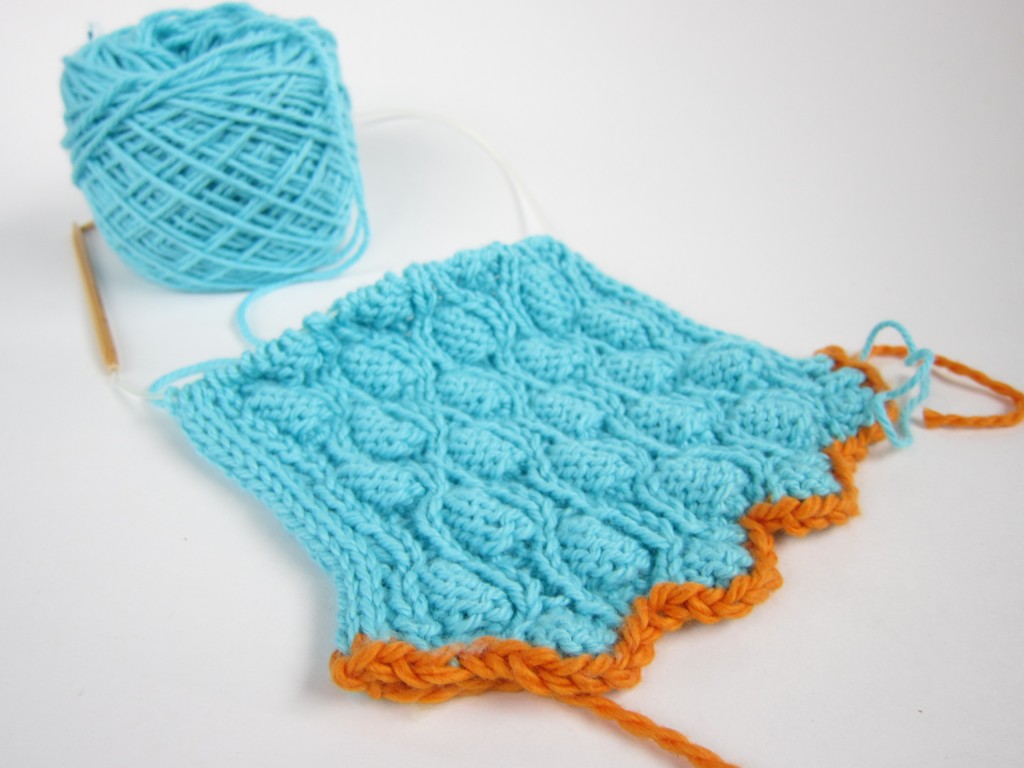
Here’s how mine looks when I’m done!
Yay!
As I said before, the better your photos are to start with, the less editing you’ll need to do. So, it’s worth taking the time to find a location with good lighting and become familiar with the exposure settings on your camera. If you take a fabulous photo, you’ll probably only need to paint the corners white to have a totally white background.
Give it a try!
I hope you give this tutorial a try! I’m sure that with a little practice, you’ll be able to take great photos with seamless white backgrounds.
And be sure to visit the other posts in the blog hop this week… such great photo tips!





I do almost all of those steps except….brushing out the darker parts! DUH!
Also, Pixelmator for the Mac is a Photoshop like program for about $10-20. I got it on sale for $10!
oooh, thanks, Vanessa, for the info about Pixelmator! I’m sure lots of people will find that helpful!
I love how great perfectly white backgrounds look for craft photos. Thanks for sharing such great tips!
Thanks so much for sharing these tips and tricks. I plan to put this software on my Christmas wish list 🙂
Thank you for the excellent how-to, Stacey! You’re right – any free or inexpensive photo-editing tool will do most of these edits, and make a huge difference in the images. Both iPhoto and Picasa are great.
…And that’s the best tip ever: the better your image, the less edits it needs!
I’ve also found Paint.net to be a great free program; I have Photoshop but never use it. People are always creating new extensions for Paint.net (also free), so it’s usually a matter of searching for an extension that does the same thing Photoshop does.
Wonderful tips, thank you so much.
Neat! I was just telling my husband the other day about how professional your photos look with a white background. Now I know how to do it too! Thanks for sharing:-)
Aww, thanks, Liz!
Thank you for posting your tips and tricks for photographing! Your pictures really turn out great too – well done! I have this linked to my blogging and photography post as well today, for great advice.
So… I just retook a pic of one of your previous projects I did (christmas pickle *giggle*) and did this with it! How exciting! My pic looks like a $100! 😀
Thanks for the tut!
Yay! So happy it helped 🙂
I am just starting to learn how to take better photos of my store and the items I make. Usually I like to make items that showcase what a yarn could look like in a project, to give my customers some inspiration. I’ve been using a white felt fabric in my store as the background but getting the light right is hard! I’d love to hear more tips for doing the same thing, but with video. I’m offering free short tutorials and tips for beginner knitters on my youtube channel, but I want to make sure that they look the best they can.
@Teresa- You’re right that the lighting is tricky. I would recommend setting up a small setup, similar to the one pictured, but with additional lighting. This blog post about making a $10 light box is a fabulous idea.
So helpful…you made it seem so easy. I can’t wait to try it!!
Nice bloog and products!
I can see that this is an old tread, but there is an easier way.
In photoshop choose Image>Adjustments>Levels
Under “Input Levels:” Move the right slide to the left as far you can go without changing to much of your lovely fabric.
And if you get the grey to more like white but the withe has taken over some of your fabric, then just move the left slider against the right side.
Keep up the good work! 😀
Thank you for sharing this tip, Glenn!