


I’ll be frank. I was scared of adding hair to my amigurumi designs. It seemed complicated.
But not adding hair was limiting me… I mean, what’s a horse without a flowing mane? So, I decided to break out of my shell… and do you know what? Adding hair isn’t that hard.
Let me show you how.
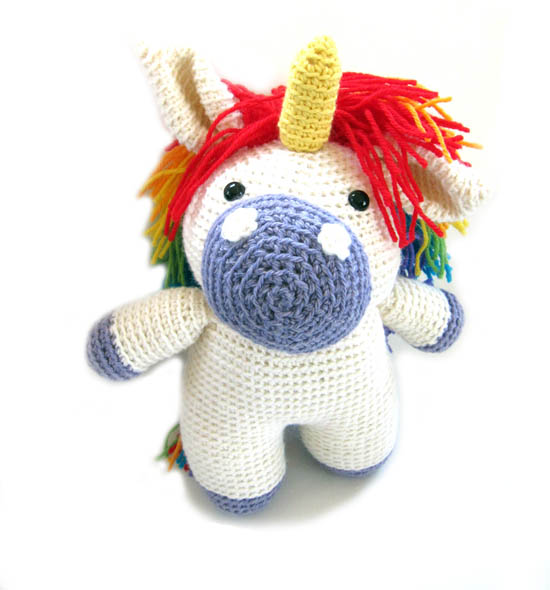
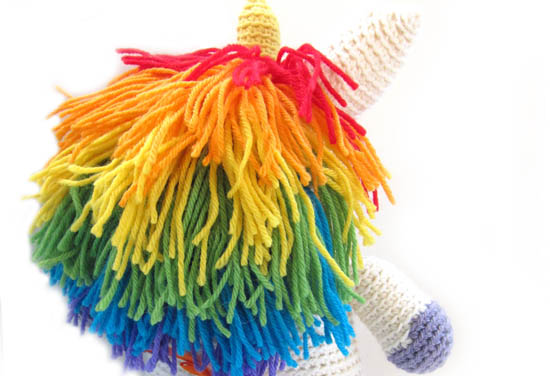
The model in this post is my friendly unicorn. You can get the pattern here.
Step 1: Make your amigurumi
This process is done after all of the crocheting & stuffing & assembly has been completed.
Step 2: Cut your yarn into pieces
The pattern will specify the length of your hair pieces. If you’re making it up as you go along, just remember that each ‘hair’ will be folded in half. So, if you want your piece to have 3″ long hair, you’ll need to cut 6″ long pieces of yarn.
The easiest way to cut multiple pieces of yarn (and you’ll need a lot!) is to find a book/box that has a circumference the length of your pieces. Wrap your yarn around oodles of times, and then cut through them all at once. Presto!
Step 3: Add your first piece of hair
Fold your yarn in half, so that there’s a U-shaped bend on one side and two ‘tails’ on the other side.
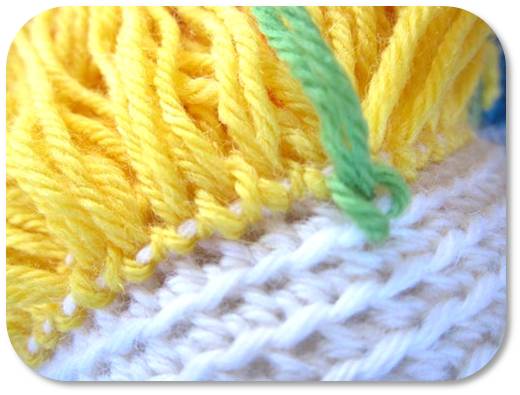
Now, look at your amigurumi. If you crocheted through the back loop, there’s lots of ‘front loops’ left behind, which are perfect for attaching hair to. They’ll also guide you to keep your hair in nice rows.
Insert your hook into a front loop, and catch the bend in your hair piece:
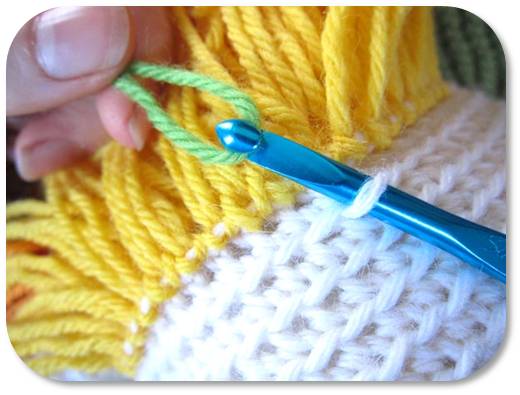
Pull the bend through the front loop, until about an inch is pulled through:
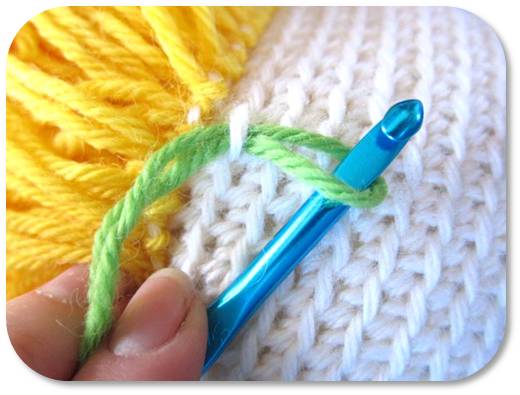
If you accidentally pull the hair all the way through… don’t worry. Just start again!
Now, your aim is to pull the two ‘tails’ of the hair through the bend.
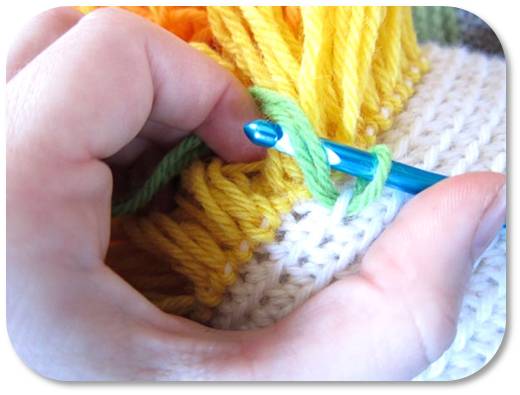
I’m doing this by using my hook, but you might find it just as easy to use your fingers.
Pull the tails and… ta da!
Step 4: Repeat until your cutie has lots of hair!
I’m not going to fib… it’s a little slow-going (especially to obtain a lush head of hair!), but it’s the perfect easy-thing to do while watching TV!
Lots of options!
For the unicorn, I made a rainbow-mane… but this technique looks just as adorable in a solid color:
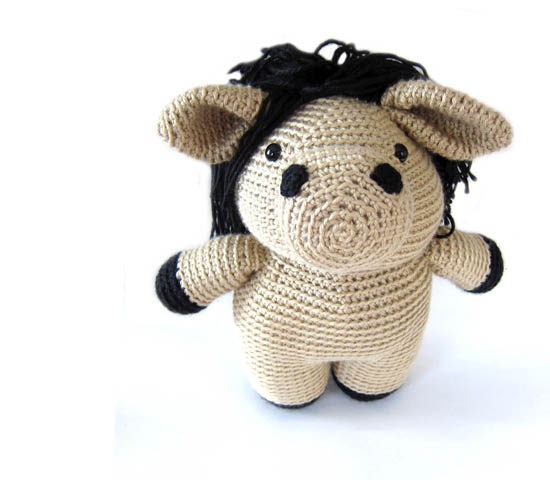
Once the hair’s in place, you can feel free to style it, add a bow, or even trim the hair into a certain ‘do. I can picture this technique being used on amigurumi dolls, long-haired dogs, horses… you name it!
Ready to try your hand at adding hair? Get the Flavia the Unicorn pattern here.

Here are handy links to all the posts about faces and details. . .
- How to Embroider with Yarn
- How to Embroider a Smile on Amigurumi
- How to Attach Felt Pieces to Your Amigurumi
- How to Add Hair to Amigurumi
- How to Make a Pompom Tail
- How to Crochet with Beads
Return to the main table of contents for Let’s Learn to Crochet Amigurumi.
Move on to the lessons about eyes.
Happy stitching!

If you have a lot of hair to add, you might find a latch-hook might speed things up; while latch-hook rugs seem to be out of favor right now :-), at least in the US Michael’s still stocks latch-hooks themselves.
@Doug- Genius! I hadn’t thought of a latch hook, but you’re exactly right!
stacey
I started to add hair to a sasquatch I made and was struggling with the crochet hook. The latch hook works so much faster! Still going to take me forever, but that’s ok.
Thank you for sharing how to do this, I love it, looks fun. Now to get the pattern on thursday, happy, happy, happy.
Hey I finished my Sparkie the Monster last night…too late to take pictures..and I got home too late tonight..hopefully tomorrow…
Along the latchhook scenario, it would be a great way to make a wonderfully shaggy orangutan out of an otherwise bare monkey. (Although we love monkeys too.)
Thanks for the info. I was kinda intimidated by putting hair on my first amigurumi project, but you made it so easy. Thanks!