


Today, I’m going to talk about how to crochet the second round of your amigurumi!
You see, I spend a lot of time talking about how to start off with the first round. Whether it’s using the magic ring method or the sloppy slip knot… the first round gets all the attention!
And then, Jen told me she was having trouble on the second round. Of course! We never talk about the second round, even though it’s just as tricky! So, here we go!
(Want to see a video version of this tutorial? You’ll find it here.)
For today’s tip, I’m using the pattern shown here, but almost all amigurumi patterns are the same! It starts with 6 stitches for the first round. So, let’s say we’ve completed our first 6 stitches:
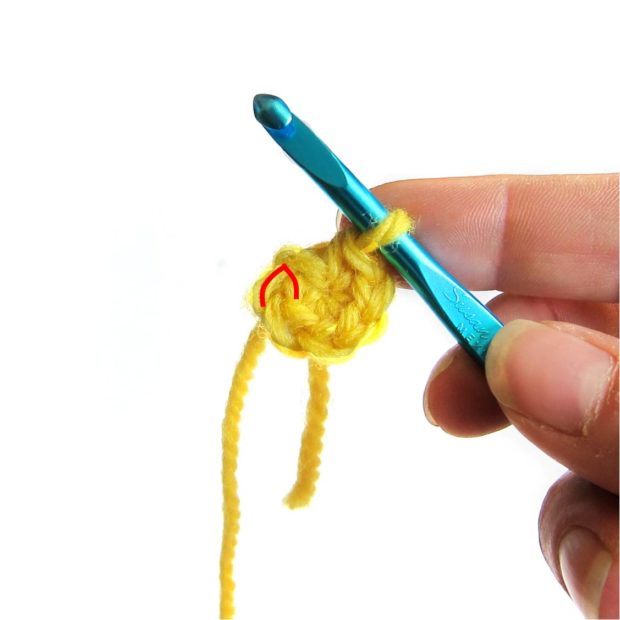
 Don’t turn your work! You’re going to crochet the second round going around just the way you’ve been going. The hardest part about crocheting the second round is finding the next stitch you should use. I’ve highlighted the next stitch in red:
How did I know it was the next stitch? It has to be! I want to have 6 stitches in my first round, so I count my 6 stitches (backwards, starting from the hook):
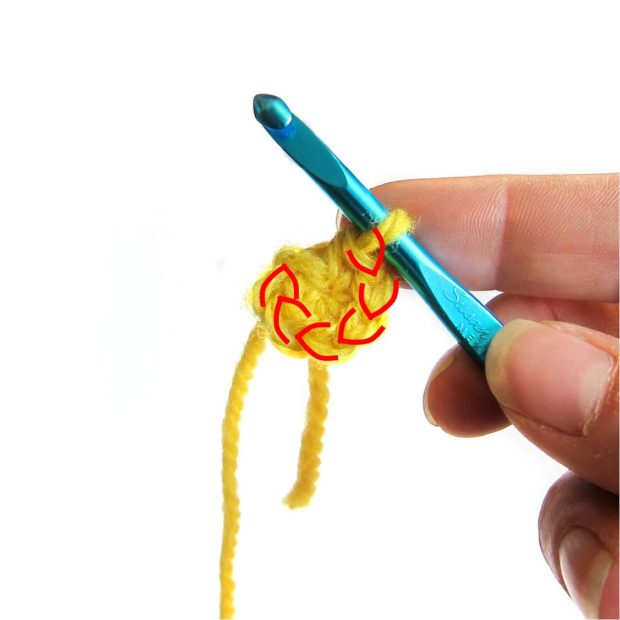 So, now I know what my next stitch is! What is that little weird extra bit that might trick you into being a stitch? The arrow is pointing to that weird piece in this picture:
![]()
That’s just a confusing chain left over from the original chain 2. Don’t crochet into it… skip over it and pretend it isn’t there!
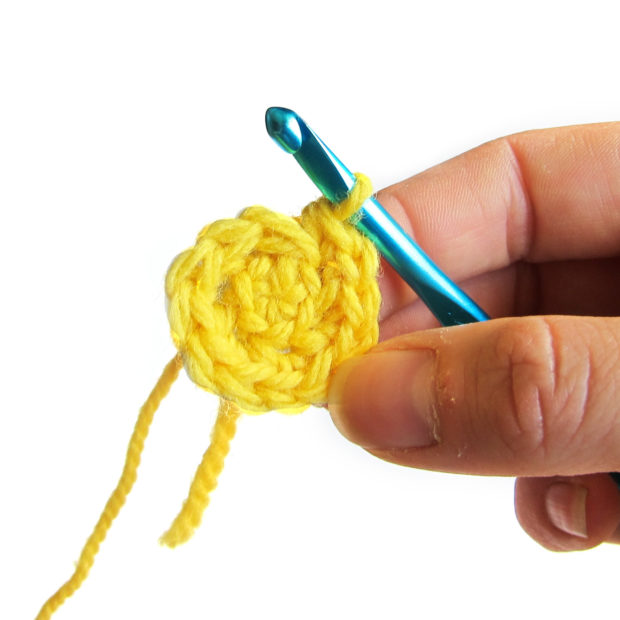
Now you know which are your 6 stitches, crochet twice in each one. Now you’ve finished your second round! The rest will be a piece of cake!
You might also want to read my post on using stitch markers… it’ll help you keep track of your stitches!
Best,
Stacey
That’s pretty much the method I use, count back to the start of the round and crochet into that stitch. 🙂
Its quite often these steps that are overlooked but those who can crochet – I will continue to direct “my ladies” to your website 🙂
Thank you, yet another clear and helpful tutorial
I’m a new follower and have just spent probably an hour reading back through your site! So many great tips – whether you crochet amigurumi or not. I’m a newbie crocheter – and have just started projects working in the round. My first hat I made had a very crooked seam for this very reason (worked in rounds, not spirals) and it took me a while to figure out I was always picking up one extra stitch along the way. This is GREAT! So many wonderful tips on your site.
Thank you so much, Karie! That’s such a compliment 🙂
I didn’t even realize I as doing this wrong!!
An issue im currently having is when I get past my first two or three rows, my ’rounds’ don’t end above my stitch marker if I only do the listed number of stitches… Anyone have a clue what I might be doing wrong?
I have just been going until I get to the stitch marker, but not sure if this will mess me up in the end if project…. Help please!
Is your final stitch ending up slightly to the right of your stitch marker? That’s totally normal. It’s because crochet stitches bias slightly, so each round shifts a little to the right. You might find it helpful to move your stitch marker after every round.
Hi, I’m getting back into crochet and enjoying your site tremendously! This tip helps a lot! What about when every round ends with a slip stitch and starts with a 1 chain? How do you do the 2nd round? Can you please explain and demonstrate the proper technique? I think I’m doing it wrong.
Hi Sylvia- What you’re talking about is called working in ‘joined rounds’, and I agree… it’s tricky! I don’t have a video or tutorial right now, but I’ll put it on my to-do list 🙂
Basically, in the meantime, you want to follow the instructions very literally… chain one, single crochet as described, and then do a slip stitch in the chain that you did to start the round. It should look like a finished circle, instead of a circle with a jag sticking out of it (the one pictured in this post)
Thank you Stacey! A tutorial would be great! I found instructions on Look What I Made. http://www.lookatwhatimade.net/crafts/yarn/crochet/crochet-tutorials/how-to-crochet-in-the-round-spiral-vs-joining/
Loving the site, about to have a go at the penguin for my first amigarumi! The problem I have with rounds is that I’m not sure if I should be slip-stitching into the last stitch on the previous round or not… I don’t see you mention doing this, but then I worry that my circles wont be so circular. Do you usually do this to finish a round, or do you just sc into the next stitch?
Ah I don’t know how I missed the previous comment, it is literally the same question, Thanks for the link! 🙂