


In amigurumi patterns, you’ll often see the instructions ‘Fasten off’ or ‘Fasten off with a long tail’. What does that mean? No worries, I’m here to tell you!

Fasten off.
Whenever you’re making a piece, and you’ve finished all the crocheting… you’ve got to end it! Even though the instruction ‘fasten off’ may sound a little obscure, it’s super-easy (and you’ve probably already been doing it)!
I’ve got a video here, followed by some step-by-step photos for if you just need a quick reference.
Here’s the video
And here’s the photo tutorial
Here’s my snout from my cow (because I’m doing the CAL!), and I’ve finished crocheting:

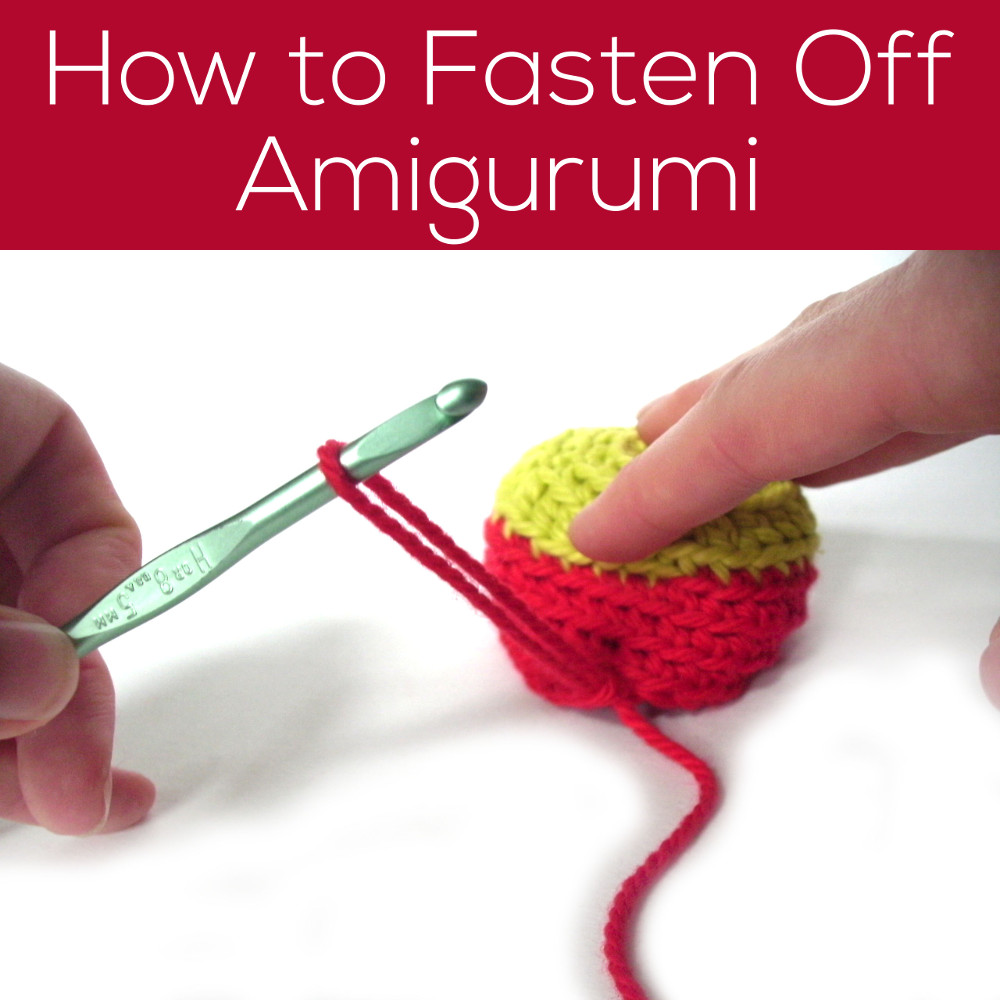
Remove your hook, making the last loop a little larger:

Now, pull the working yarn through the loop (you can either cut the yarn- see the next part of this blog post first- or pass the entire skein through the loop. Up to you!).

Check out that beautiful knot:

How much tail should you leave?
Excellent question! When you’re cutting your yarn when you’re fastening off), you always want to leave a few inches or so. That way, you’ll have enough to weave in (or hide) the tail on your finished piece.
When making amigurumi, you often want to leave a ‘long tail’… enough so that you can use the tail to attach the piece to another piece later on. I usually say about 12″, but a more accurate measurement is about twice as long as the last round of your piece.
Here’s the step-by-step:
Keep in mind, you can cut your working yarn while tying off the knot (see above) or after the knot has been fastened. Simply snip your yarn (leaving the length I described):

And you’ve done it!

How’s your cow coming?
(It’s not too late to join in! Read all about our Cow CAL here!)
Last time, I showed you that I finished up my cow’s head a couple days ago, and now I’ve finished the body, arms and legs, as well:

Pretty rainbow-y, huh?
On Thursday, I’ll show you how to slip stitch and half double crochet, two stitches you’ll need for crocheting the snout!

Here are handy links to all the posts about closing up the stuffing opening and fastening off in amigurumi. . .
- How to Close Up Your Stuffing Opening – Drawstring Method (Wendi’s favorite)
- How to Stitch Up Those Last Few Rounds (Stacey’s favorite)
- How to Fasten Off Amigurumi
- How to Tie a Knot in Amigurumi
Return to the main table of contents for Let’s Learn to Crochet Amigurumi.
Move on to the lessons for attaching parts.
Happy stitching!

He is super rainbow-y, and is going to be very adorable when you are finished!
Do you recommend stuffing after attaching pieces or does it even matter? Thanks for all your video tutorials 😀
Hey Brigette! That’s such a good question!
I always attach (stuffed) pieces like arms and legs to an unstuffed body. That way, you can tie a secure knot on the inside of the body, and then stuff it!
I’m the Amigurumi beginner and always looking for tips from a pro! I’m enjoying your book, Crocheted Softies. Today I got the Herrschners catalog in the mail – flipping through guess what I saw? – your book! You’re all over the place. It’s great the way you interact with everyone, it makes me want to see what you’re doing next. Nice cow!
Thank you so much, Robin!