Tutorial: How to Attach Perfectly Positioned Buttons

Okay, so you’ve gone through all of that work to knit or crochet a sweater… and now it’s time to attach the buttons. How do you make sure you sew on the buttons in exactly the right spot? I’ll show you how!

All you need is one locking stitch marker.

First, close your sweater so that the button band overlaps exactly how you’d want it closed when finished, with the holey side of the button band on top.

Starting at the bottom (or top), poke your locking stitch marker through the first hole, and attach to the solid side of the button band.

attach buttons 0

This stitch marker marks where your button will go! Lock the marker.

Notice that the holey side of the button band will pull off… the locking stitch marker goes right through the hole!

attach buttons 1

Here’s what it looks like:

attach buttons 2

You want to sew your button directly on top of the locking stitch marker. Read this blog post about sewing on buttons for help.

attach buttons 3

When you’re finished sewing (or at least have finished the first few, securing stitches), remove the stitch marker. It should just slip out once you unlock it.

attach buttons 4

Now it’s time for the other buttons! Repeat this trick for each button.

Each time, button up the buttons you’ve already completed so you can ensure they line up properly.

attach buttons 5

No more wonky button problems!

Sample sweater is Gramps knit using the Rainbow Yarn Sampler Pack.

How to Make Denim Shorts for The Dress Up Bunch

How to Make Doll-Sized Denim Shorts with all those cool details - a tutorial from Shiny Happy World

Here’s how to make some denim shorts for a doll and give them that cool hem and seam treatment that jeans have.

Steal it!

Start with the legs from a cut-off pair of jeans (you do save those, don’t you?) and the free Play Clothes shorts pattern.

How to Make Doll-Sized Denim Shorts with all those cool details - a tutorial from Shiny Happy World

The instructions for the shorts say to turn up the bottom hem 1/2 inch and then another 1/2 inch. We’re going to steal the already-made hem so we need to shorten the pattern by 1 inch. Just turn up the bottom edge one inch and crease it to hold.

How to Make Doll-Sized Denim Shorts with all those cool details - a tutorial from Shiny Happy World

Make sure the edges of the cut-off denim leg are all lined up – the outside seam running right up the side and the front and back edges of the bottom lined up with each other.

Place the pattern on the bottom of the cut-off denim leg. The folded hem of the bottom of the pattern should be lined up with the bottom edge of the pants, and the edge of the pattern that says to place it on the fold should be butted right up against the flat-felled seam at the side of the cut-off leg. Cut around the pattern. It should look like the photo up there. Repeat with the other leg for the other side of the shorts.

How to Make Doll-Sized Denim Shorts with all those cool details - a tutorial from Shiny Happy World

Follow the rest of the pattern instructions without any more changes. You’ve got a cool pair of denim shorts with nice hem and seam details!

I call them Cheater Pants. 🙂

Here they are, modeled by Bean.

How to Make Doll-Sized Denim Shorts with all those cool details - a tutorial from Shiny Happy World

I used the same technique to give Karl here that classic hem treatment to his denim shorts too.

Karl (with a K) - boy doll wearing denim shorts

You can use this technique with any doll-clothes pattern!

Happy stitching!

The Dress Up Bunch is a collection of cute and cuddly rag dolls. Get patterns for the dolls, plus all their fun outfits and accessories!

How to Sew a Dart – video tutorial

How to Sew a Dart - video

Most people learn how to sew a dart because they’re sewing clothing. Darts are one of several ways to shape the clothes to the body.

But sometimes I use darts in my softie designs. Just like clothing, they can give a softie a nice rounded shape. You can get rounded shapes with curved seams too – but sometimes a dart is just right. Especially if I want to suggest a belly button!

Darts are sort of like partial seams – little tucks in the fabric. I’ve met a lot of folks who find them intimidating, but they’re actually very easy to sew. Watch the video to see how easy.

(And to see a sneak peek at this cute puppy softie.)

See? Learning how to sew a dart isn’t hard at all! And – unlike clothing where you really want those tapered ends of your darts to be PERFECT so they lie nice and flat, any imperfections in a stuffed animal’s belly dart just makes it look even more like a belly button. See where I positioned the end of the dart on Munch here?

Munch the Pocket Mouth Softie from Shiny Happy World

I did that on purpose. 🙂 You can’t fail!

Happy sewing!

One Technique – A Kajillion Costumes – No Pattern Needed – video

One Technique One Kajillion Costumes - No Pattern Needed - video
Way back this summer when I taught Harry Potter Camp I promised you I’d make a video showing how to make these easy Harry Potter cloaks – without a pattern. I didn’t forget! And for those who joined us after this summer – I had 20 kids in the class (ages 7-12) and they all made these cloaks in less than an hour.

The great thing about this technique is that you can use it for all kinds of costumes – knights, thieves, princesses, wizards, jesters, and so much more!

Here’s the video – but be sure to scroll down for more photos of samples and links to other techniques you’ll be able to use in your costuming.

See how easy that is?

I breezed right through a couple of techniques because I already have separate videos for them, with the demos designed to be easy to see. I especially recommend the one on using elastic with a casing. If you’re wondering what the heck I was doing with the clipping into the armpits, take a look at this video. With a lot of costumes I skip the whole hemming and finishing thing, but if you want to hem yours, here’s a video that will help. And applique with fusible adhesive is great for Halloween costumes. If you’re new to sewing (and this site) be sure to check out all the links to how-to videos gathered together on the Sewing Lessons page. And if you’re sewing with kids – here’s a post with some specific tips for them.

And now here’s a look at some costumes I made with this technique.

I used it to make this princess gown for Jo.

This took me exactly one hour to make – and I sewed it three times in that hour. Jo has gotten pretty opinionated about the fit of her clothing and I took this in a few times to be more fitted in the top, but keep the drapey arms and the width of the skirt. I just kept sewing the body narrower and narrower until she was happy with it.

This is made of stretch panne velvet – really easy to sew and comfy to wear. And since it’s a knit, the edges won’t fray even though I didn’t finish any of them. I used a stretch needle in my regular machine with a regular straight stitch. Easy peasy. No serger needed.

I used some of the scraps to make a matching dress for one of Jo’s dolls.

The belt is made of binder rings (available at any office supply store) all linked together.

I wanted to show you something less flowy too – something a boy could wear. I talked about the possibility of a Robin Hood/Peter Pan tunic in the video and then decided to make one up for real.

I used regular embroidery thread to lace up the slit at the neck.

Finally, I wanted to show you a patchwork girl. Jo just read A Little Princess and wanted Princess Ivy to have a rag dress too. I didn’t sew the patches together – this is some old cheater cloth from my stash. I cut the sleeves and hem all raggedy and used some beading hemp for a rope belt. I turned this dress around so the neck slit is in the back. I just added a little hook and eye to hold it closed.

So there you go! Lots of costume possibilities!

Happy sewing!

Applique Wendi (with fabulous hat)

Best,
Wendi

What are some good commercial patterns for costuming?

My Favorite Patterns for Making Costumes

Today I thought I’d share some of my favorite commercial patterns with you all. I drafted the pattern for Jo’s Sally dress – but only because I couldn’t find a commercial pattern with the right silhouette. If there’s an already-made pattern available for use – I use it! Especially for kids patterns because they’re generally easier to fit.

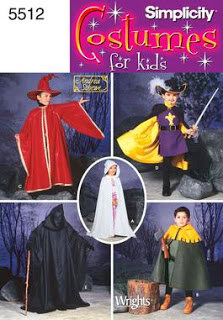
A lot of you wanted to know about Jo’s Hogwarts cloak. That’s Simplicity #5512 with just a few modifications.

The Hogwarts cloaks have sleeves, so I used view C (the red robe) and made the sleeve openings less huge. I added on the hood from view A (the white robe) and lined the whole thing with Gryffindor satin. Adding a lining is really easy and adds so much!

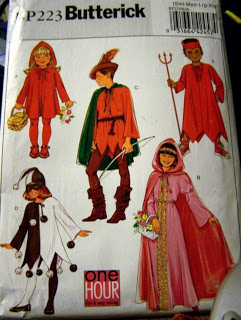
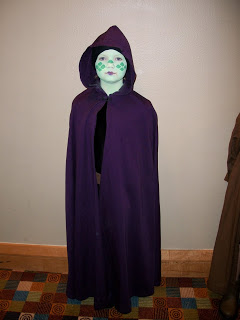
Jo is a big fan of cloaks. My favorite non-sleeved cloak pattern is Butterick BP223.

This pattern is actually no longer available, but I’m sure you can find something similar from other companies, or use the pattern number to search for a copy of it on Etsy, or Amazon.

I used that pattern as is for the cloak in Jo’s Jedi costume here. . .

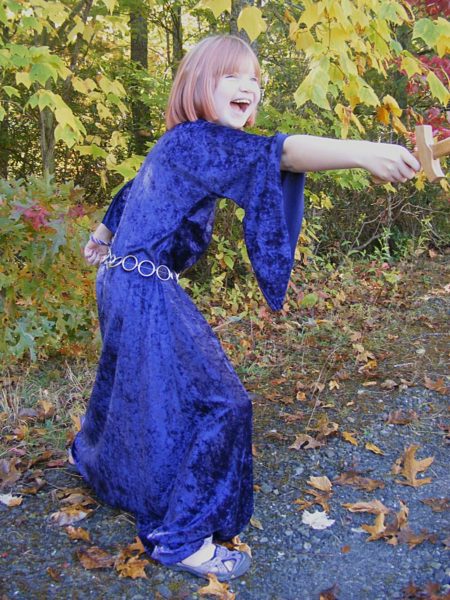
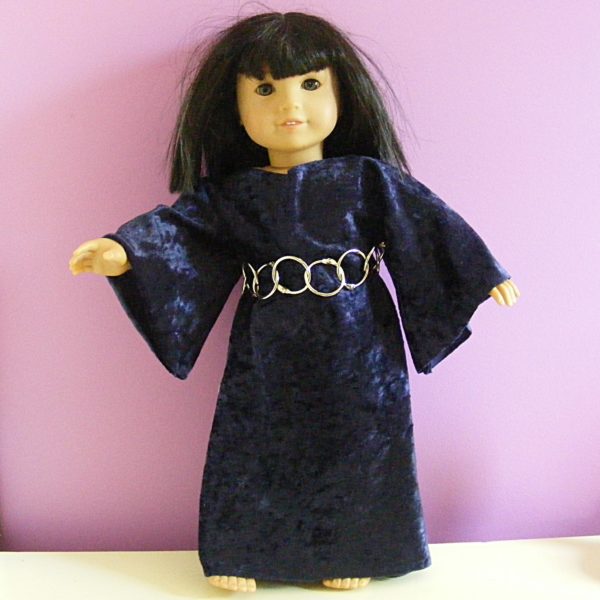
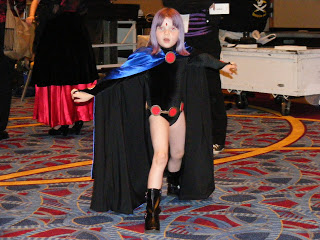
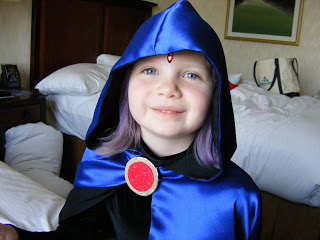
. . . and I lined it for Jo’s Raven costume here.

I love hoods on cloaks – so dramatic!

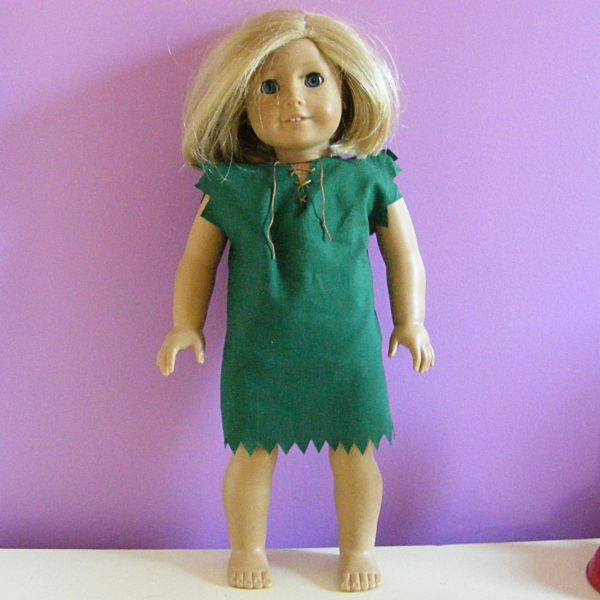
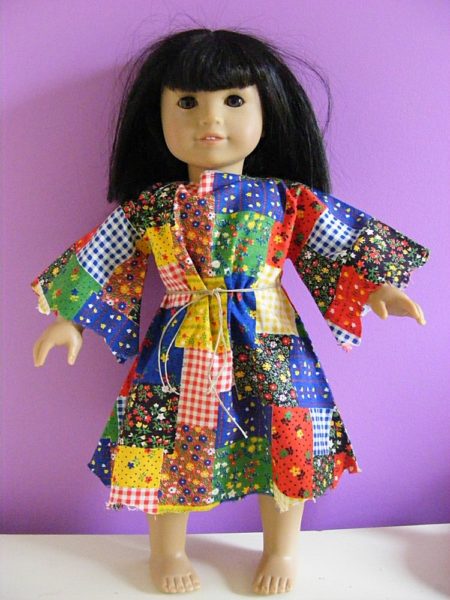
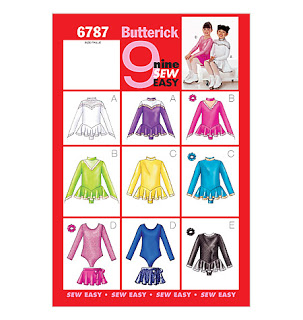
For the bodysuit part of the Raven costume I used Butterick 6787.

I love this kind of basic pattern, with lots of possible variations built right in: skirt attached or separate, sleeve hems straight or pointed, collar or scoop neck, plain body or fancy piecing. This one shows nine possible combinations, but of course there are more possibilities than that with a little additional mixing and matching of the basic pieces.

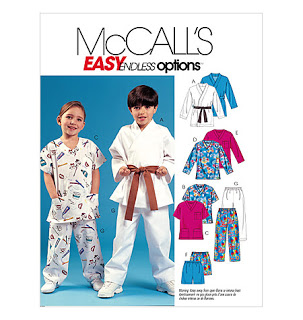
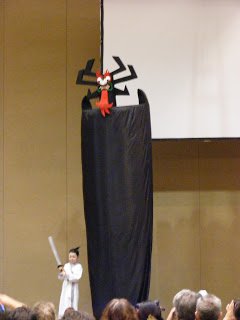
I don’t have any good photos of things I’ve made, but McCall’s 4103 is another great basic pattern. Scrubs costumes and martial arts uniforms are both good basic silhouettes that can be used for lots of things – and this pattern includes both! The pants are easy elastic waist pants that could be used for ANY costume – make them up in silver fabric for a knight, in burlap for a scarecrow. . . you get the idea. Lengthen the martial arts top, use a contrasting color for the neck band – and you have a Samurai Jack costume.

That’s a teeny-tiny Jo as Samurai Jack next to her Dad as Aku, from Dragon*Con two years ago.

Finally – shoes. Boot covers are great – but sometimes you just want to make shoes from scratch. Butterick 5233 is a great pattern – though it runs WAY SMALL so check your measurements!

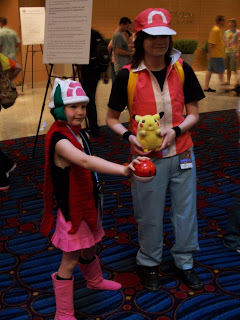
Jo used a modified version of the tall moccasins to make the boots for her Pokemon Trainer costume last year.

It was REALLY important to her that her boots be the exact same color as her skirt – and the symbol on her hat. She crocheted that scarf too!

So that’s it – some of my favorite commercial patterns for kids costuming. I make fewer costumes for big people. 🙂

Do you all have any favorites you want to share? Tell us in the comments! And tell us even if they’re out of print – old patterns are REALLY easy to find online – especially if you can give us the pattern # to search by.

Happy sewing!

Best,
Wendi

Applique Wendi (with fabulous hat)


How to Sew a Zipper in a Seam – video

How to sew a Zipper in a Seam - a video tutorial from Shiny Happy World

I didn’t try using zippers for a LONG time because I thought they’d be too hard. Looking back, it’s astonishing to me how many things I avoided because I thought they’d be too hard. Seriously – how long did I think I could make clothing without using any closures? And then when I did venture into closures – I tried sew-on snaps (Yuck! What a pain!) and velcro. Velcro! Anyway – when I finally learned out how to sew in a zipper I couldn’t believe how easy it was. It’s three straight lines and some work with a seam ripper. Don’t believe me? Watch the video. You’ll be putting zippers into everything you sew.

I never pulled back in the video to give you a shot of the finished zipper, with all the loose threads cleaned up and the tape pulled off the back. (Yes, tape. Watch the video and you’ll see.) Here’s the front. . .

. . . and here’s the back.

This zipper is kind of hidden behind two flaps of fabric. If you want your zipper to be visible, take a look at this video instead.

Happy sewing!

Best,
Wendi
Applique Wendi (with fabulous hat)

How To Use Snaps – video

How to Use Hammer-On Snaps - a video tutorial from Shiny Happy World

Back when I first started sewing, I did everything possible to avoid buttons.

Or zippers.

One of the notions I turned to was snaps. My first experience was bad – I tried using those sew-on snaps, thinking they’d be the easiest option. But I hated sewing them on and I found it really hard to held them in place while I sewed.

My life changed when I discovered regular snaps. A neat professional finish with just a hammer? I had NO IDEA you could do this from home! Why was nobody shouting this from the rooftops? Snaps are really easy to use and look terrific. Here’s how. . .

Give them a try!

That tiny little shirt you see up top is one of the shirts for the Dress Up Bunch dolls. All the dolls have the same basic body pattern – which means they can all share clothes. Fun!

Update! The pretty colored snaps I used to carry are no longer available in shops. 🙁 The good news is that you can now choose individual colors and buy direct from the manufacturer. The best size for Dress Up Bunch doll clothes is size 14.

Happy sewing!

Best,
Wendi


How to Use Elastic in a Casing – video

How to Use Elastic in a Casing - video tutorial from Shiny Happy World

This one’s on the longish side, but I show you pretty much everything you need to know about using elastic in a casing.

We start with what kind of elastic to use (did you know there were different kinds?), some tips on pre-stretching and measuring, how to measure for and sew the casing, how to thread the elastic through the casing and sew it up. I even show you a little trick I use to help kids put on handmade clothes (with no tags) the right way!

Update – after making this video I discovered a new tool for threading elastic through a casing. It’s called an elastic bodkin and it’s pretty much the best thing ever. This is the one I use. They’re super cheap and they make that step of the process a million times easier. I wish I had known about this tool twenty years ago!

Want to practice your new elastic skills? Try this free simple skirt pattern. It has instructions for sizes to fit everyone from dolls to grown-ups.

I also use elastic in a lot of the dress patterns for Dress Up Bunch dolls. Look for the ones with gathers around the neck like this one.

Lizzie in her new Cat's Meow outfit

That’s the Cat’s Meow pattern, but there are several others with a similar neck finish. Those gathers means there’s elastic in a casing around the neck – which means no fasteners for little hands to wrestle with!

Happy stitching!

The Dress Up Bunch is a collection of cute and cuddly rag dolls. Get patterns for the dolls, plus all their fun outfits and accessories!

How to Turn a Hem – video

How to Hem - video tutorial from Shiny Happy World

You’re the master of the straight line now, right? Well, now you get to practice it a little more. In this video you’ll learn how to turn a hem and stitch it in place.

This is a basic, double-turned hem on a straight edge – used for casual clothing and lots of craft projects. There are fancier ways of stitching invisible hems on more elaborate clothing but this is a good, easy technique for a basic hem.

Happy sewing!

Best,
Wendi
That's me!