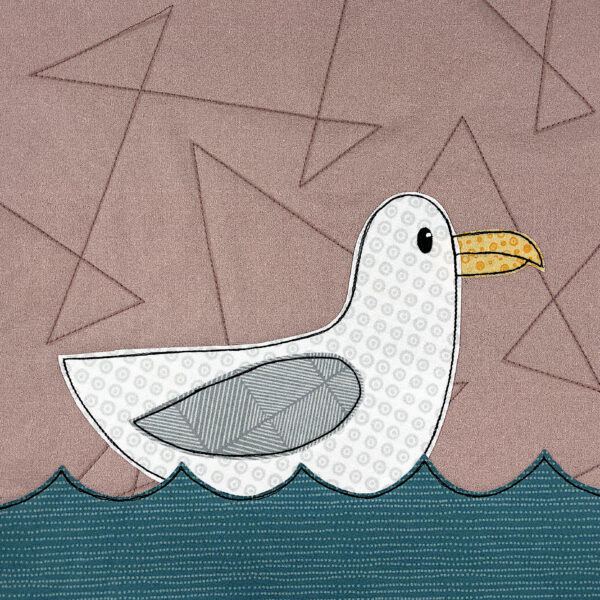
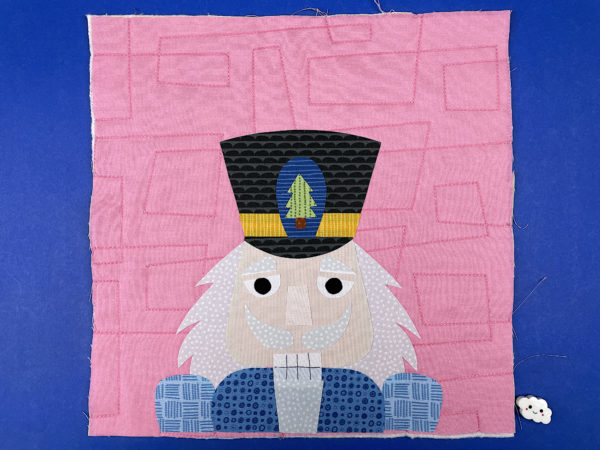
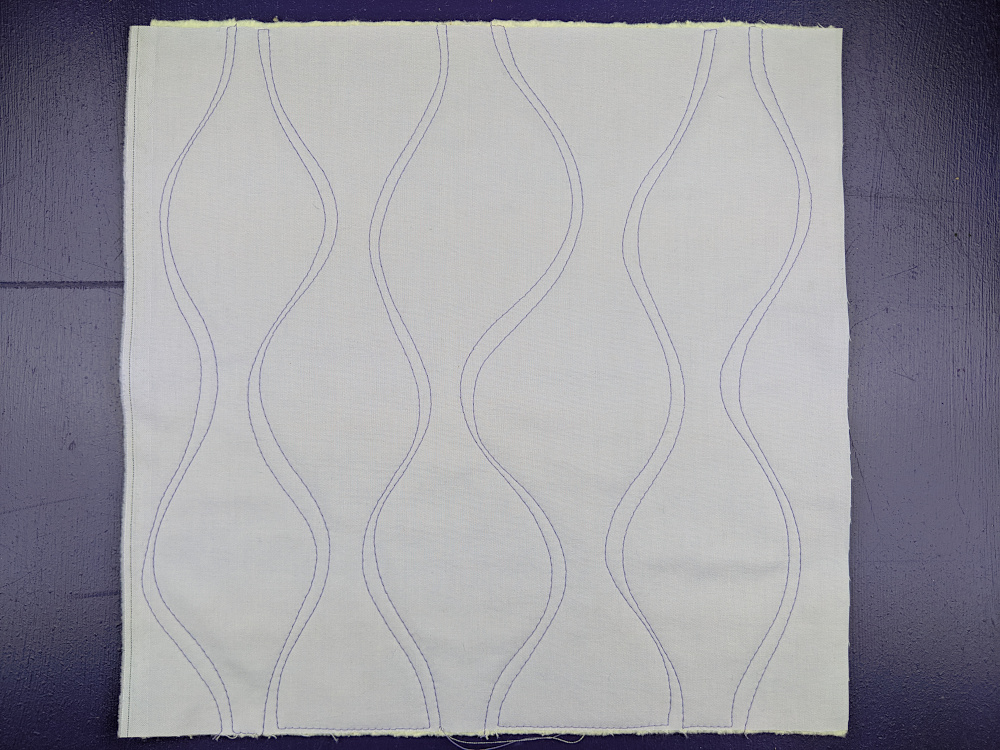
Add some waves to your quilts with this free applique pattern!
In addition to the wavy stripes you see in the top image, the free pattern also includes a template designed to use at the bottom of a block, in combination with an animal applique.
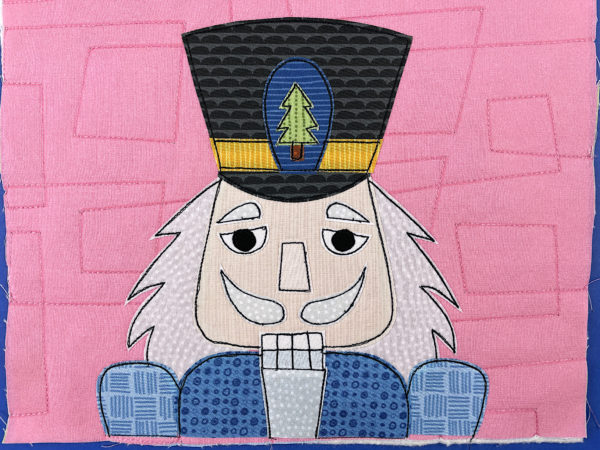
Here’s an example.
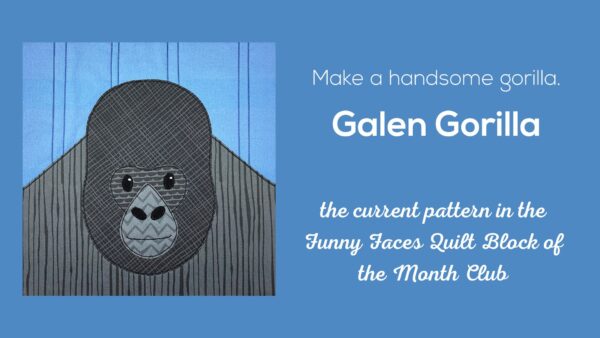
These waves will work particularly well with the following patterns:
Want to learn how to make a quilt with an easy online workshop – totally free?
Sign up for Let’s Make a Quilt here. You’ll learn how to get started, the tools and supplies you’ll need, and how to make a quilt from start to finish using Quilt As You Go and applique with fusible adhesive.
It’s the easiest, most fun way to make an applique quilt. You can do it!
Every year (almost) I release a free holiday applique pattern.
Here are the links to the patterns from previous years.
These instructions assume you’re already familiar with the applique method I use – Quilt As You Go and applique with fusible adhesive.
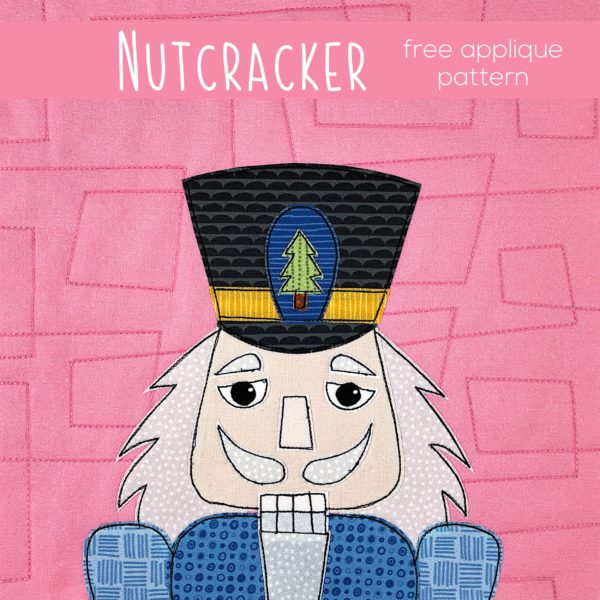
If you’re new to my patterns, there’s a detailed video workshop here that takes you step by step through the methods I use. It’s totally free, and you can work your way through the lessons using any pattern you like, including this nutcracker pattern!
Step 1
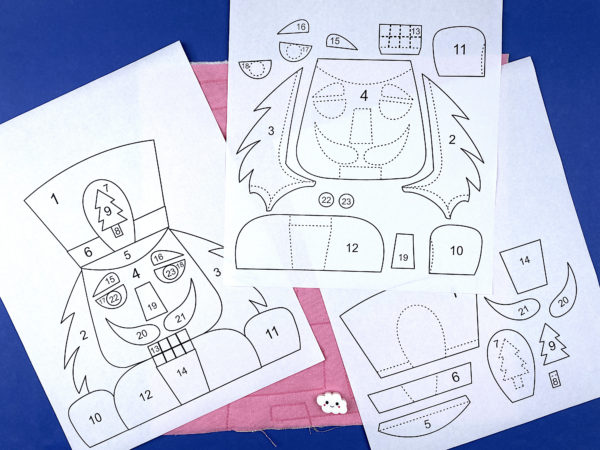
Download the template pieces. If you’re using paper-backed fusible adhesive and cutting by hand, use this link to download the PDF. If you’re using an electric cutting machine, use this link to download the SVG. On most computers that link will take you to a preview of the file. You’ll need to click on the down-arrow icon to actually download it to your computer.
If you’e using an electric cutting machine like a Cricut. . .
Upload the file to your machine.
Resize if needed. (The small square in the top left corner should be 1 inch.)
Ungroup the pieces and assign colors.
Cut.
Step 2
Trace or print the pattern onto the paper side of the fusible adhesive.
I use Heat & Bond Lite for all my quilts, and I love printable sheets because I’m lazy and hate to trace. 🙂
The image has already been reversed, so just trace or print. If you’re tracing, be sure to trace the lines separating the teeth too. You’ll need those for Step 5.
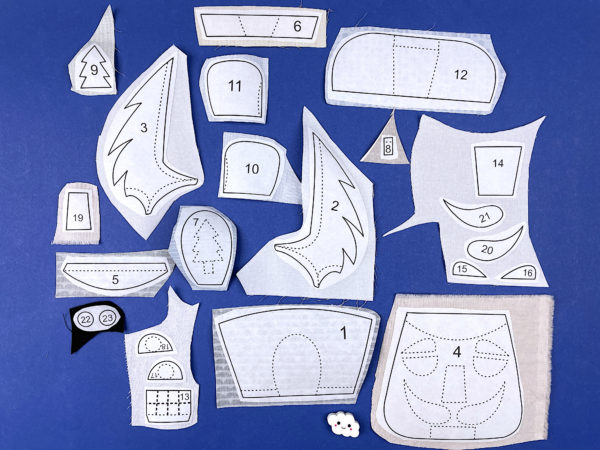
Step 3
Whoa! That’s a lot of pieces!
It’s ok – the numbers tell you what’s what and there’s a video showing how to layer them up. 🙂
Roughly cut around each shape and fuse it to the back of your fabric.
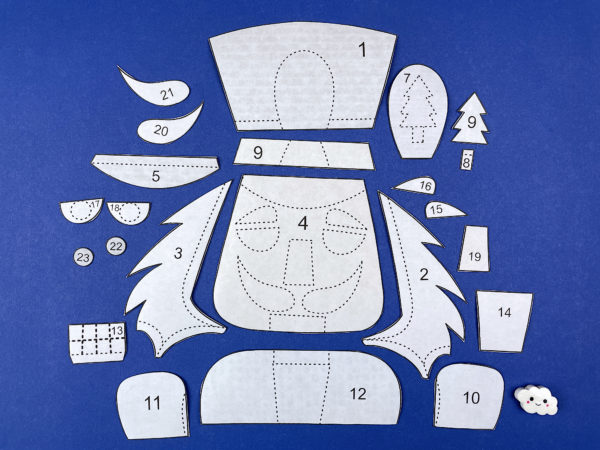
Step 4
Cut around each piece neatly.
This time you’re cutting directly on the solid lines.
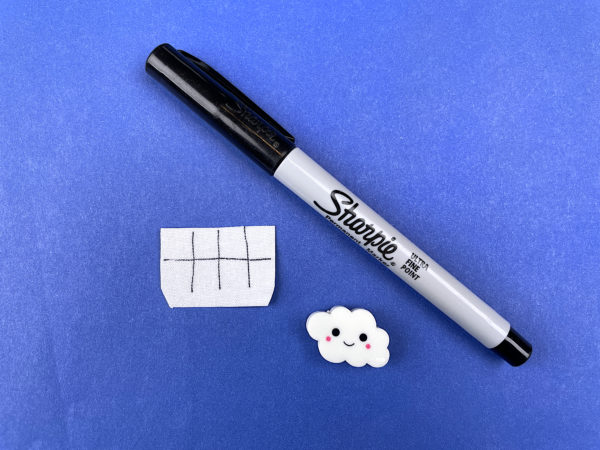
Step 5
Remember back in Step 2 when I told you to make sure you traced the lines for the teeth? Now you’re going to use that. Hold the teeth up to a window so the light shines through it. You’ll be able to see all the dotted lines, and the adhesive will stabilize the fabric so you can trace on it without it crinkling up.
If you’re not using a lightbox (I am in my video), trace all the other dotted lines too using chalk or a pencil. They’ll help you position the pieces.
Step 6
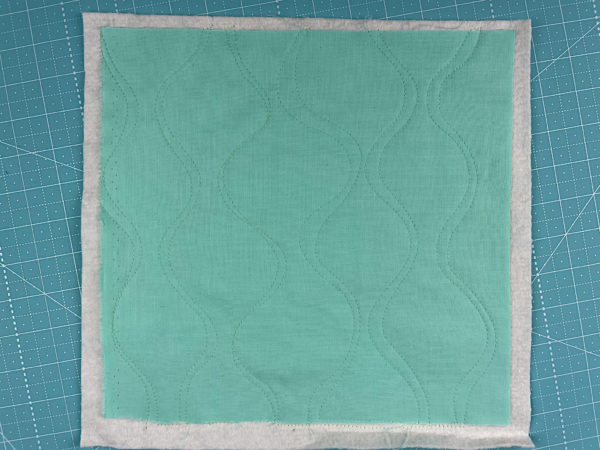
If you’re doing Quilt As You Go (I did) then you can quilt your block before adding the applique. So easy!
Cut your background fabric and a piece of 100% cotton batting 11 inches square.
Layer the block with a piece of 100% cotton batting. Quilt any pattern you like!
I prefer to quilt my blocks before I applique. These posts show how I do that, along with lots more info. Start with them.
Some people prefer to quilt after they applique. This post features a gallery of lots of quilt patterns with video instructions showing you how to work those patterns around applique you’ve already done. Of course, you can also stitch these designs before you applique.
If you’ll do the quilting later, simply skip this step.
Step 7
Peel off the paper backing and arrange the pieces on a background block.
Fuse the pieces in place, following the instructions for whatever brand of adhesive you used.
This video has detailed instructions for layering all those pieces and also shows the finished block.
Step 8
Outline all the pieces with black thread and a simple straight stitch – or choose your favorite decorative stitch.
Want to learn how to make a quilt with an easy online workshop – totally free?
Sign up for Let’s Make a Quilt here. You’ll learn how to get started, the tools and supplies you’ll need, and how to make a quilt from start to finish using Quilt As You Go and applique with fusible adhesive.
It’s the easiest, most fun way to make an applique quilt. You can do it!
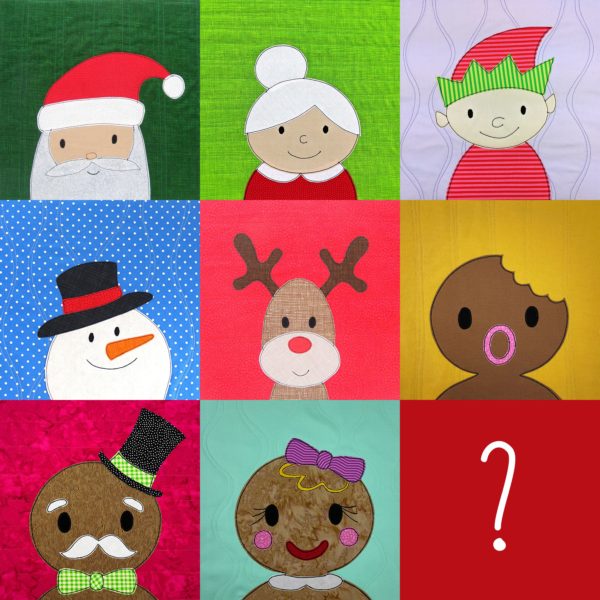
Every year (almost) I release a free holiday applique pattern.
What to do this year?
Here are the links to the patterns from previous years.
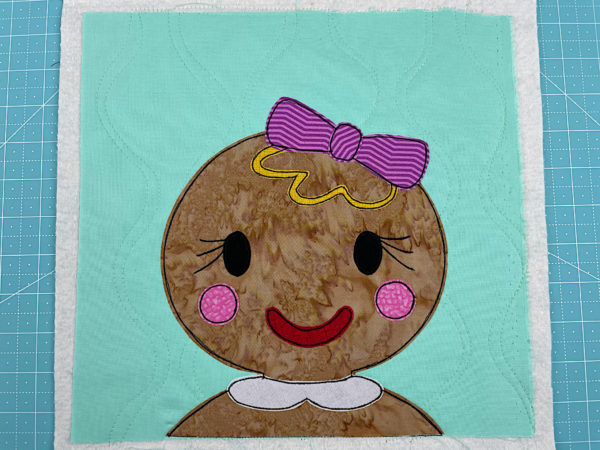
I’ve been having a lot of fun with Mix & Match patterns lately, so I decided to make a gingerbread cookie with lots of parts for you to play with!
Here’s a quick intro. . .
Now let’s jump right to the instructions!
These instructions assume you’re already familiar with the applique method I use – Quilt As You Go and applique with fusible adhesive.
If you’re new to my patterns, there’s a detailed video workshop here that takes you step by step through the methods I use. It’s totally free, and you can work your way through the lessons using any pattern you like, including this gingerbread pattern!
If you’e using an electric cutting machine like a Cricut. . .
Upload the file to your machine.
Resize if needed. (To fit a block that finishes at 10 inches square, the image should be 15 inches wide.)
Ungroup the pieces and assign colors
Cut.
Step 2
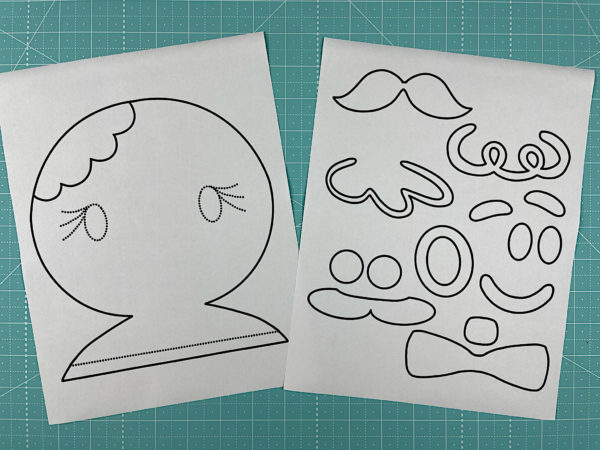
Trace or print the pattern onto the paper side of the fusible adhesive.
I use Heat & Bond Lite for all my quilts, and I love these printable sheets because I’m lazy and hate to trace. 🙂
The image has already been reversed, so just trace or print. If you’re tracing, be sure to trace the eyes and (optional) eyelashes too. You’ll need those for Step 5.
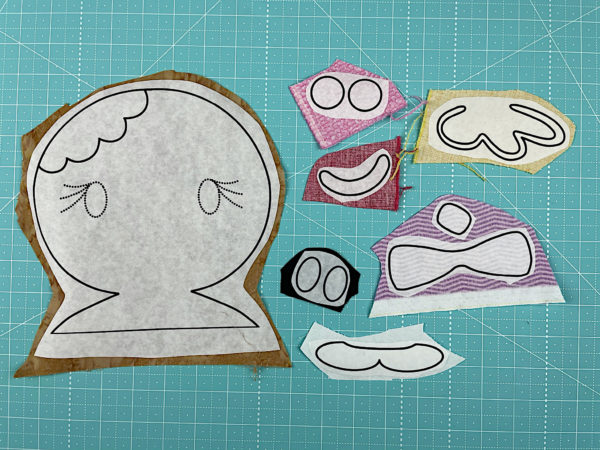
Step 3
Roughly cut around each shape and fuse it to the back of your fabric.
Here’s a video showing those first two steps. . .
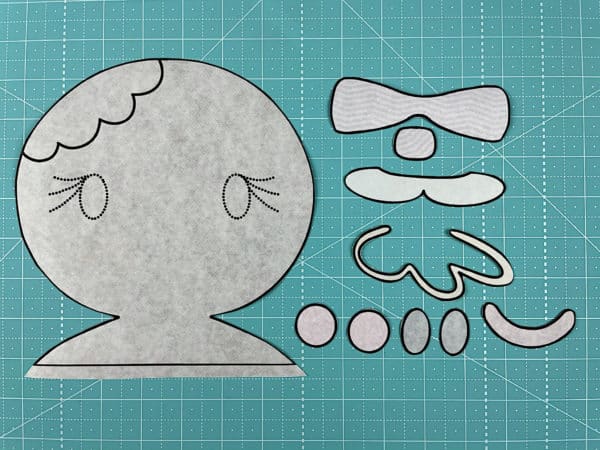
Step 4
Cut around each piece neatly.
This time you’re cutting directly on the solid lines.
This video has more info about that step.
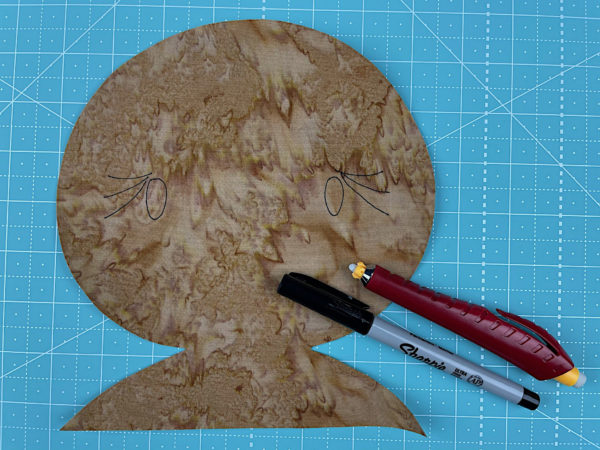
Step 5
Remember back in Step 2 when I told you to make sure you traced the eyes and eyelashes? Now you’re going to use that. Hold the face up to a window so the light shines through it. You’ll be able to see all the dotted lines, and the adhesive will stabilize the fabric so you can trace on it without it crinkling up.
Trace the lines to show where the eyes go. If your cookie will have eyelashes, trace those too.
Here’s a video with more info about this step.
Step 6
If you’re doing Quilt As You Go (I did) then you can quilt your block before adding the applique. So easy!
Cut your background fabric and a piece of 100% cotton batting 11 inches square.
Layer the block with a piece of 100% cotton batting. Quilt any pattern you like!
Have fun! And share a photo of what you make! You can share it in the Shiny Happy People group or tag it with #shinyhappyworld on Instagram.
If you like this free pattern, sign up for the Shiny Happy News! Subscribers get a weekly newsletter full of sewing tips and tricks, free patterns, special discounts, and other things to make you smile. 🙂
I started this project AGES ago and finally finished it. I haven’t been working on it anything like steadily. I didn’t plan on releasing a pattern, so I just picked it up and worked on it at odd moments, and didn’t worry about documenting the process much.
Of course, now people want a pattern! I’m happy to share. It was a lovely project and one that was really relaxing and low-pressure to stitch. I’m just letting you know upfront that it’s a pretty loose pattern. 🙂
So here’s how to make it!
My project finished at 11 inches square. That gives me a little bit of breathing room all the way around, because I’m going to put it in a 12-inch frame. You can size yours up or down as you like, but here are the materials you’ll need for this size.
One 20-inch square of background fabric. I used a nice dark slate grey.
Thread to match the felt. I used Invisifil 100 wt. thread. (Yes – you read that right. 100 weight. It’s the thinnest thread I’ve ever used – like sewing with spider silk.) I matched the colors to the felt but, honestly, that thread is so fine that you could probably just use a medium grey for everything. If you want to use embroidery floss, there’s a bundle that matches the felt in the Frosty Pastels collection.
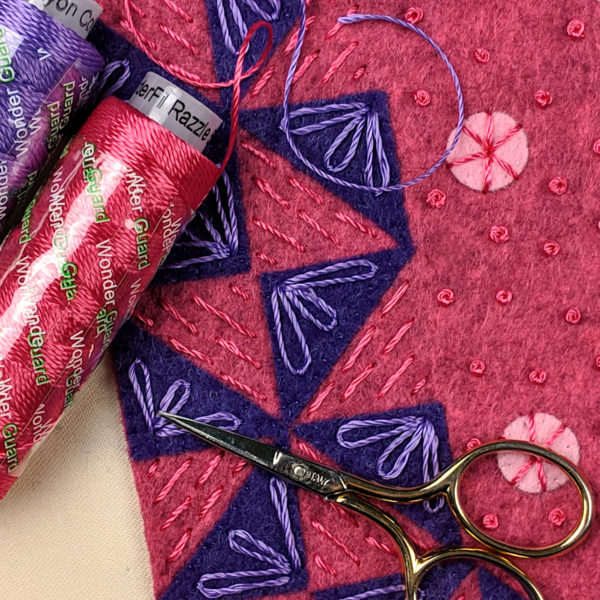
Slightly darker, thicker thread to contrast with the felt. I used Razzle 8 wt. rayon thread. I love the way the shiny rayon thread contrasts with the wooly felt.
Print it at 100% size – or scale as desired. You can print directly onto the freezer paper, or you can print it onto regular paper and then trace it onto freezer paper.
Using freezer paper to cut small pieces like these makes it sooooo much easier to be accurate. You’ll find more info here.
The pattern page has the letters and eight blocks of blocks.
Cut the letters out of light grey felt.
Cut four blocks of blocks out of each of your other six felt colors. That way you’ll end up with four of each shape/size in each color. That’s more than you’ll actually need – but it will give you some extras to play with as you arrange.
Ok. Here’s where things are a little loose. Sorry – I didn’t take any photos of this process and I was really just winging it. That’s ok – it means you can wing it too!
Lay your background square on a flat surface.
Map out a 12-inch square in the center. I used a few rulers to block it out – use what you have handy. You just need to be able to “see” the borders of your square of workable space.
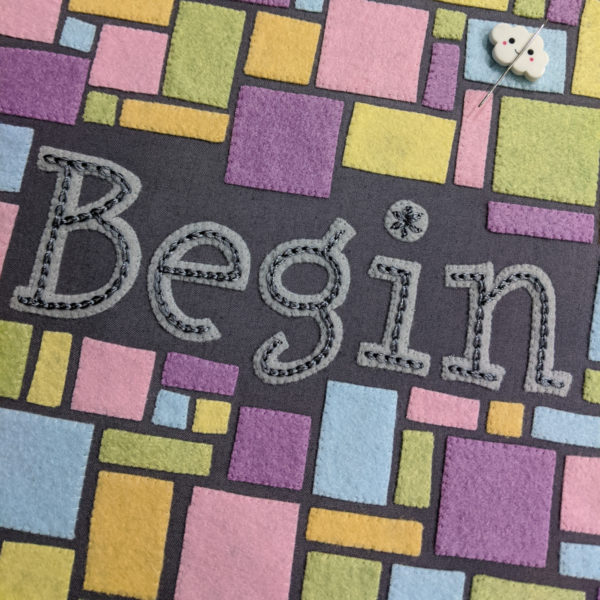
Start by laying out the letters, centering them in the space.
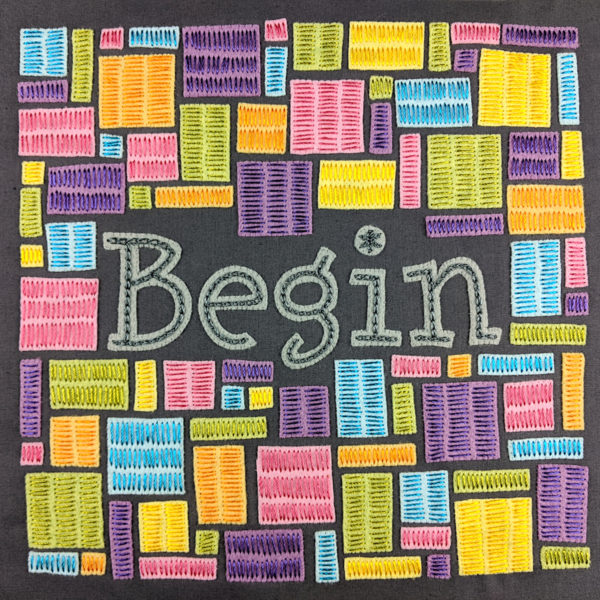
Here’s the finished layout again so you can refer to it for the next bit.
Start building your way out from your letters, filling the square space you have mapped out. I followed a few “rules” as I built.
I kept all my blocks running horizontally or vertically. None of them are tipped at an angle.
I tried to keep the spacing between the blocks pretty consistent. Think of it like grout between tiles.
I tried to never have two tiles of the same color right next to each other.
I sometimes had two of the same shape next to each other, but I kept it a pretty rare thing.
You can follow my finished project as a map if you like, but please don’t feel like you need to follow it exactly.
Once you’re happy with how everything looks, use a swipe of fabric glue stick to stick all the pieces in place. If you don’t have a glue stick, you can use liquid glue like Elmers, but I recommend brushing it on. If you squeeze it right out of the bottle you may get too much glue on there and it will seep through to the top of your felt and remain visible even after it dries. Don’t use a restickable glue (like a post-it glue stick). As soon as you put your hoop in the frame and pull it tight, those pieces will pop right off. Ask me how I know. 😛
Let it dry and hoop it up. You’re ready to start stitching!
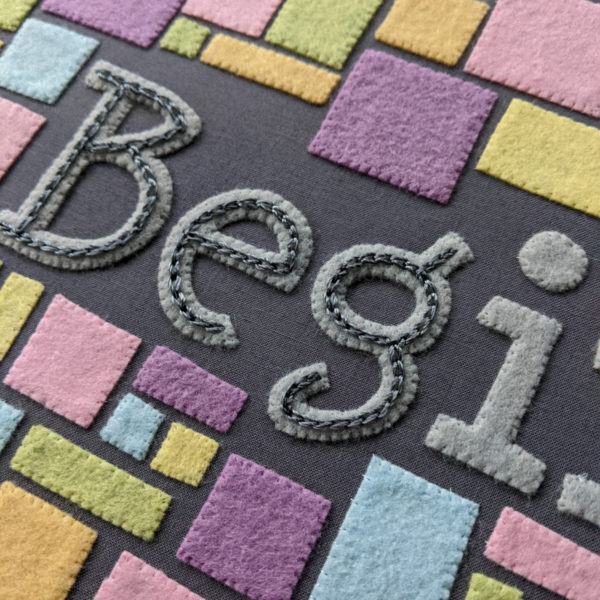
Once everything’s whipstitched down I can stop worrying about accidentally pulling any of the pieces up, or catching my thread on them. Time to relax and settle into the fancy stitching.
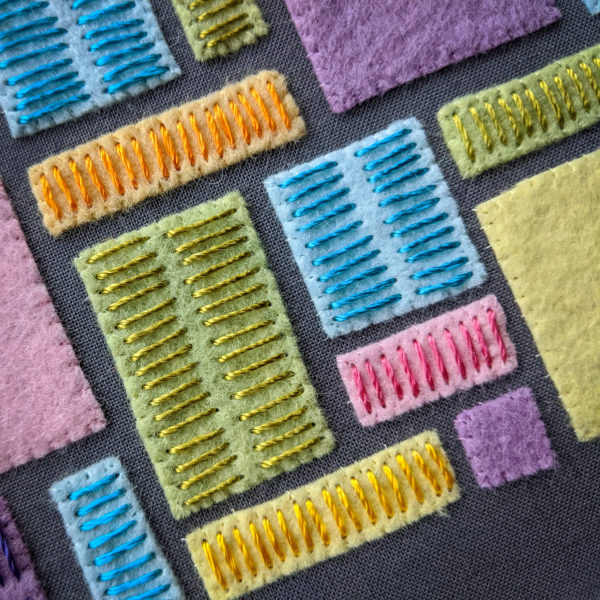
I chain stitched in dark grey right down the center of each letter.
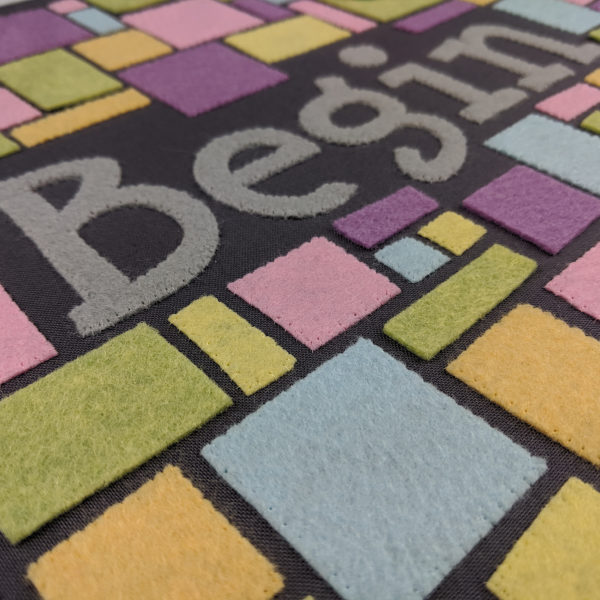
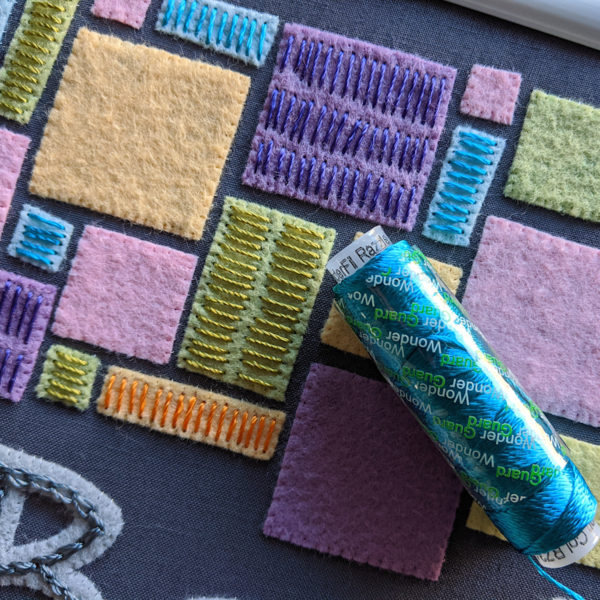
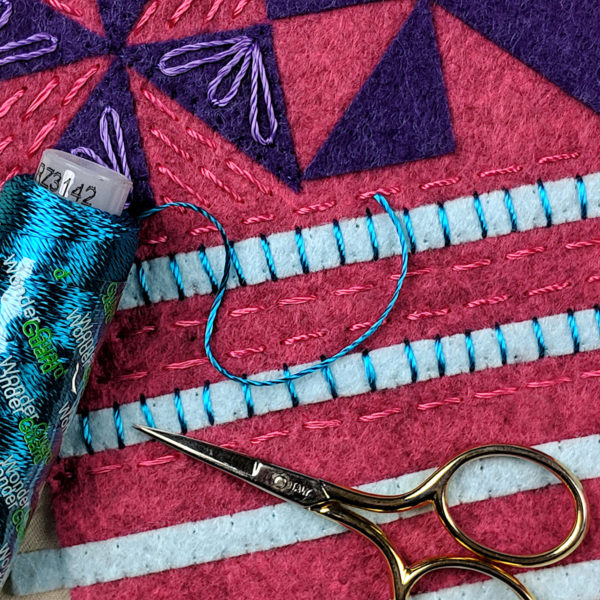
Finally, I wanted to embellish each block. The stitching is all tone-on-tone, using a thread color a little more vibrant than the felt color. I really agonized over what kind of stitching. I debated it for what felt like weeks and finally settled on simple stacks of straight stitches. I just love the texture of that!
I started with the long skinny pieces since there was only one way I wanted to stitch those. Just stitch a stack that almost fills the block.
Next I stitched the larger rectangles. They’re twice as wide as the skinny rectangles, so they get two stacks of stitches, side by side, but not touching.
Finally, I stitched the squares. The small squares got one stack, the medium got two, and the large got three. But which direction? Horizontal or vertical? I made the call for each square based on what kind of stitching was going on around them, trying to keep the direction as varied as possible.
My daughter Jo has been a mask-making machine. She made over 1000 masks and donated them to our local United Way who is distributing them to the clinics and organizations that need them.
I don’t want to get into a debate here – so please don’t send me an email or comment about how you read these aren’t effective. Medical people in my area are asking for them, and right now I’m going to give them anything and everything they ask for.
When I mentioned making and donating masks in my most recent newsletter, I was INUNDATED with emails from patients, nurses, mothers of nurses, hospice workers and more telling me how much these masks are needed and appreciated.
And when production has ramped up and hospitals and clinics are getting all the PPE they need, there will still be a need for masks to help reduce transmission when we all start leaving our homes again. I thought this article laid it out especially well. The short version is – everyone should be wearing masks when they’re in public. My favorite line in the article is, “My mask protects you. Your mask protects me.”
In addition to people saying they wish more people were making and donating masks, there were a lot of emails from people asking for the pattern I’m using. Keep reading for the complete tutorial.
This is a no-elastic mask. Everyone is sold out of elastic and I’ve heard from a number of health professionals saying that a behind-the-ears elastic mask is very painful when worn for hours at a time – which is what they’re having to do. I’m also hearing that some places are washing these masks multiple times a day, and the elastic is wearing out quickly under those conditions. So our mask uses fabric ties. One ties up at the crown of the head (it doesn’t seem like it would stay put there, but it really does) and the other ties behind the neck. This size fits any size head.
If you’re keeping a mask for yourself to wear to the grocery store, walking your dog, etc. make sure to remove it properly. Don’t grab it by the front of the mask and toss it on your kitchen table. Remove it by the ties, put it in the laundry, and then wash your hands.
Whew! That’s a lot of preface. Here’s how to make it. Scroll past the video for written instructions with step-by-step photos.
And here are the written instructions.
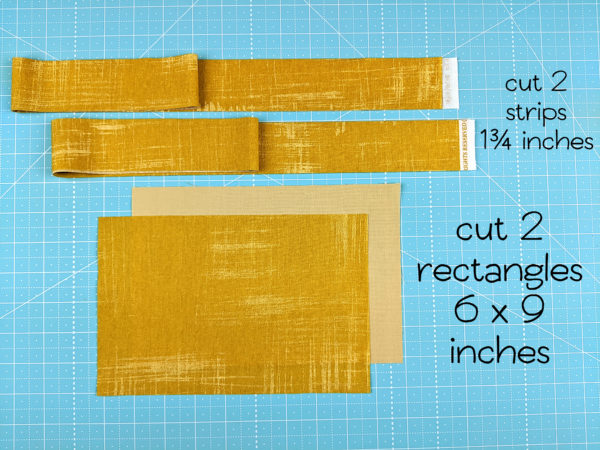
For each mask you’ll need two 6×9 inch rectangles and two 1 3/4 inch strips. I read several studies that said NOT to add any additional layers to this kind of loosely-fitted mask. Yes – additional layers will increase the filtration, but they make it harder to breathe THROUGH the mask, resulting in more unfiltered air being drawn in around the edges. Use tightly woven cotton – quilting cotton is great. T-shirt fabric also tests very well, but I don’t have any so I haven’t tried that with this pattern. It should work fine, though.
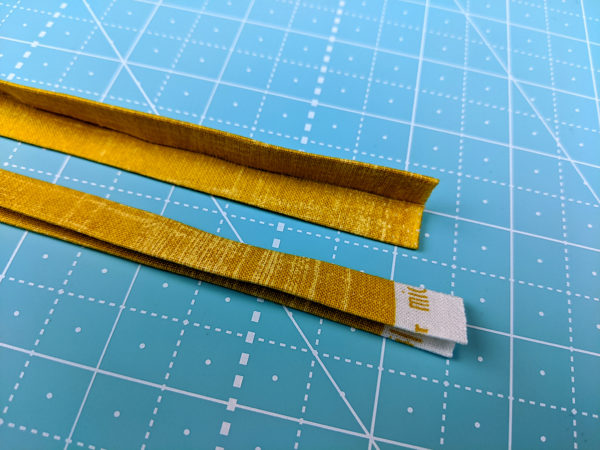
The ties need to be 1 3/4 inches wide and at least 40 inches long. We went with the full width of the fabric – selvedge to selvedge – because that’s 40 – 45 inches wide. Don’t trim off the selvedges. That finished edge means you don’t have to hem, which will save time. 😄
With this method, every 3/4 yard will make 4 masks.
If you prefer to use purchased bias tape – that will save time and stretch your fabric stash. Make sure you get 1/2″ double-fold bias tape. There are TONS of people selling large rolls on Etsy
If you use purchased bias tape, then 1 yard of fabric will make 12 masks.
Press your strips into double-fold bias tape. There’s a video tutorial here showing two different methods for doing that. Jo is using a 25 mm bias tape tool to make hers. That’s the right size for 1 3/4 inch strips of fabric. If you have a different sized tool at home, you can adjust the size of your strips accordingly. Just don’t go too skinny or it will be hard to catch all the mask layers when you sew it in place.
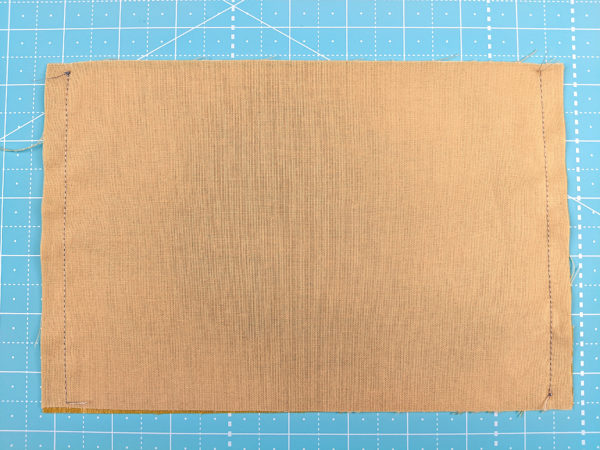
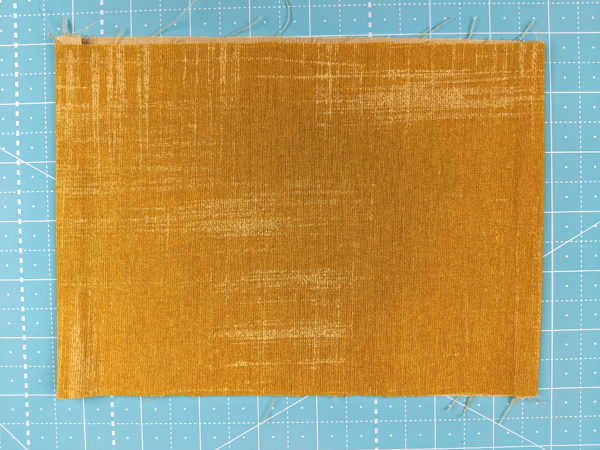
Put the two rectangles of fabric right sides together. (Nurses are recommending using two different fabrics so that if they have to remove the mask and put it back on, they can easily tell which is the outside and which is the inside.) Sew them together along the short sides, using 1/4 inch seam allowance.
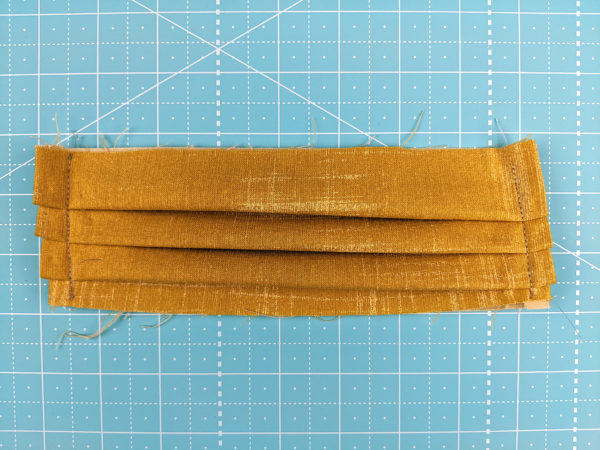
Turn the mask right side out and press it flat.
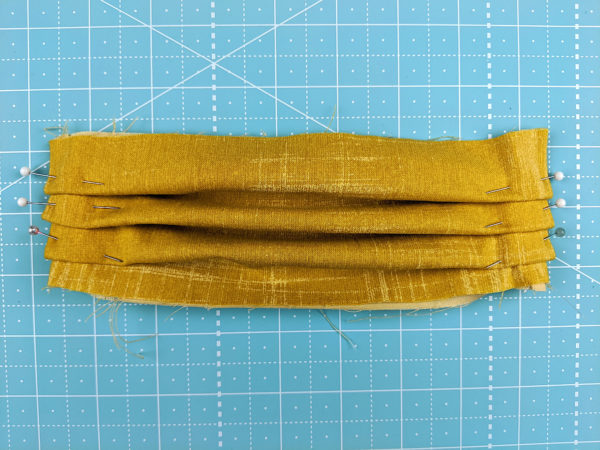
Now it’s time to pleat the sides. You need to put three evenly-spaced pleats in each side of the mask.
If your fabric has a direction to it, make sure the pleats are pointing down.
You can eyeball the position of the pleats, but Jo has been measuring to keep things nice and even.
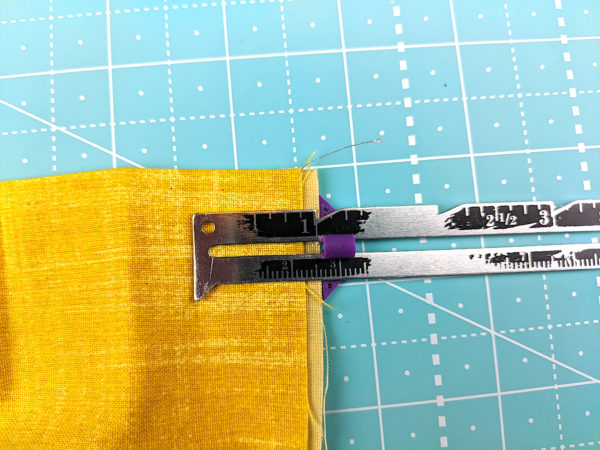
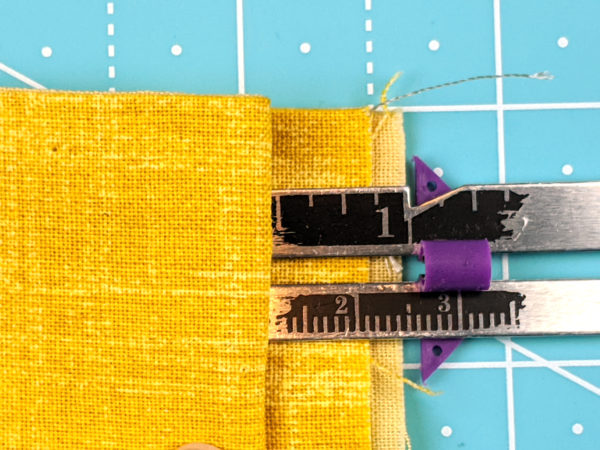
Measure up one inch from the bottom edge of the mask (turned sideways here). Then fold the rest of the mask down over the end of the ruler, and fold it back up at the half-inch mark.
Hold that fold with a pin and continue up the side of the mask with two more pleats, each starting one inch from the fold of the previous pleat.
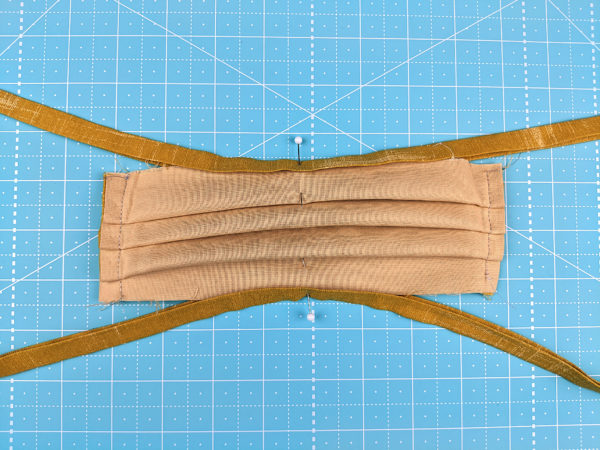
Pleat up both sides, then sew those pleats in place by sewing 1/4 inch from the short edges.
Time to add the ties.
Fold the mask in half to find the center. Mark the center top and center bottom with pins. Fold the ties in half to find their centers. Wrap the center of one tie around the raw edge at the center of the top of the mask and pin. Repeat with the second tie and the bottom edge of the mask.
We’re only pinning at the centers to hold the ties in the right place. You can get the bias tape wrapped around the rest of the mask edge when you get to it while sewing.
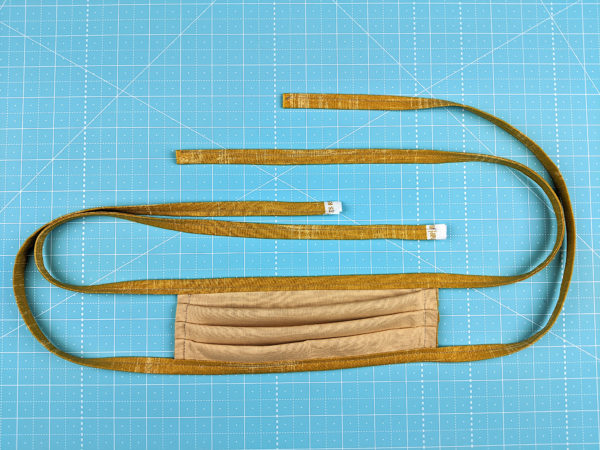
Now it’s time to sew up those ties.
Start at the end of one tie and sew the folds together as close as you can reasonably get to the edge. When you get close to where it starts to wrap around the edge of the mask, pause, make sure the mask edge is tucked all the way up into the fold of the bias tape, and keep sewing. Continue past the edge of the mask, and on to the other end of the tie.
Repeat for the second tie.
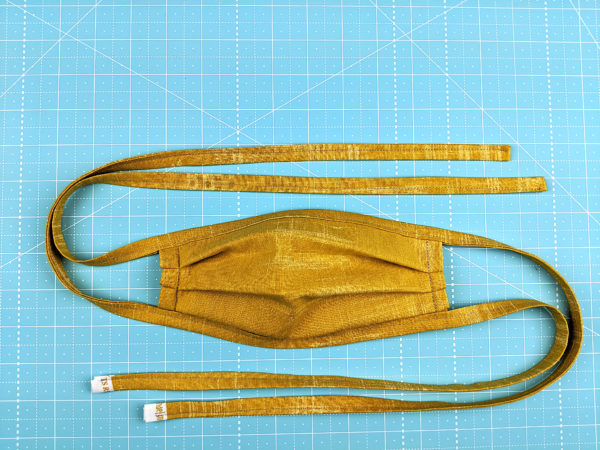
Finished!
A few more notes. . .
If you have elastic and want to make a mask with behind-the-ear elastic loops, there’s a pattern here.
If you have smaller pieces of fabric and don’t mind taking a little more time, this center-seam pattern might work best for you.
Before you make any masks, you can contact a local organization to see if they’re requesting a particular pattern or materials.
If you’re looking for where to donate your masks, reach out locally first. I found our local United Way by contacting our county health and human services office. United Way has taken it from there, finding out which organizations can use DIY masks and handling distribution to them. There’s probably someone in your county doing the same thing.
If your local hospitals/clinics/hospice care workers/etc. don’t need masks – fantastic! You can still make them for regular people. Maybe your grocery store employees need them, or your friends and neighbors. You’re also welcome to sell masks made with this pattern. In the Czech Republic, a grassroots effort provided ten million masks in just three days.
If you post on social media, please use the hashtags #coverourcaregivers and #masks4all to help spread the word.
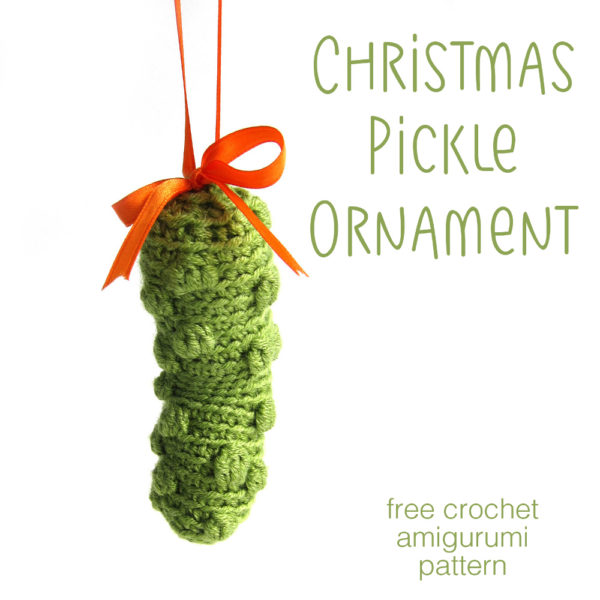
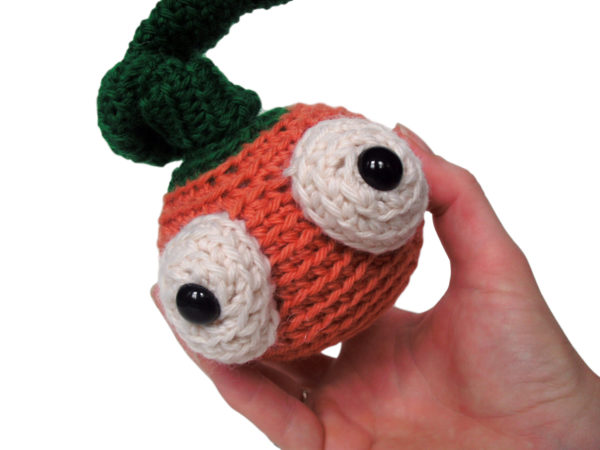
Stacey loves eating pickles, and is a Christmas Pickle Collector – so it’s no surprise that she designed a pattern for a crocheted Christmas Pickle! We’ve updated it here with some new tutorial links.
The skills you’ll need for just about any amigurumi are. . .
This pattern doesn’t specify a gauge. It’s a stuffed pickle, and you don’t need to be too picky about exact sizing. The most important thing is that you use a hook size that creates a nice looking fabric for your yarn. If you use the recommended hook size, and your fabric looks very loose (so that stuffing would show through), then you will want to use a smaller hook. Other than that, no measuring required!
Stitch into the Back
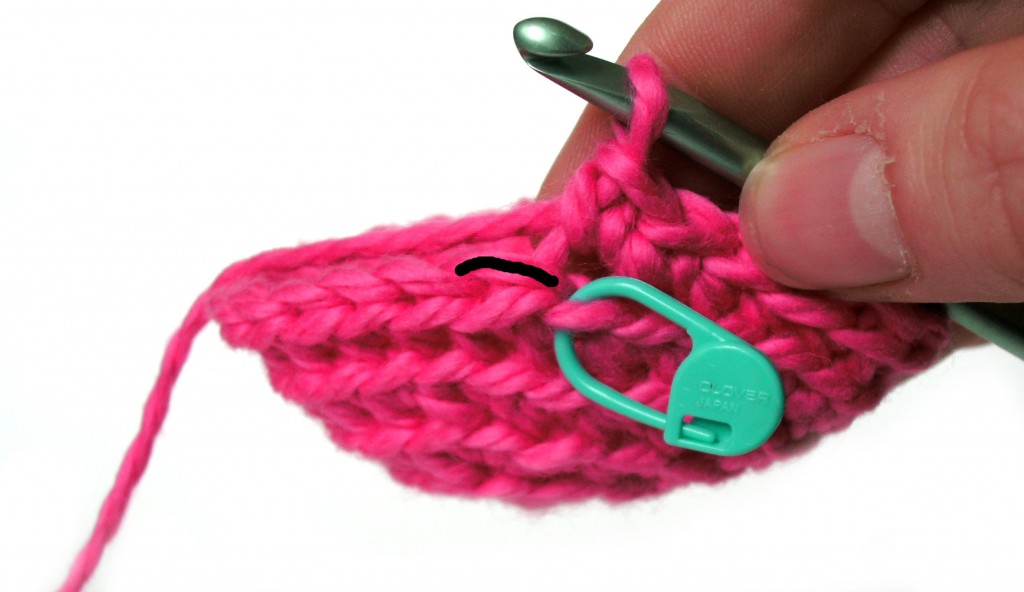
All stitches in this pattern (that are worked in the round) are worked through the back loop only, unless otherwise directed. Look at this picture.
See how one loop is highlighted in black? This is the back loop, and it’s what you’ll stitch into. Stitching into the back loop creates ridges on the right side of the piece.
Want to see crocheting through the back loop in action? Check out this blog post. It talks all about why Stacey crochets through the back loop and even has a handy dandy video showing how to find that loop.
You can go through all those posts now, or just hop to them as you get to those points in the pattern – whatever works best for you!
Yarn
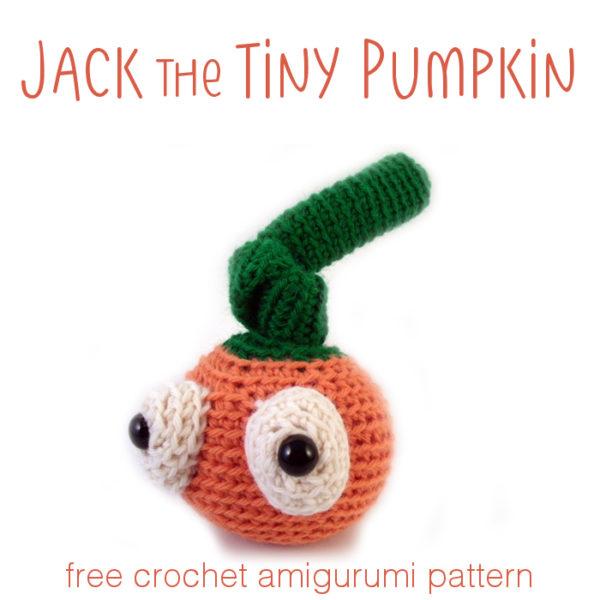
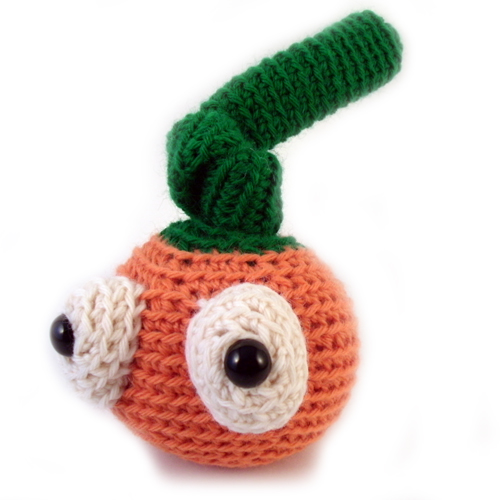
This pattern can be used with any weight yarn. The sample is crocheted with worsted weight yarn to make a 3-inch tall pumpkin with a 10-inch vine. You can use thicker yarn/a bigger hook to make a bigger pumpkin, and thinner yarn/a smaller hook to make a smaller pumpkin.
Materials
Size H crochet hook (or size needed to get a tight fabric)
All stitches in this pattern (that are worked in the round) are worked through the back loop only, unless otherwise directed. Look at this picture.
See how one loop is highlighted in black? This is the back loop, and it’s what you’ll stitch into. Stitching into the back loop creates ridges on the right side of the piece.
Want to see crocheting through the back loop in action? Check out this blog post. It talks all about why Stacey crochets through the back loop and even has a handy dandy video showing how to find that loop.
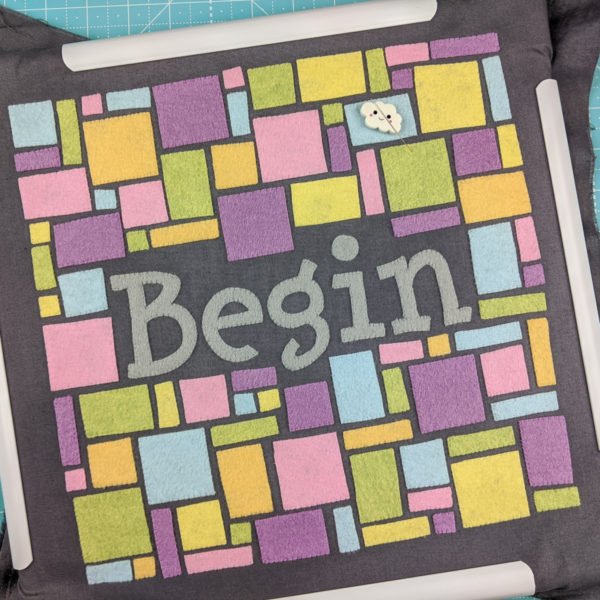
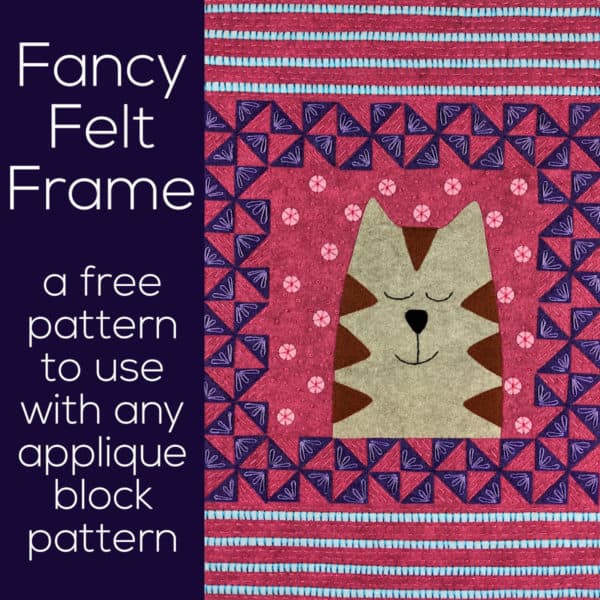
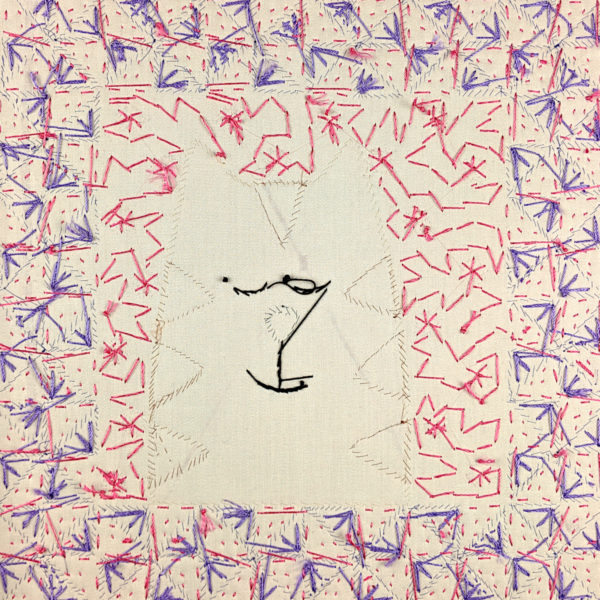
I had so much fun with the Bears in the Hills project that I immediately needed another way to play with felt applique and embroidery. I had been having glimmers of an idea about using traditional quilt patterns as felt applique and I thought it would be fun to do that as a frame around one of my applique patterns.
It was so much fun to make that I decided to put together a tutorial showing how to make the frame. I want you to be able to use it in combination with any of my applique patterns you already have. I’m always looking for ways you can get more use out of your library of patterns. 😄
So here we go!
This layout works for two different possibilities. If you want the full rectangle, use a double-sized sheet of felt (I carry them now in the shop in some colors) and a 12″ x 18″ frame. That’s a standard size I know for sure you can get at Michaels because I checked over the weekend. 😄
If you want just a square frame around your square image, ignore the blue striped parts of the image and use a 12″ x 12″ frame – also a standard size.
What You’ll Need
One 12″ x 18″ sheet of felt for the background. I highly recommend wool-rayon blend or bamboo felt. Don’t use acrylic felt – it will pill and look grubby before you even finish making it. This is the felt I use in all my projects.
Assorted felt colors for the other parts. I used the following colors. . .
Optional – I like to use a Q-snap frame for this kind of handwork, so I bought a couple of extenders for my 17-inch frame so it could go all the way to 20 inches. I also used some cheap muslin as a base for my felt so I didn’t need to catch the felt in the clamps.
That’s it!
Prep the Pieces
You’ll need to cut some strips, triangles and circles from your felt.
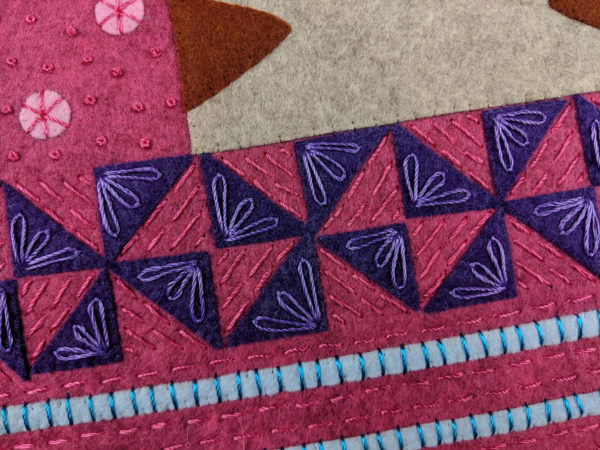
For the triangles, cut four strips of felt 1″ wide and 12″ long. From each strip, cut 1″ squares. You need a total of 40. Cut each square in half on the diagonal to get 80 triangles.
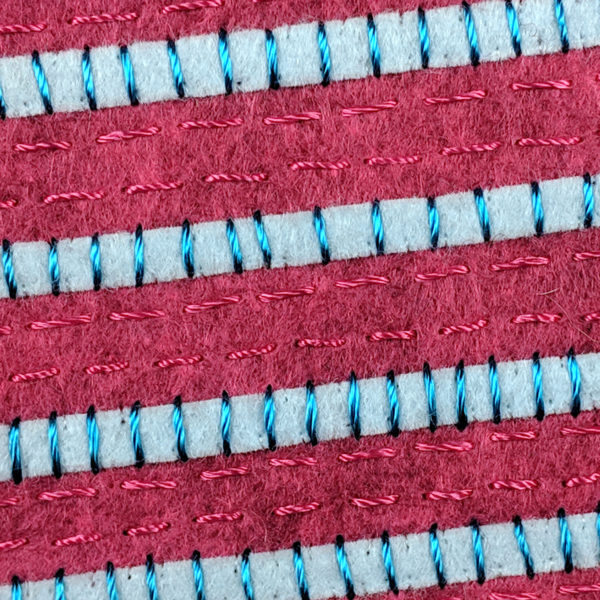
For the blue stripes, cut 8 strips 1/4″ wide and 12″ long.
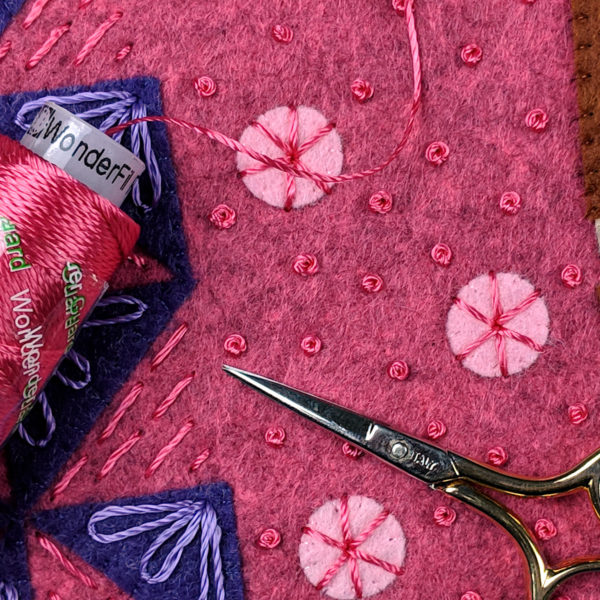
For the pink polkadots, cut nineteen 1/2″ circles. (I buy mine pre-cut from Woolhearts on Etsy.)
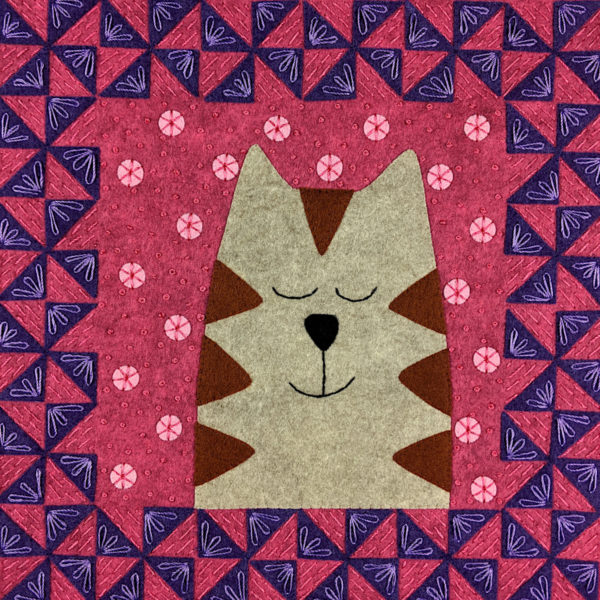
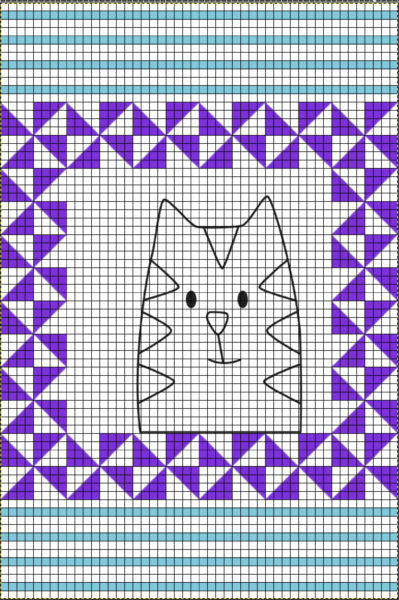
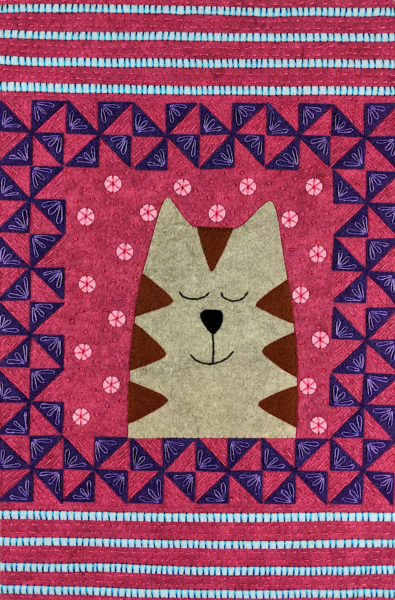
Choose your pattern for inside the frame and print it at 80% size. I used one of the cats from the Cuddly Cats quilt pattern, but changed his eyes to happy sleeping eyes. There are also a bunch of free patterns available here. Cut out all the pieces. (I like to print mine on freezer paper to make it easier to cut out the pieces accurately.)
Put It All Together
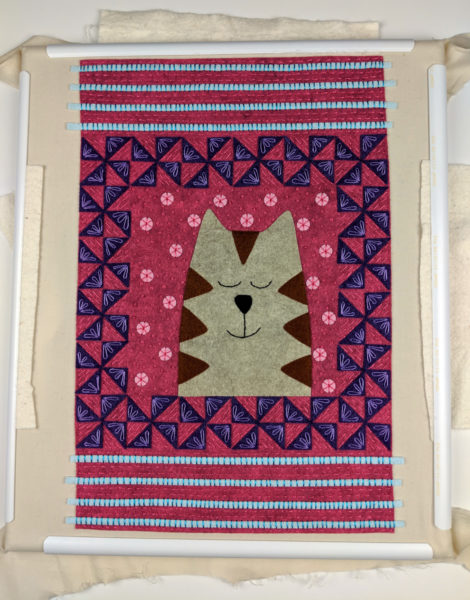
I started by gluing my large background sheet of felt to some cheap muslin so I could easily hoop it without covering up any of the stitch area. Here you can see my piece in its hoop.
I used a couple of batting scraps under the clamps to give them more to grab onto, since the muslin was pretty thin.
Next I started to arrange the cut pieces onto the background felt. Here’s the plan. . .
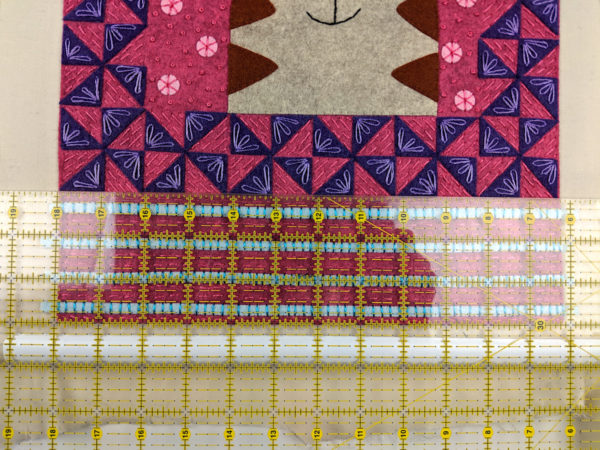
Each square in the grid is 1/4 inch. I don’t like to mark on felt, so I used a ruler as a guide to position my pieces.
Here you can see that I’ve laid the ruler across the bottom of the background piece so that the top edge of the ruler is exactly 3 inches up from the bottom edge of the felt. That’s where I lay down the purple triangles in a pinwheel arrangement. I originally positioned one triangle in each inch of the background felt, but I photographed this after I finished all the stitching – which draws up the width a little bit. (You can see that the finished width is now a smidge less than 12 inches, which throws off the alignment of the triangles a bit – but you get the idea.)
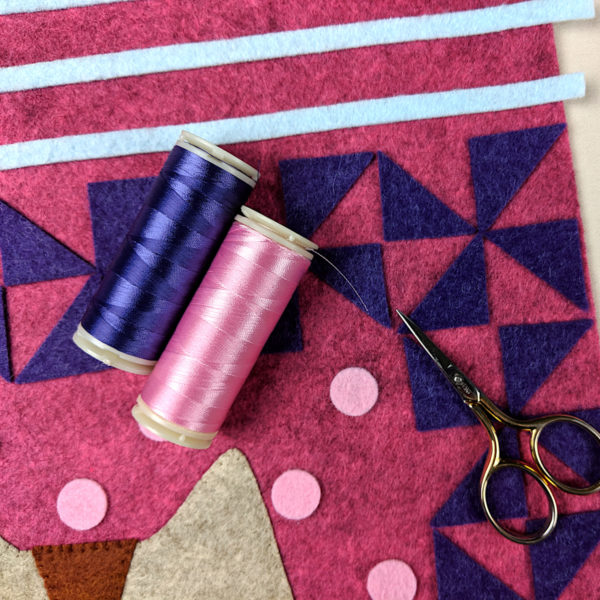
Once you get the bottom row of triangles in place, it’s easy to build out the rest of the pinwheel frame. When you’re happy with how it’s all laid out, glue each piece in place with a swipe of glue stick.
Use the ruler as a guide to position all the skinny blue stripes as shown in the diagram and glue in place.
Position your face. I shifted mine a bit to the right, just to make things more interesting.
Sprinkle some polkadots in the background and glue them down too.
Here are several free patterns that work with just some simple resizing. This post about making coasters has info about resizing an applique pattern that can be applied to any of these projects.
Want to learn how to make a quilt with an easy online workshop – totally free?
Sign up for Let’s Make a Quilt here. You’ll learn how to get started, the tools and supplies you’ll need, and how to make a quilt from start to finish using Quilt As You Go and applique with fusible adhesive.
It’s the easiest, most fun way to make an applique quilt. You can do it!
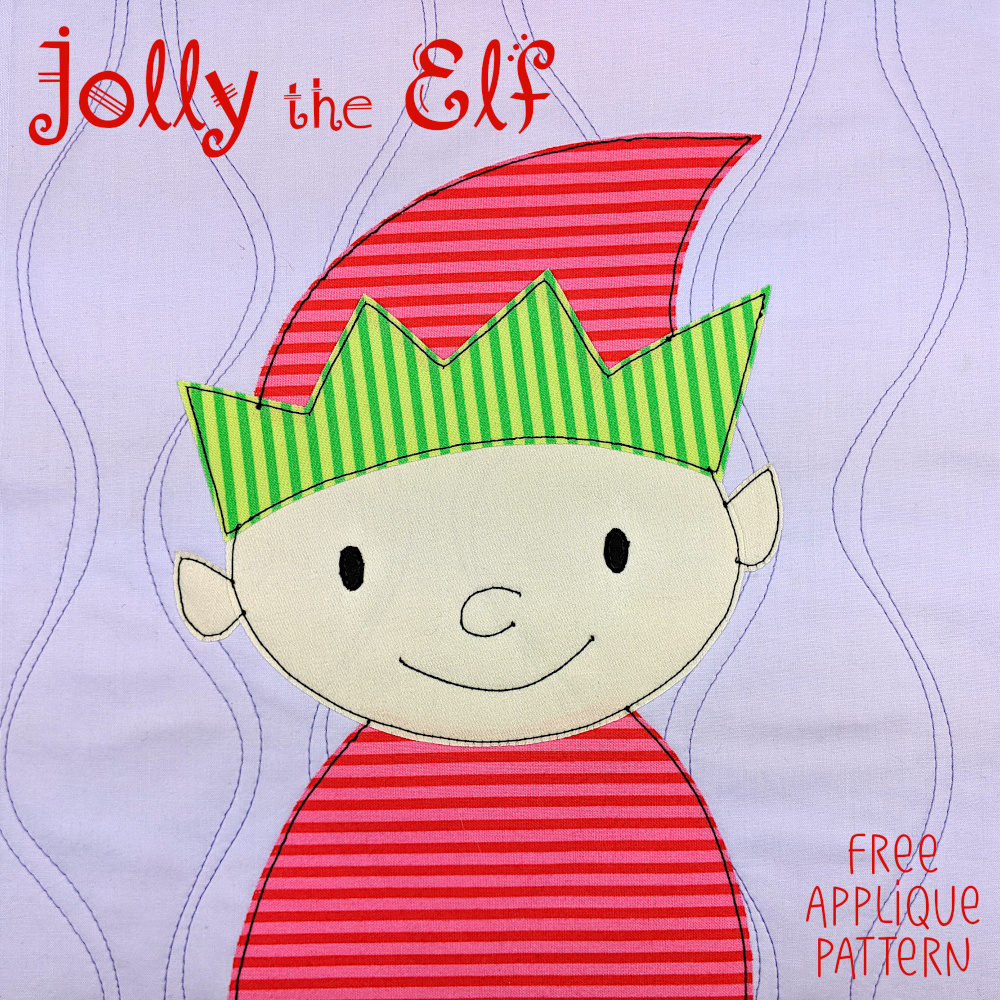
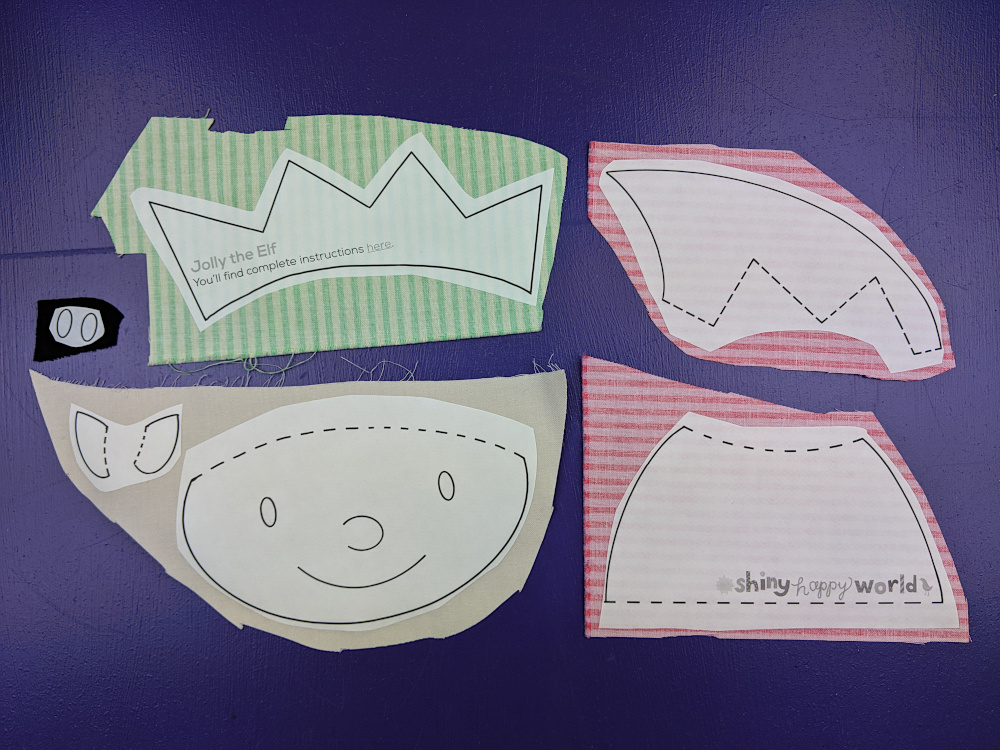
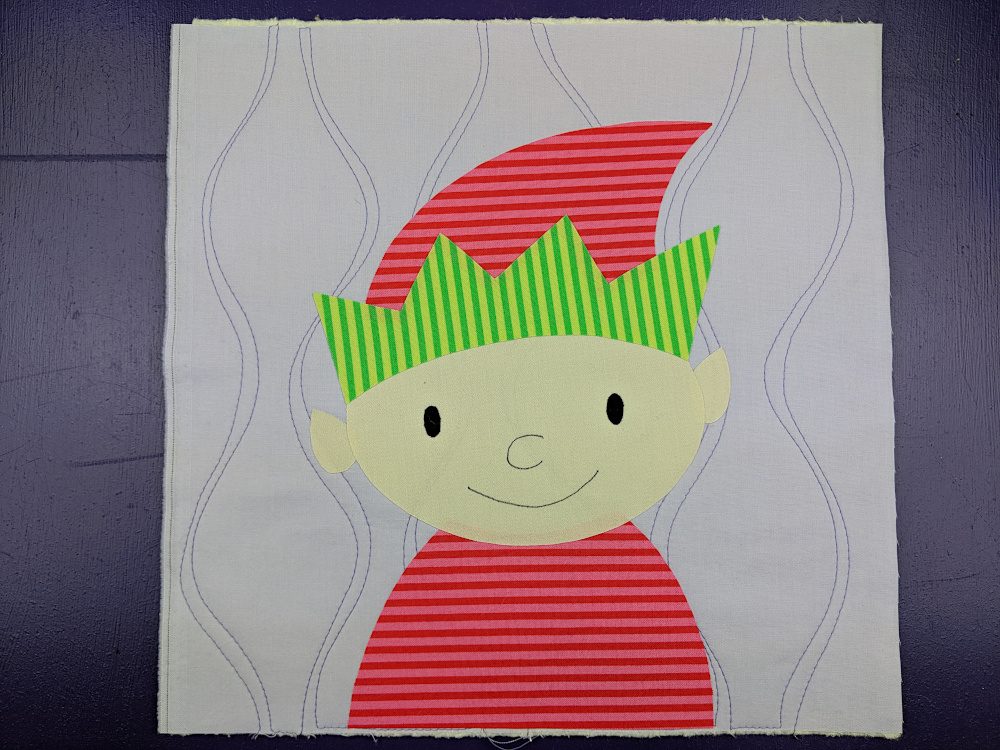
There’s a new free applique pattern for you! Merry Christmas!
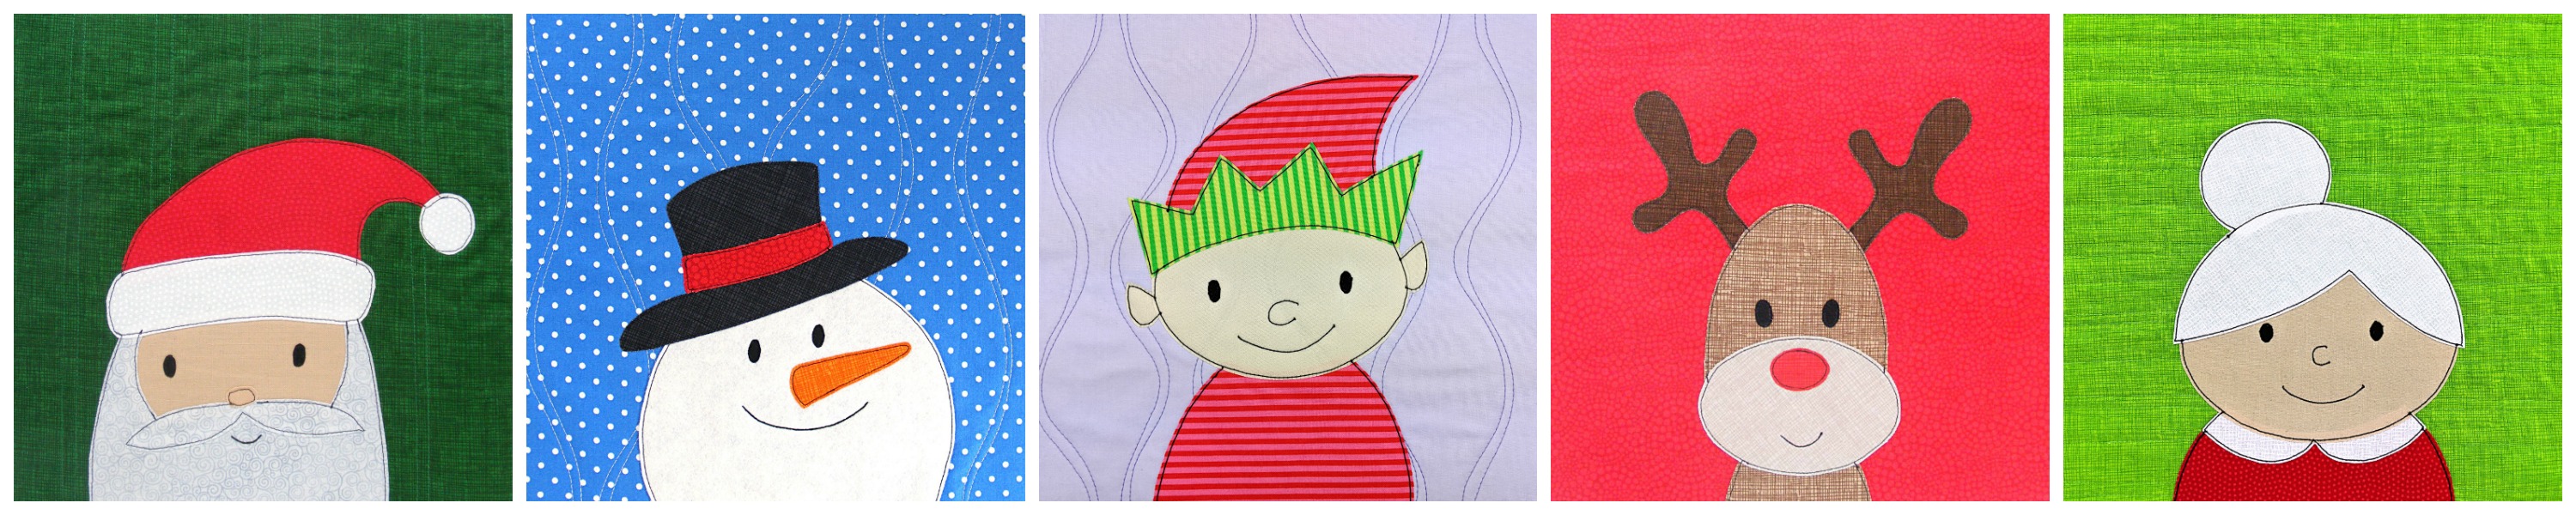
This adorable elf pattern is the same size and style as the other free Christmas applique patterns (10 inch finished blocks). There are five now! (You’ll find links to all of them at the bottom of this post.)
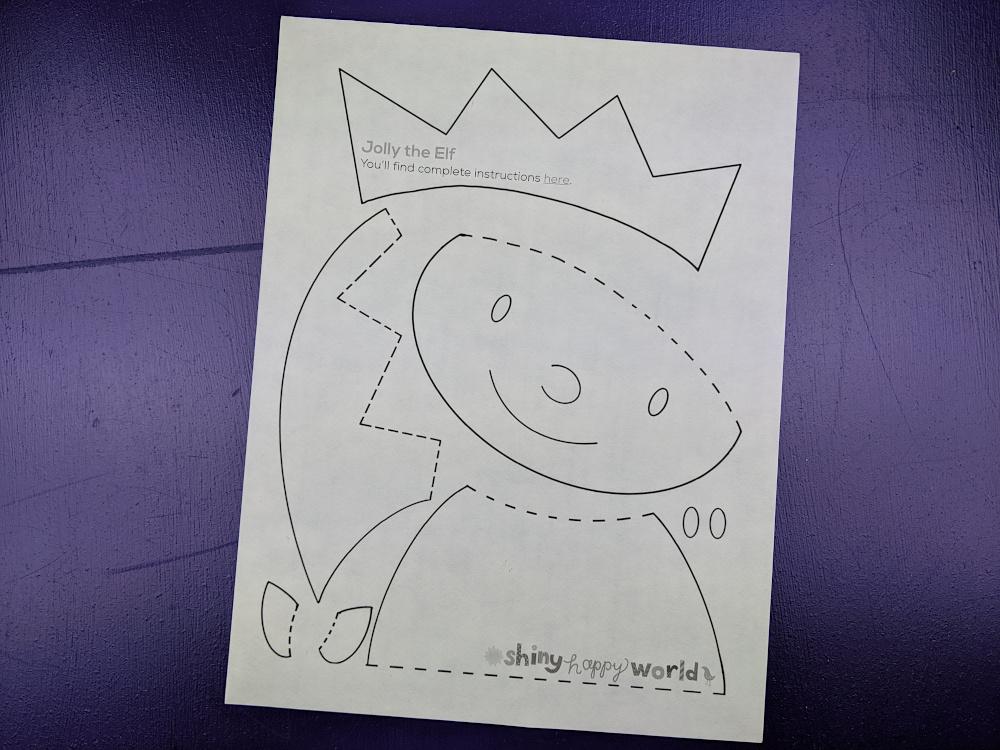
The image has already been reversed, so just trace or print. If you’re tracing, be sure to trace the facial features too. You’ll need those for Step 4.
Step 2
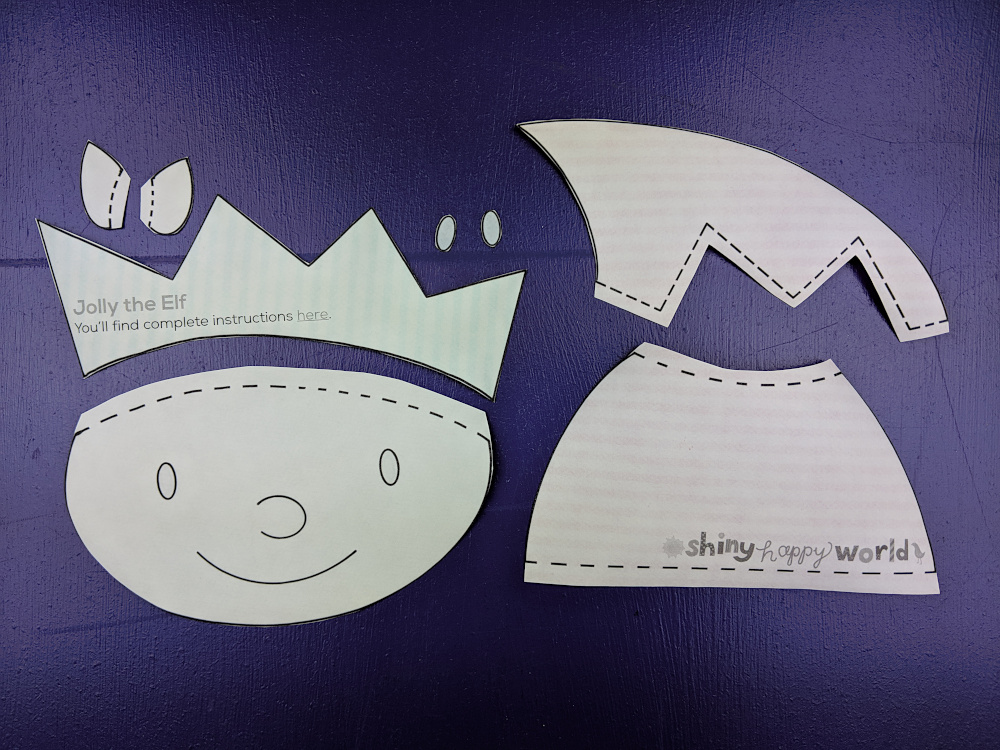
Rough cut around each shape and fuse it to the back of your fabric.
Leave a little bit extra all the way around - a little extra extra (at least 1/4 inch) where there’s a dotted line, like the top of the shoulders and the base of the ears.
Step 3
Cut around each piece neatly. Cut directly on the solid lines.
Leave a little seam allowance on the dotted lines - those are the seam allowances that will tuck behind other pieces.
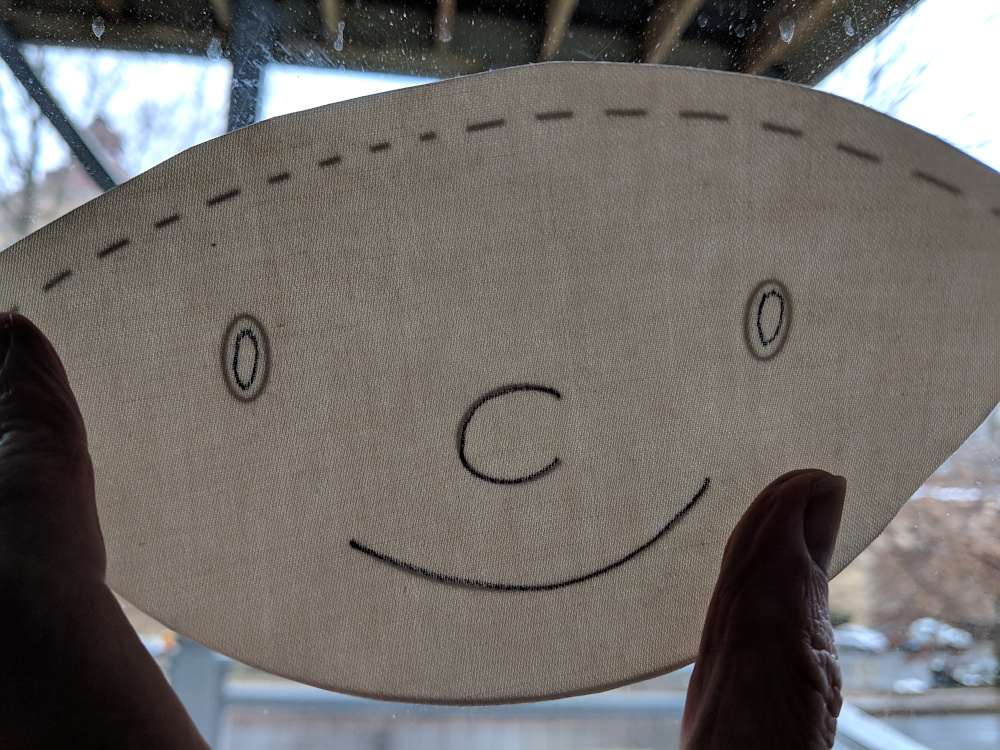
Step 4
Remember when I told you to make sure you traced the facial features in Step 1? Now you’re going to use that. Hold the face up to a window so the light shines through it. You’ll be able to see the eyes, nose and mouth, and the adhesive will stabilize the fabric so you can trace on it without it crinkling up.
I traced just inside the eyes, and directly on the nose and mouth.
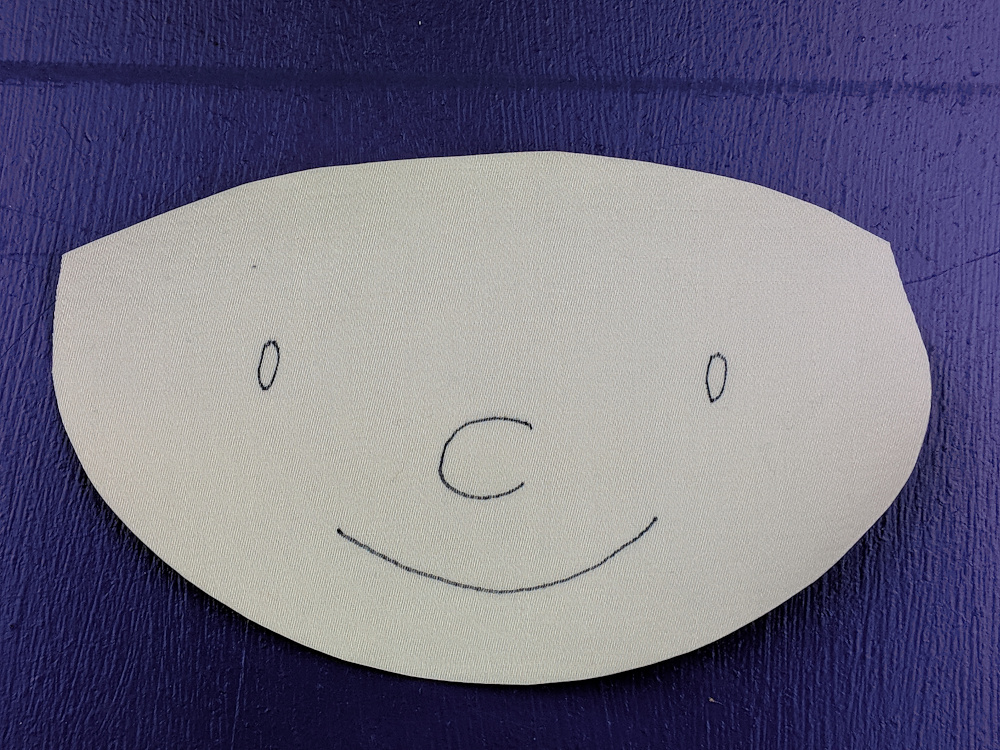
Here you can see all the tracing I did – without the light shining through.
Step 5
If you’re doing Quilt As You Go (I did) then you can quilt your block before adding the applique. So easy!
Cut your background fabric and a piece of 100% cotton batting 11 inches square.
Layer the block with a piece of 100% cotton batting. Quilt any pattern you like!
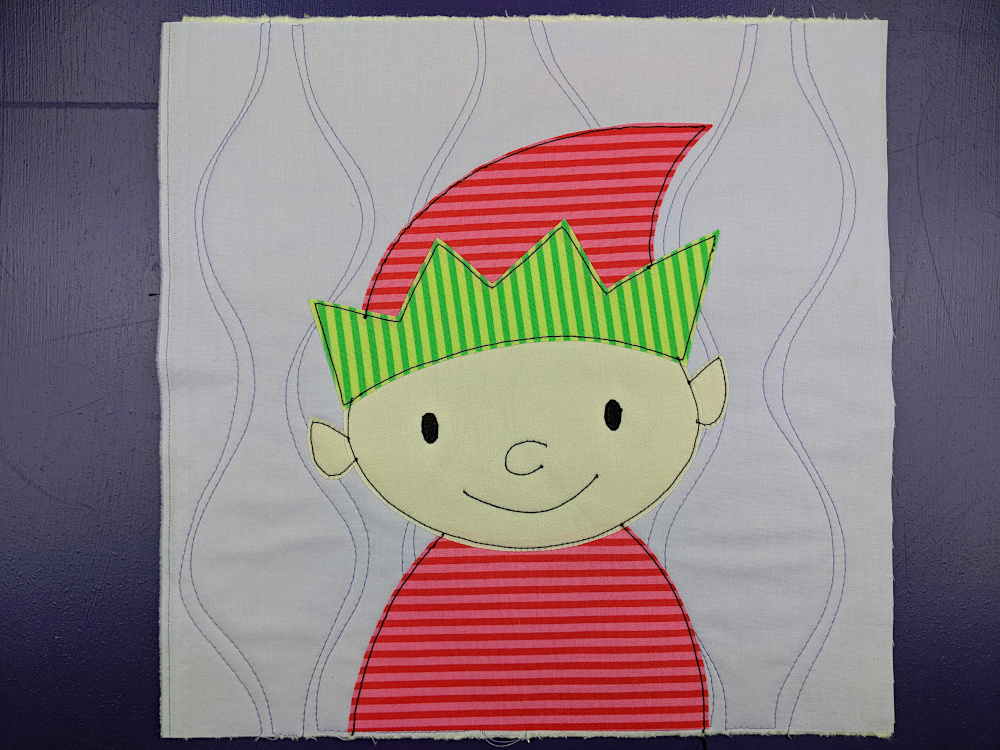
If you’re making a one-block project, go ahead and finish it up!
If you’re making a bunch of elf blocks to join into a quilt - have fun!
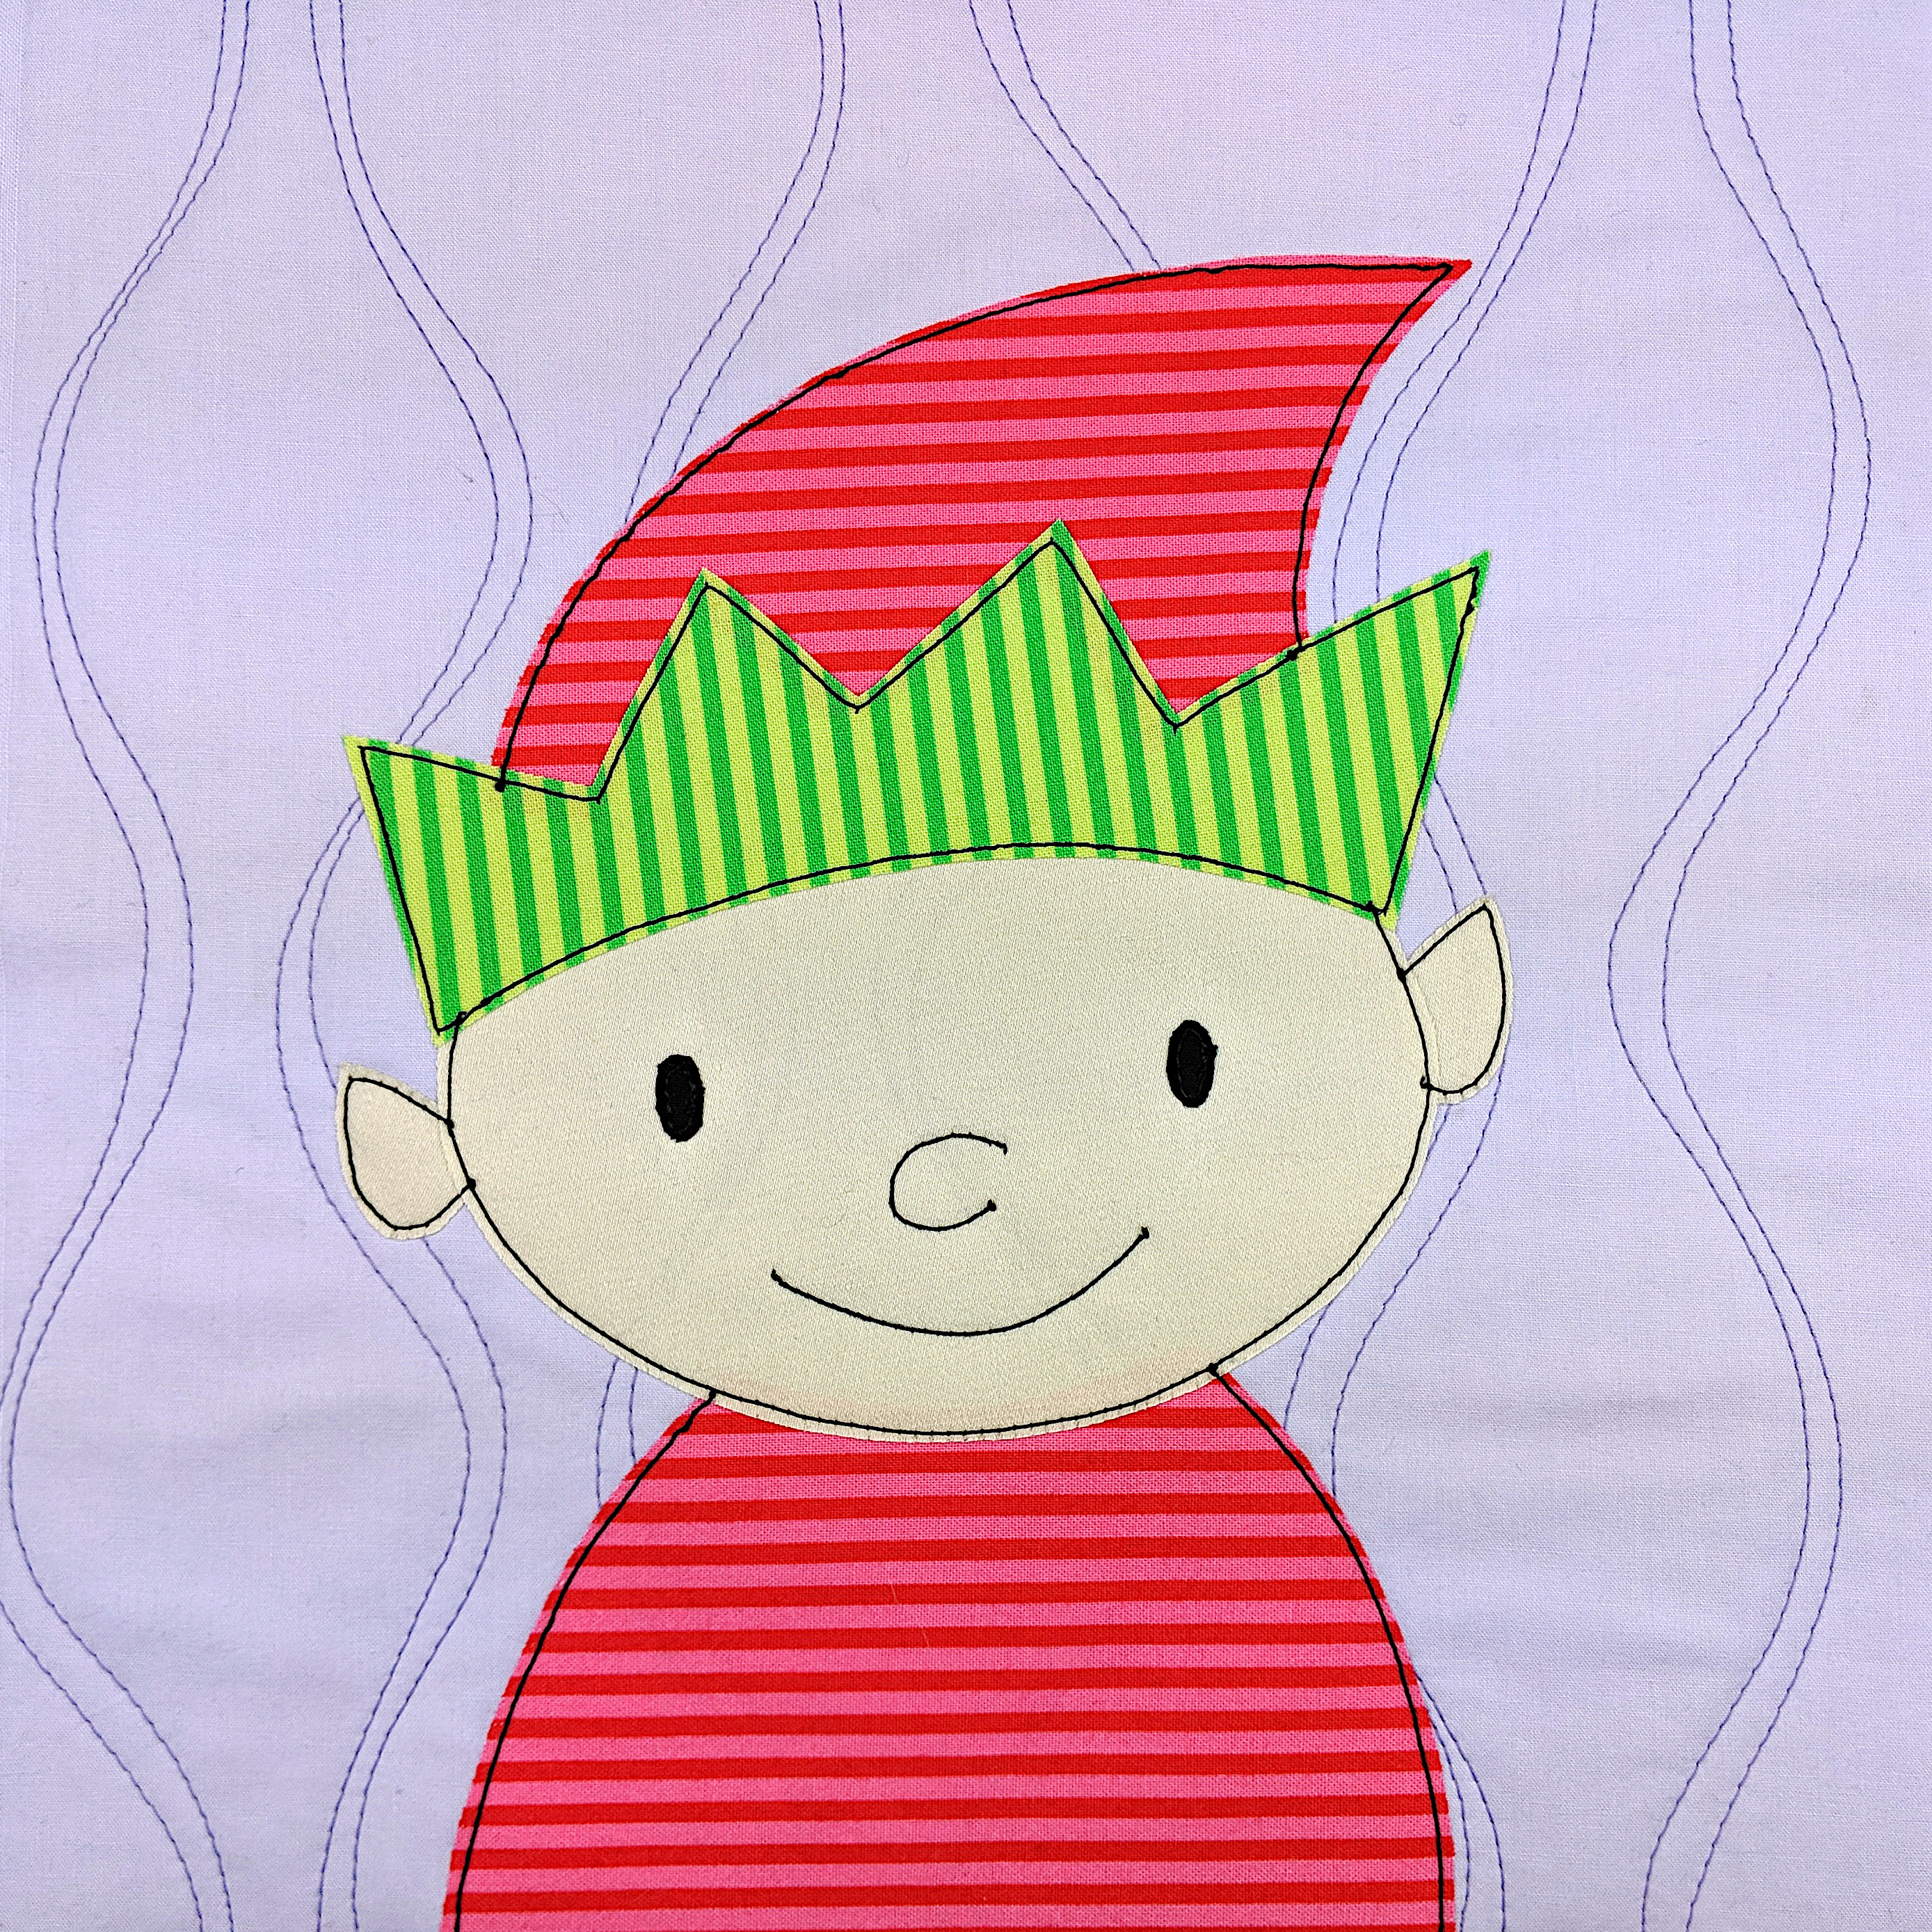
What can you do with just one block pattern? Tons of things!
Check out this page I’ve been slowly building – 100 Things to Do with an Applique Pattern. There are links to a bunch of free patterns you can use with your applique pattern to make bibs, pillow covers, tote bags, and more! 🙂
Here are all the free Christmas applique patterns so far.
If you’re looking for a different fun Christmas quilt pattern check out this post. It has a bunch of free patterns for little signs that you can add to a Shiny Happy Houses quilt to turn it into a North Pole quilt. 🙂
Have fun! And share a photo of what you make! You can share it in the Shiny Happy People group or tag it with #shinyhappyworld on Instagram.
If you like this free pattern, sign up for the Shiny Happy News! Subscribers get a weekly newsletter full of sewing tips and tricks, free patterns, special discounts, and other things to make you smile. 🙂
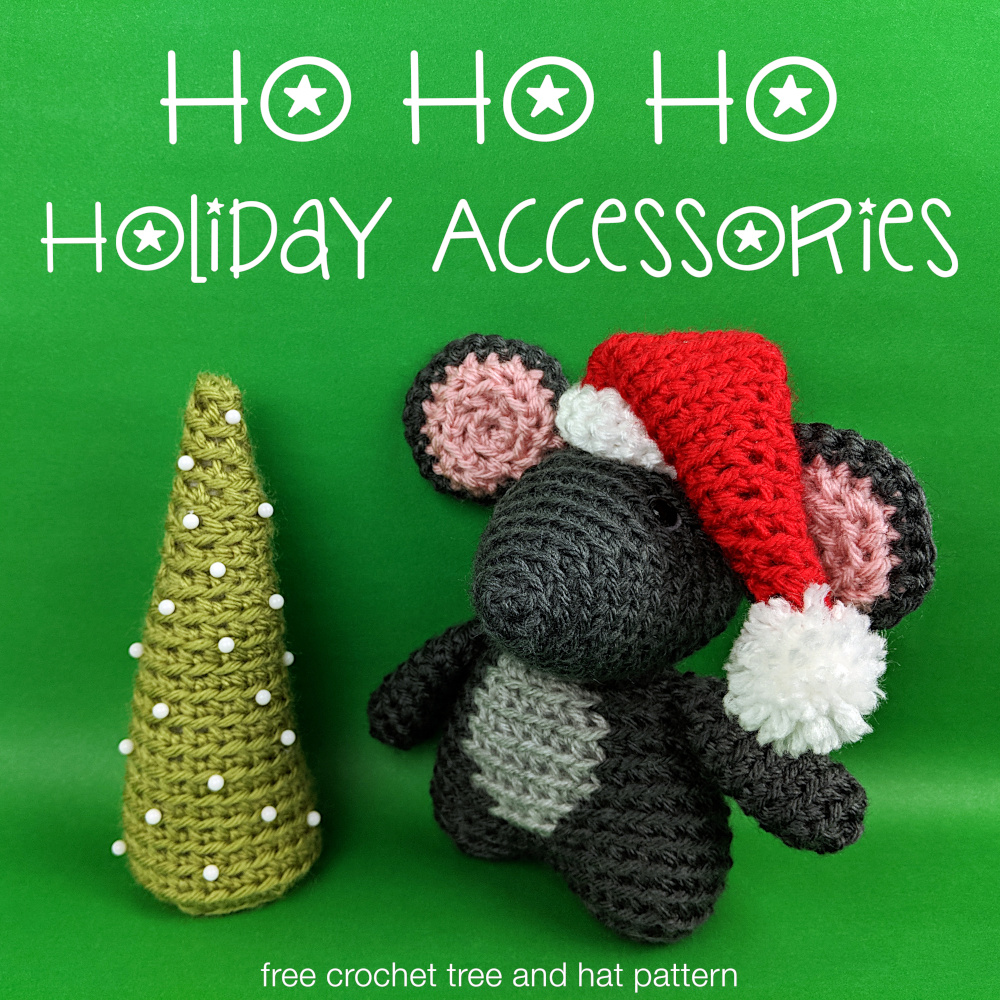
I’ve got free patterns below for both the tree and the hat – plus some extra fancification ideas for both at the bottom of the post. Have fun with these!
You can use these patterns for any holiday decorations – the repeat pattern is easy to follow to make them larger if you need. Or just use thicker yarn!
If you’re making a hat for a larger softie, just follow this pattern of increasing one stitch per round until the hat is big enough to fit, then stitch at least four rounds of straight single crochet for the contrasting band. You may need to add more rounds of contrast to feel like it’s in the right proportion with the hat, depending on how much bigger you make it. Trust your judgement. 🙂
For the tree. . .
Picking up after round 16 above.
Round 17 sc twice in next st, sc in next 18 sts (20)
Round 18 sc twice in next st, sc in next 19 sts (21)
Round 19 sc twice in next st, sc in next 20 sts (22)
Round 20 sc twice in next st, sc in next 21 sts (23)
Round 21 sc twice in next st, sc in next 22 sts (24)
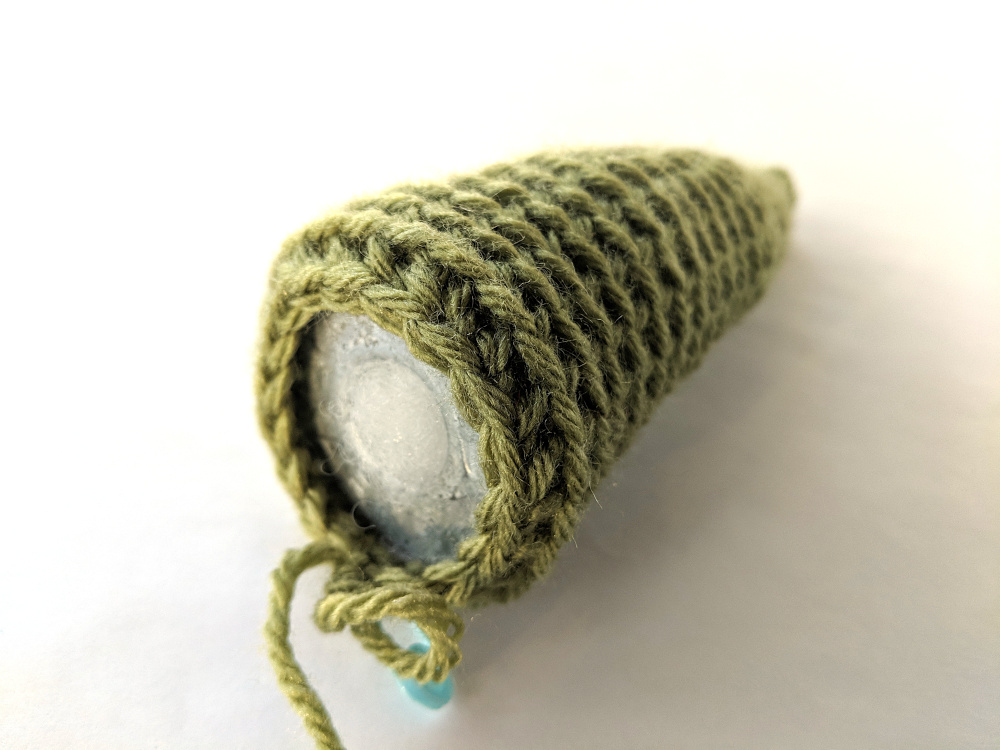
Stuff the tree and slip a large washer across the stuffing at the base of the tree. This will give your tree a nice flat base and the washer adds a nice weight.
Round 22 [sc2tog, sc in next 2 sts] 6 times (18)
Here’s what it looks like after that first decrease round wraps around the edge of the washer.
If you don’t have a metal washer, you can cut a circle of cardboard. It will give you the flatness without the weight.
If you want to make your tree bigger, keep following the same increase pattern after round 21. To make your decrease rounds easier to calculate, make sure to make your last increase round one whose stitch count is evenly divided into 6.
I dressed up my tree with some simple white-headed pins – but there are tons of possibilities to dress up both the tree and the hat!
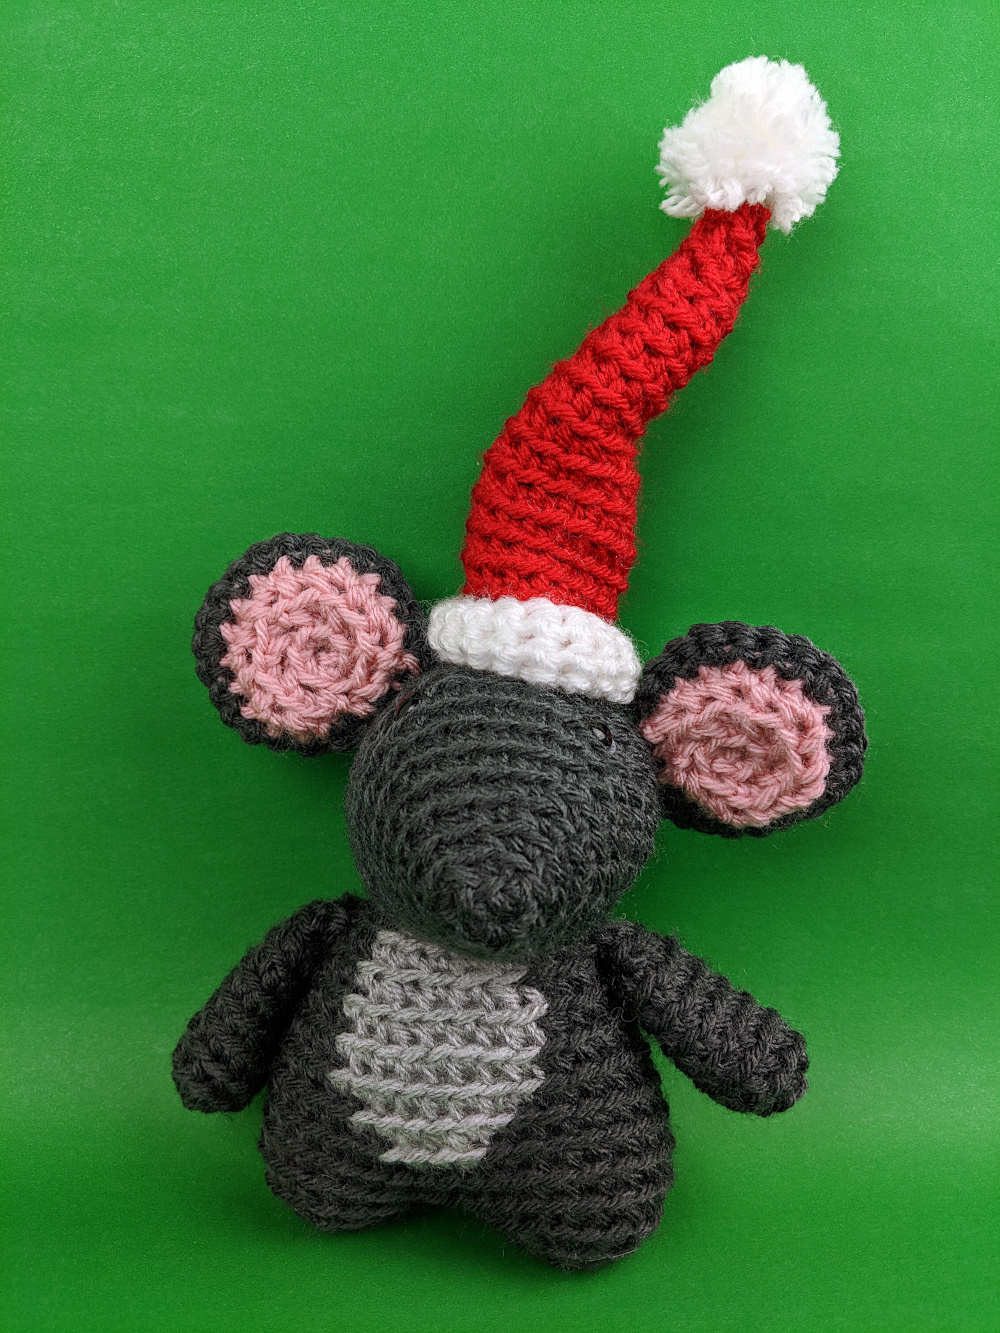
If your hat is kind of stiff and you want it to flop down like the one in the photo, you can drop a metal nut into the tip of the hat. The weight will keep it dipping down. I use a surprising amount of hardware store items in my softies. 🙂
If you decide to give a holiday Milo Mouse as a gift, I suggest pairing it with these books.
The Night Before Christmas – I had the line “Not a creature was stirring, not even a mouse” in my head as I designed Milo. There are so many beautiful editions of this story available – the link goes to one with very traditional illustrations.