Have you heard about the Red Scarf Project?

This post originally appeared on November 20th, 2013. But it’s such a great cause, I’m reposting it with additional information!

What happens to a child in the foster care system when they turn 18? They’re ‘adults’, and are set out into the world alone, and without a network of family or social resources.

Sad, right?

If those kids are awesome enough to get themselves into college… who sends them care packages? Who do they call if they need an emergency $50 for a surprise textbook?

In most cases, they have no one to turn to.

Makes you sniffle, right?

That’s why I love Foster Care to Success, an organization that supports foster care children who have ‘aged out’ of the system. The organization collects money for emergency funds and runs other great drives to support this often-overlooked population.

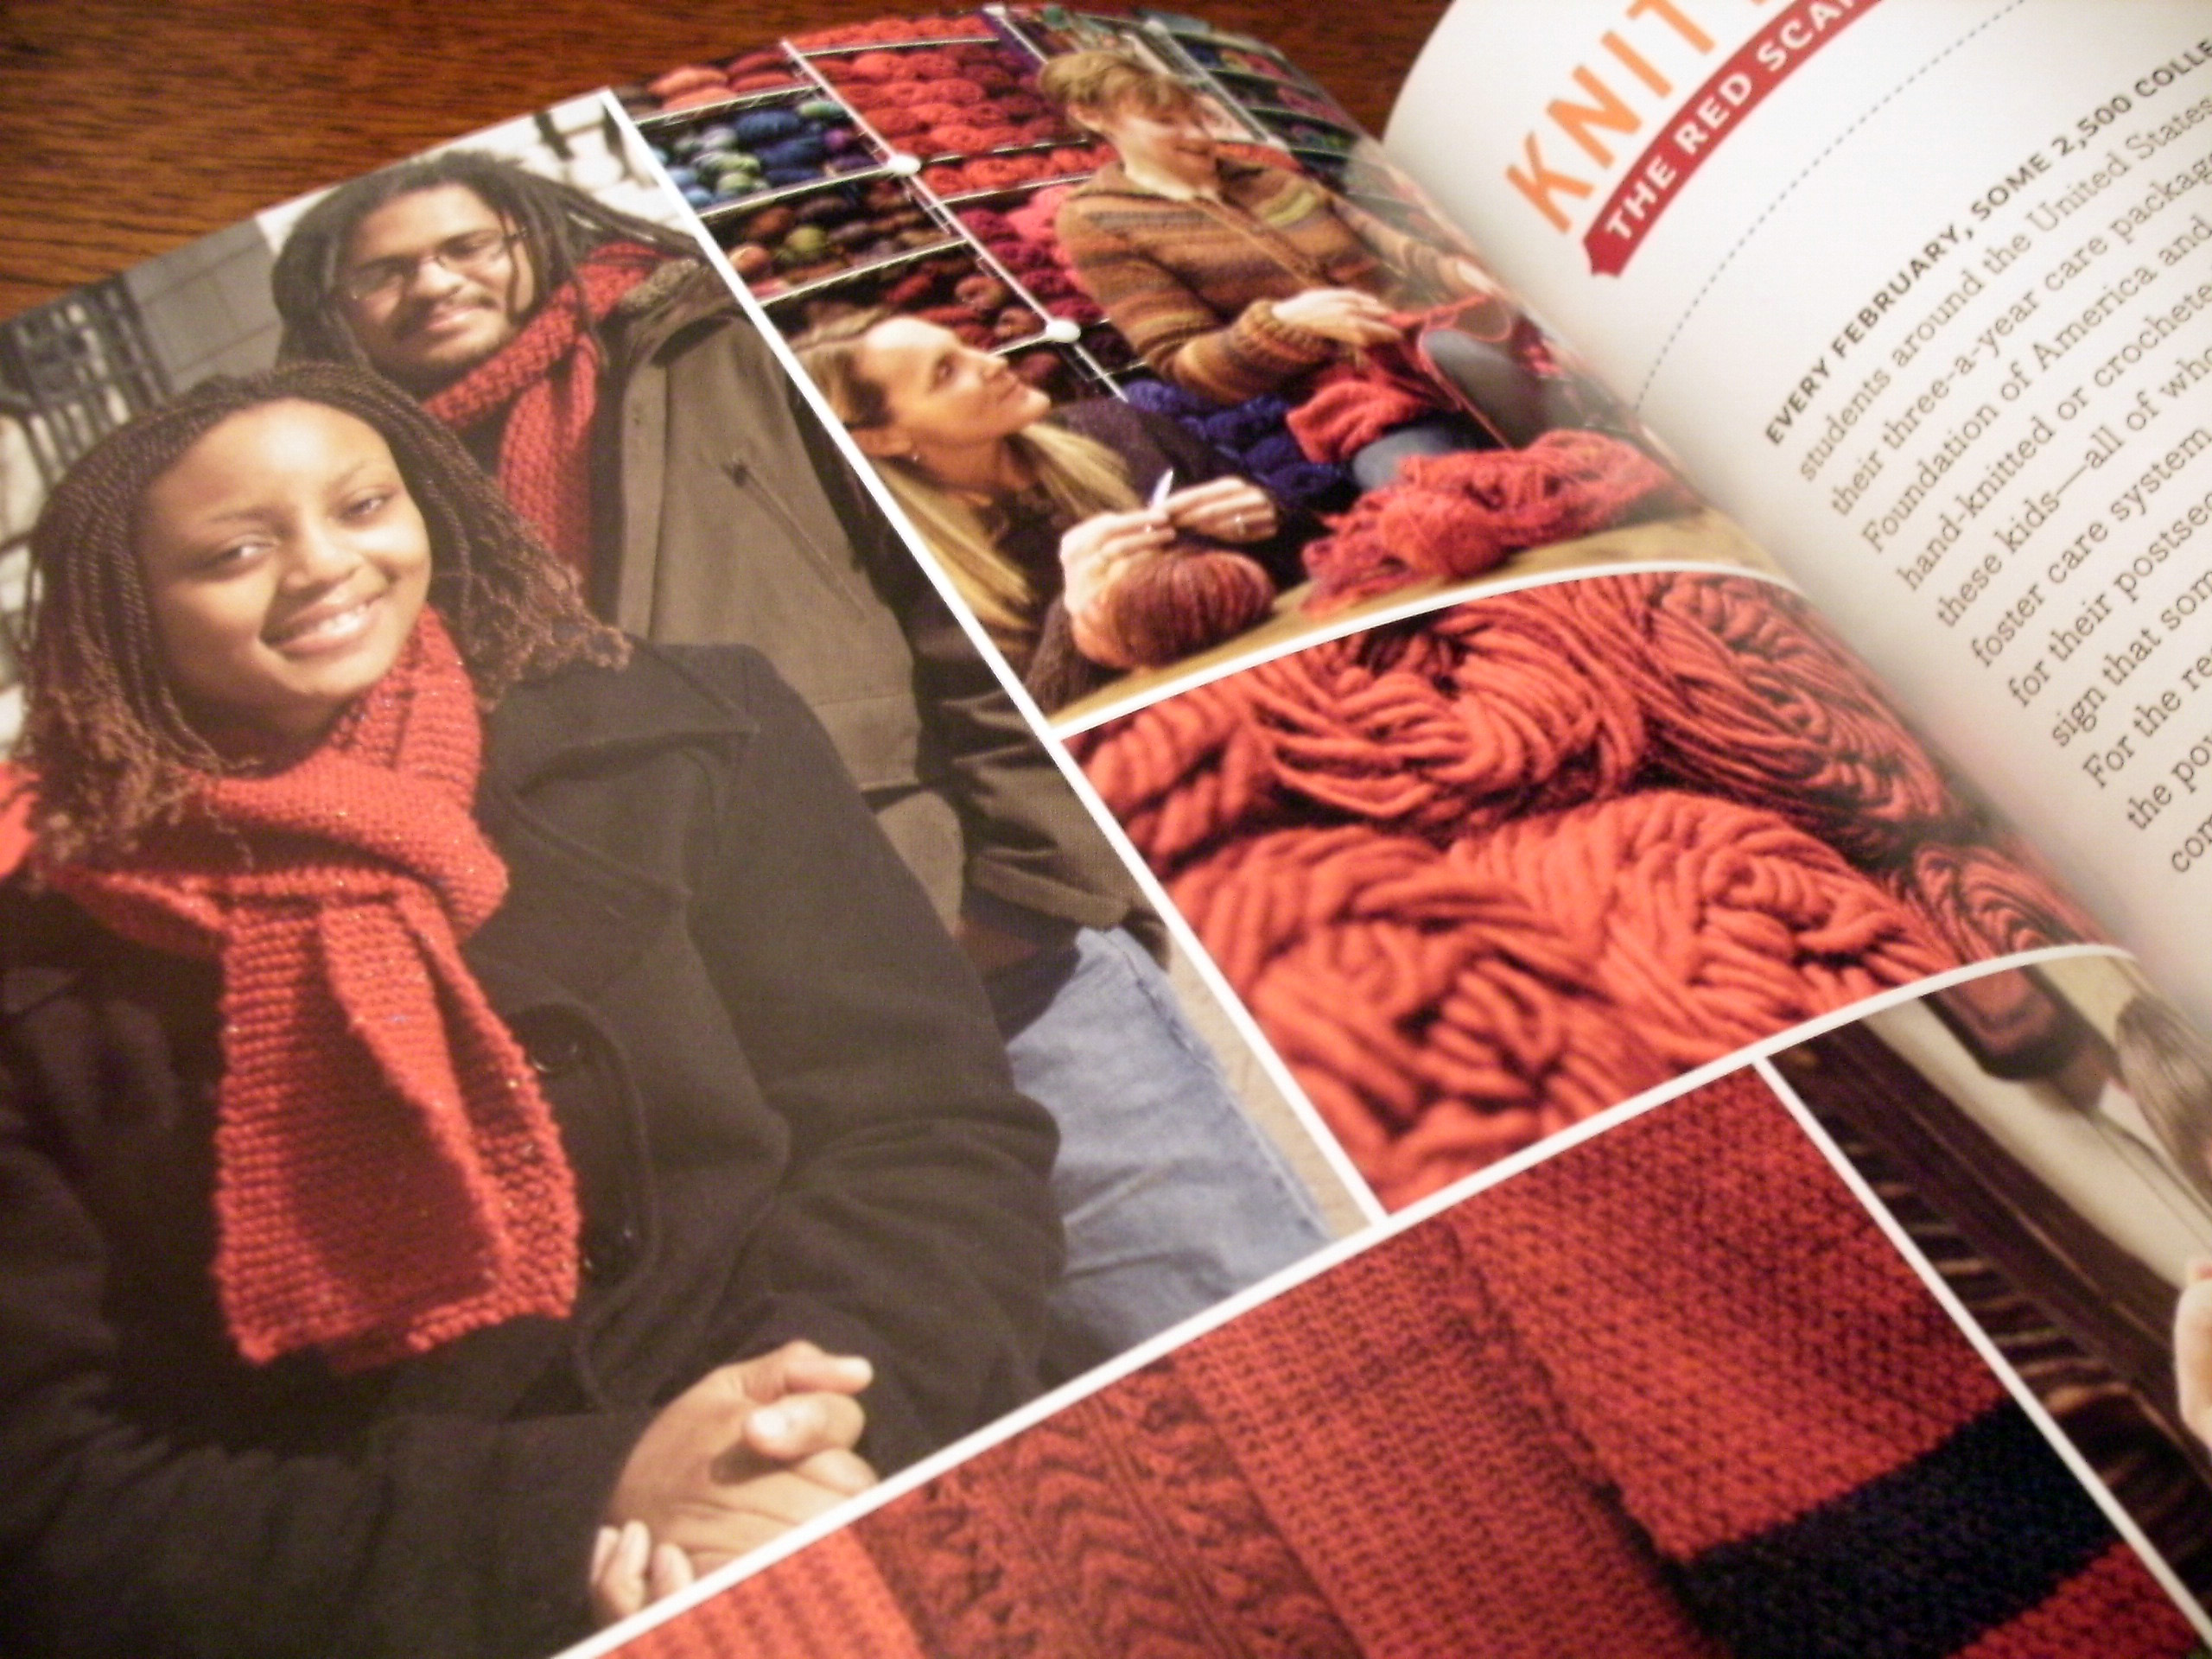
I particularly love the Red Scarf Project. I read about it in Craft Activism.

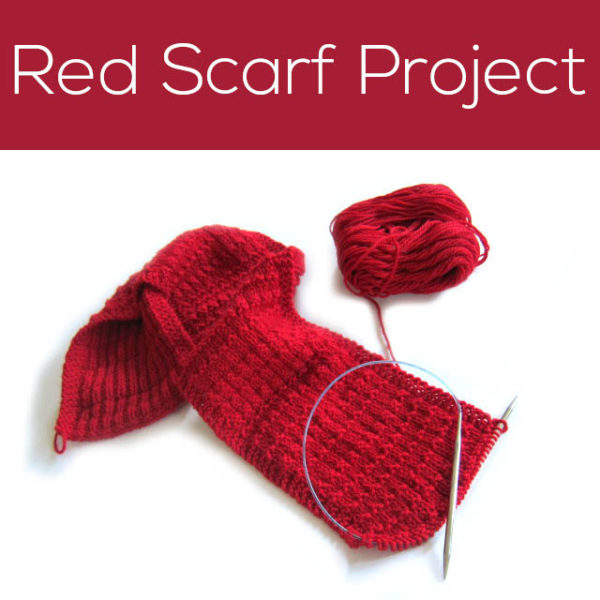
Red Scarf project

The Red Scarf Project collects scarves from September 1st – December 15th every year, and then distributes them to a foster student on Valentine’s Day.

Isn’t that sweet? Can you imagine how special you’d feel if a handmade scarf with a sweet note showed up on your door? And what a boost that would give to your semester?

That’s why I’m knitting one!

Red Scarf Project

I didn’t feel like I had the time: the Kit Club packages, hosting Thanksgiving dinner, planning for the holidays… and then I told myself “Balarky! You can make the time! These college students don’t have families!”

And surprise… I’m finding the time!

Join in!

Can you spare the time?

Nothing fancy is required, just a simple red knitted or crocheted scarf. Check out the guidelines, here.

This link tells you where to mail the scarves, as well as the not-too-hard guidelines (basically is red, gender neutral and about 60″ long). Pattern suggestions, too!

Sweet extras, such as a hand-written note, are welcome!

Color Theory: Neutrals + Pop of Color!

You know that I love color.

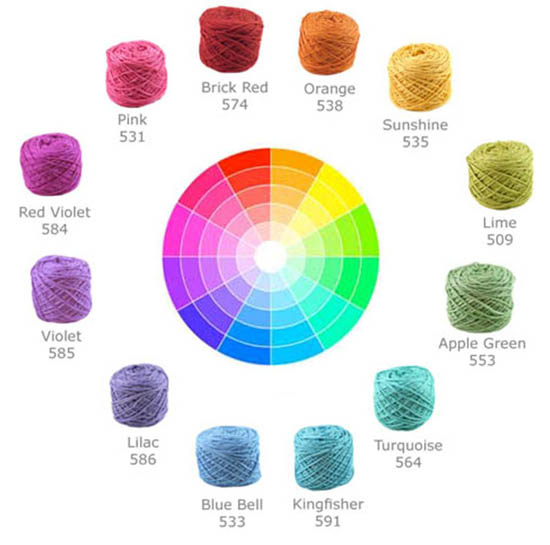
In fact, one of my most popular blog posts is this one where I talk about putting colors together.

But maybe you’re not into wearing lots of different colors. I have another great color combo for you: a neutral + a pop of color!

How to do it

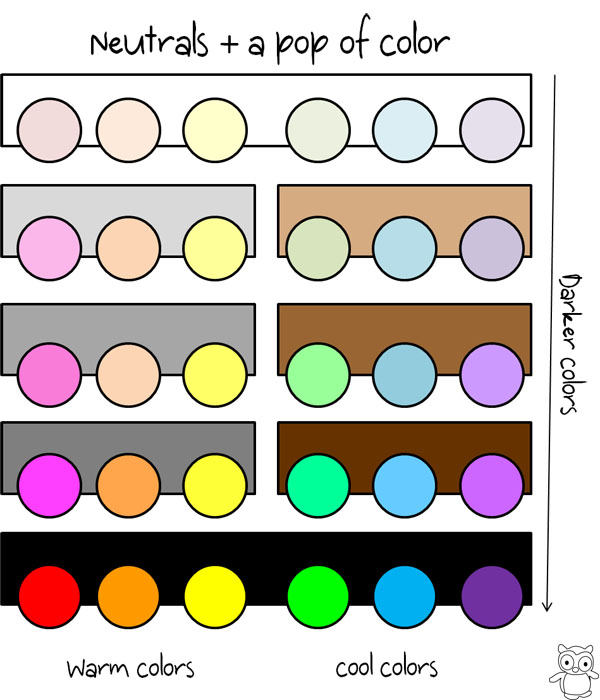
My philosophy for mixing neutrals and color is to mix warmth, but keep the darkness the same. For example, I mix a warm color with a cool neutral… but keep them about the same lightness.

Here’s a little chart showing some ideas:
mixing neutrals and color from freshstitches

See it in action!

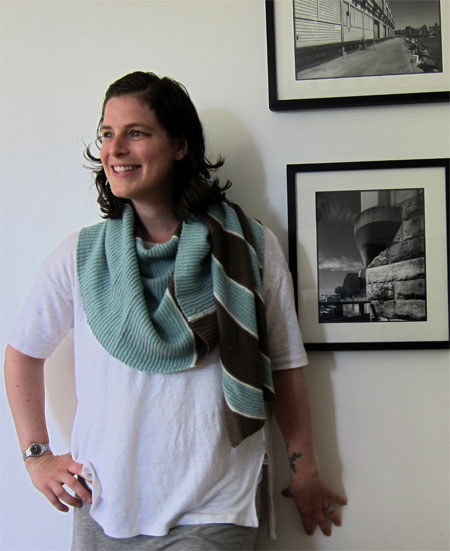
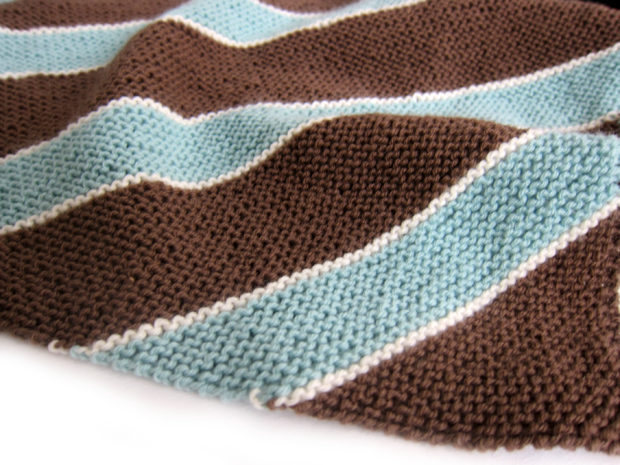
I just finished knitting Dromos (well… actually, I finished knitting it a long time ago, but I just finished weaving in the ends!), and I just love it. It combines a medium brown with a soft blue.

Dromos knit by Freshstitches

Here’s a close up:
close up

Yummy, right? It’s a warm brown mixed with a cool blue, and they’re both similar darkness and a similar muted tone.

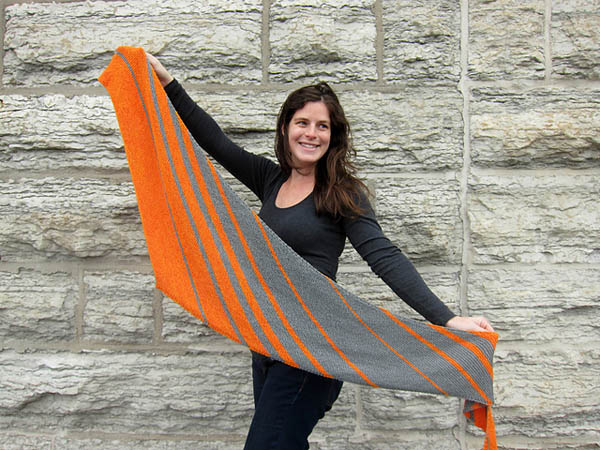
And do you remember Phi?

Phi Shawl

A cool grey plus a warm orange… both fairly dark. Delicious!

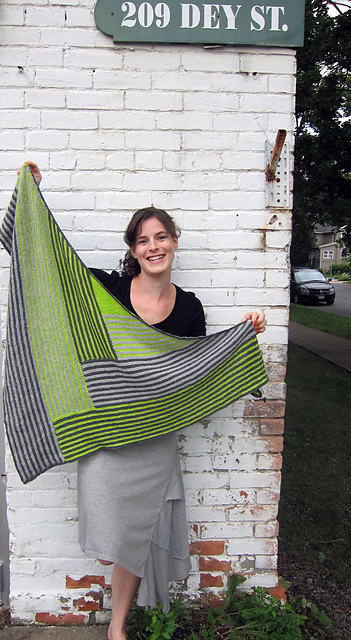
Dark grey and lime green? Oh, yeah.
Derecho
Bonus: whenever you use different colors in a project, it’s an opportunity to stash-bust and use up some odd skeins you might have on hand! Stripes are a stash-busters best friend!

Have you done this before? What’s your favorite color combination?

When should you teach a child to knit/crochet?

A little while ago, someone on Twitter asked me:

When should you teach a child to crochet?

My reply: whichever she’s most interested in, whenever she’s ready

Children begin to crawl at different ages. Kids start to speak at different ages. Is it any surprise that different children are ready to knit/crochet at different ages?

When is a child ready to knit/crochet?

There are a couple prerequisites to knitting or crocheting, so these are some good signs to look out for to see if your child is ready:

  • They hold and use a pencil (sloppy handwriting is okay!)
  • They can sit and work on an activity for at least 10-15 minutes
  • They can count to 10 (not a must, but helpful)
  • They show interest in the craft

Trying to teach a child before they are ready is not a good idea. It leads to frustration and can discourage the child from trying again later, so I highly recommend you look for these skills!

I began writing at four, and learned to chain when I was 5-6 years old. I just made chains for a really long time! That’s okay!

It’s most important that your child enjoys the activity, rather than hoping they accomplish a certain syllabus of skills. I liked crocheting (and according to my mom) was hopeless at knitting. Again, that’s okay. Encourage what the child is interested in.

What can you expect at what age?

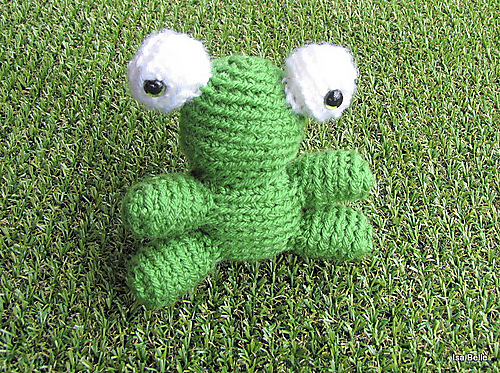
One of the members of my Ravelry group taught her 6-year-old son to crochet. He made this frog all by himself!

frog crocheted by 6 year old

Isn’t that amazing? Before the age of 10, a child can typically learn to crochet with help from a parent who shows them the stitches and teaches them the steps of a pattern.

I’ve had children as young as 10 learn to crochet on their own in my Craftsy Course. By this age, kids are used to following instructions in class, and are able to take instruction from a teacher. So even if you can’t knit or crochet, your child might be able to learn!

child learning to crochet

Once a child is a teenager, they’re just about adults as far as learning knitting/crochet is concerned. ‘Kids’ of this age are usually fine taking an adult class at an LYS/shop (but double check with the store’s policy, first).

The younger the better!

As long as a child has the prerequisite skills (listed above), the younger the better! My husband, Tim, learned to knit when he was about 6 or 7, and it’s a skill he still has today!

With that background, I taught him to crochet as an adult in no time!

I think that exposing children to skills and experiences is a great thing to do… and they may never use it later on. (Tim has knit, like, one thing in his life) That’s okay! They may also latch on to it and the skill becomes a lifelong love, like it did for me!

You won’t know unless you give it a try! I recommend reading my post on tips for teaching a child to crochet!

Interview with Heidi Bears!

If you’ve been on Ravelry or Pinterest, you’ve probably seen Heidi Bears‘s gorgeous stuffed animals! She creates totally unique designs using the African Flower Motif.

I’ve been a fan and I’m thrilled that Heidi agreed to come over and have a chat with us!
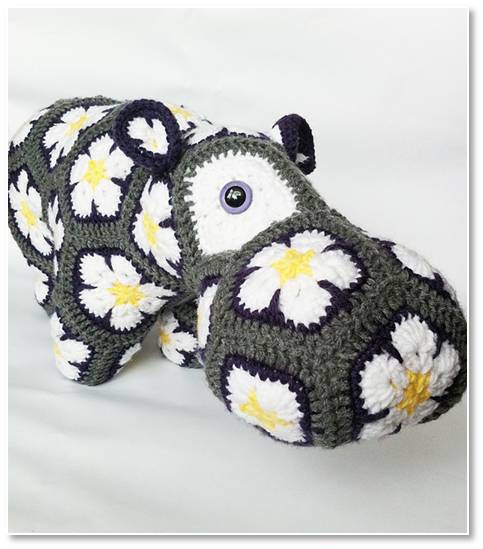
Hippo by MissWorld

Hippo by Ravelry user, MissWorld

Interview

Stacey: I have to say, your concept of putting the African Flower Hexagon together to make animals is absolutely stunning! When did you first get the idea to experiment with the technique?

Heidi: Thanks Stacey! I think it came about as I was fiddling around with the basic hexagon pattern to see if I could make a pentagon and other polygonal shapes. Some of these were quite different in 3D shape to the hexagon, and while sitting in my kitchen one day, I thought, “Hmmm…. what if I combine this polygon with this polygon, maybe I can make it look like something…”

This led to an enormous amount of testing, crocheting, frogging, re-testing until I finally put together the pattern for Lollo Bear. I had spent several years as a Teddy Bear pattern designer and maker, which I think helped with the ability to “see” how different parts would fit together. Naturally (since I love and collect artist bears), my first design idea was for a teddy bear.
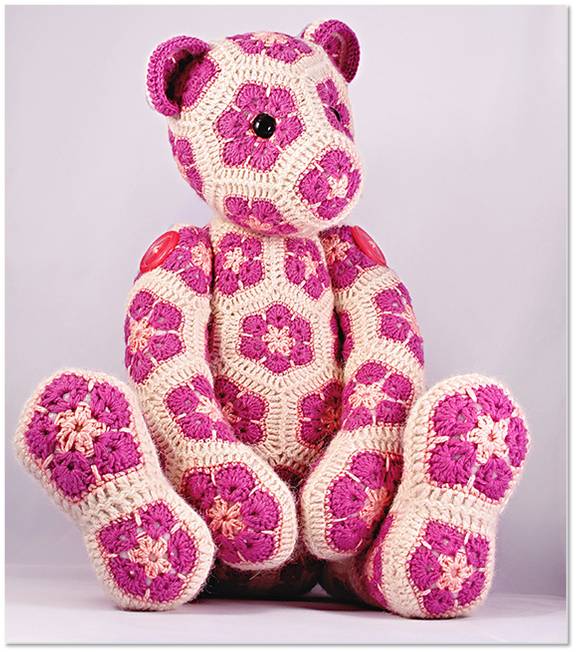
Heidi Bears Lollo

From the time I released Lollo Bear, my day job started demanding much more time, so my designing took a back seat. At the beginning of 2013, I had the opportunity to take a break from my regular job and concentrate solely on designing. At that point the kinds of items made from crochet motifs, seemed to consist of bags, blankets, scarfs and hats with the odd clothing item thrown in.

With so many amazingly talented people in the designing world, it can be extremely hard to produce something completely different, unusual and original when trying to establish a name for oneself as a designer. With the background I had in writing the pattern for Lollo, it appeared that there was nothing else on the Internet that I could find that was similar to my motif toys idea, in my style, so I decided to try and pursue that avenue.
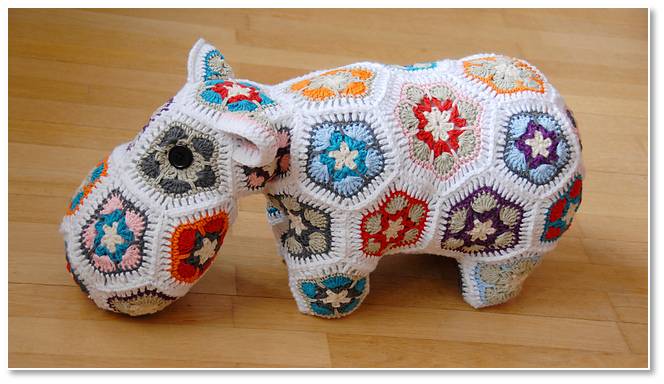
Hippo from Ravelry

Hippo from Ravelry user, SteffiFalun
It took me several months to put together the pattern for Happypotamus, but during this time I learned a lot about polygons and how they act and what works and what doesn’t when putting them together. I like designing toys as they are smallish projects and when made well, appeal to both child and adult alike. I will branch out into other kinds of items when the time comes, but at the moment I still love thinking up ideas for animals, so until that well of inspiration runs dry, toys are it!

Your style is certainly unique… I can’t picture anyone doing a better job of creating an original design niche! What attracted you to the African Flower pattern over other motifs?

I love symmetry and balance in design. I can’t stand seeing a skew picture or lamps that are not symmetrical…the flower is both pretty and appeals to my love for symmetry…
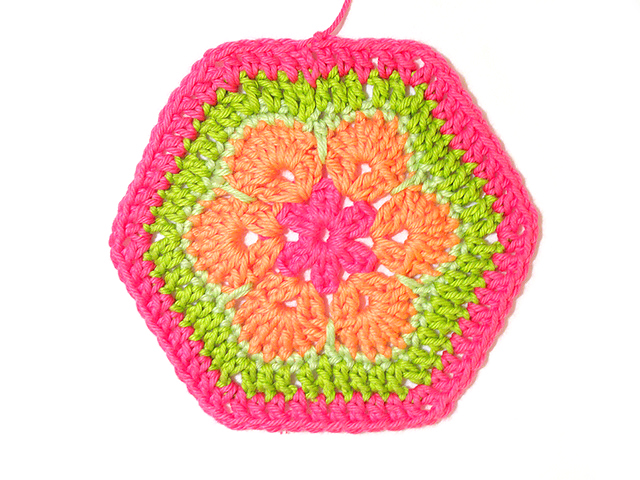
African flower from Heidi Bears

Were you nervous about taking the step of writing up the instructions? I mean, it’s a lot of steps!

Absolutely! My previous profession had nothing to do with my current work, so I had no experience in writing a crochet pattern… I pretty much winged it, hoping more than anything, that I hadn’t left any important bits out.

thumbnail

My goal was to provide a really detailed newbie’s guide to making Lollo, and from the feedback I have received over the years, it seems to have done the trick. However, I have since developed a much more streamlined approach, which, although it still has all the detail a crocheter may need, doesn’t run to such a big pattern anymore!

Can you tell us a bit about the yarn culture in South Africa? Is crocheting and knitting popular? What are yarn stores like?

Yes, knitting and crocheting are very popular here! Over the last few years, we have seen a wonderful increase in local indie dyers providing us with gorgeous and affordable natural fibre yarns that come in a much bigger range of colors than can sometimes be found in retail lines. I use yarns from two amazingly talented and lovely ladies, who use local merino and other fibres to dye up the full range of colors you see in my animals.

Similarly, there are more “indie” yarn shops popping up. There are a couple of traditional LYS too, but the growth has certainly been in the online indie shops!

I know that you’re also a sock knitter… what’s your favorite method for knitting socks?

Definitely toe-up two-at-a-time with a short row type heel.

toe up sock knitting from Heidi Bears

My favourite is the Sherman heel… hides any holes perfectly! I am experimenting with all kinds of new heels and toes (just for fun), but knitting them in baby sized socks. They are from a wonderful new ebook teaching just that.. sock anatomy and all the variations you can get for heels and toes… learning is growing, so I like to keep trying new techniques!

Tell us a bit about yourself! Hobbies? Family? Pets?

Well, I am very happily married to the most awesome guy… we’ve been married for 20 years and are still best friends. We live in beautiful South Africa. We have two lovely (and adored!) girls and a pitbull, who is, if the truth be told, is more like a cat in many ways. Likes his comforts, worships the girls and gets spoiled waaaay too much.

I love learning new things and over the years have tried pretty much all the different types of hobbies you can find… I quilt, sew, paint, knit, lampwork, make stained glass… at one stage I ran a photographic studio and at one time even tried my hand at carving full sizes rocking horses! I am terrified of being bored, so I like to have loads of stuff on the go at the same time. I love the color pink, use only natural fibre yarns and have a stash that is shameful (except I can claim I neeeeed all that yarn for my work 😉 ).

I hear you… I’m a bit the same way with hobbies! Your new sea turtle is fabulous! What animals are on your brainstorming list?
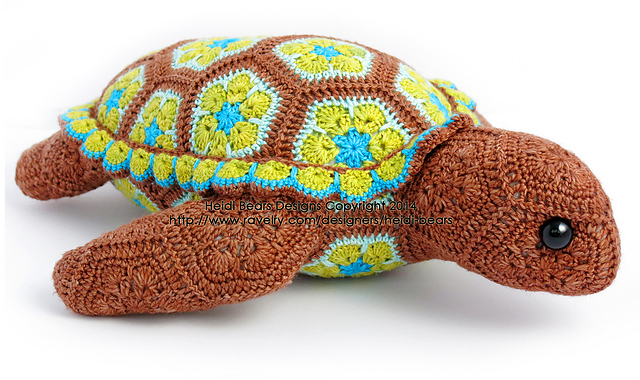
Heidi Bears Sea turtle

Thank you very much! I have a string of designs all worked out and ready to write up…the problem is the pattern writing takes a tremendous amount of time. I take around 500 photographs for each pattern that I write. I then edit the best ones for colour, focus, composition etc. I then annotate each one. Then I start the actual pattern writing, which also takes a lot of time, so the write-up is essentially the delaying factor.

I am currently writing up the pattern for what I think will be a very popular animal and have also test crocheted two completely new and different bear patterns. I love bears! Everyone loves bears! I had read a comment by someone that a bear is a bear is a bear… this couldn’t be further from the truth! It’s like saying “a human is a human is a human… they all have two arms, two legs and a head…” Obviously people are incredibly different despite having the same basic anatomy, and bears are no different. These bears (plus two other totally different bears which will follow) will be focused on making what would traditionally be called an “artist bear”. The regular crocheted and knitted bears have been seen by some as the “humbler cousin” …something I really want to change. The cleverness of the first two designs is that they are self-shaping. I have purposely created them in such a way that they have a little hump (as bears do), they have fat tummies and shaped limbs…all of which is achieved by simply constructing the bear as directed. The patterns will have a whole section devoted to finishing techniques, which will allow the bear maker to create something unique and of artistic quality. Yes, of course it may just be for a grandchild, but it will be the best bear anyway!

I also have plans to release my first shawl pattern this year. It’s for a really unusual geometric pattern that creates a shallowish triangular shawl. I am very excited about it and have started dyeing and testing up yarns and yarn combinations for it… also there is a secret line of new toys that is in the process of being created. This is something I am sooooo looking forward to seeing as it’s a totally different take on my current line….

Thank you so much for joining us, Heidi! Be sure to check out all of Heidi’s amazing designs on her Blog & Pattern Shop!

All photos courtesy of Heidi, unless otherwise specified.
Tips for Getting Back to Knitting after an Injury

Do you remember when I severely cut my thumb?

Three months later, I still only have partial sensation on my right thumb. And I’m right handed. The doctor told me that it might take a full year for the nerves to completely heal.
But you won’t catch me complaining… it could have been much worse. Did you know more than 500 Americans lose a limb every day? My numb thumb is a piece of cake.

Tips for Getting Back to Knitting/Crocheting

There are still some things I can’t do. I definitely notice that my hand is ‘not normal’. But I’d like to share a few insights that will help you get back on the path to knitting/crocheting as quickly as possible after an injury.

Talk to your doctor

This may sound obvious, but your doctor is the best one to advise you on treatments/therapy you should be doing to recover after your injury. Don’t hesitate to mention that you have a needlework hobby! A doctor may automatically ask about your line of work… and forget to ask about other goals you may have.

doctor illustration

It’s completely okay to say, “I crochet as a hobby, do you have recommendations for improving my fine motor skills?” Vanessa from MMAAC recommends bringing a notebook with you that contains questions you have for your doctor.

Accept the ‘New Normal’

For now, I can’t lift items one-handedly (at least, not reliably!) and I find myself relying more on my left hand. I’m very fortunate that for the most part, I can knit and crochet similarly to how I did before.
If that isn’t true for you, it might be time to have a talk with yourself about your expectations. You can only do what you can do, and lamenting over your loss of ability is only going to cause heartache.

Set Reasonable Goals

Think about where you’d like to be (remembering what’s reasonable!) and create concrete steps you can do to get there. Physical therapy may be a component of this.

goal setting

Can you crochet for 5 minutes a day? Do it consistently, and you might find yourself at 10 minutes. Baby steps.

Research Alternative Techniques

There’s more than one way to knit! If an injury is plaguing you, look into other techniques that may be more comfortable. Is your Tennis Elbow making knitting a pain? Perhaps knitting continental (holding the yarn in your left hand) is less painful.

holding crochet hook like a pencil

Or maybe try holding your crochet hook a different way? Or swap to an ergonomic hook? There are lots of possibilities!

Reach out to Chat

Don’t be afraid to be open about your injury- you never know when a game-changing suggestion will come your way! There are a number of Ravelry Groups dedicated to particular injuries… you never know where you’ll find a great suggestion that will help!

Have you had an injury?

Did it affect your knitting/crocheting? Any recovery tips you’d like to share?

What does ‘amigurumi’ mean?

Today’s guest post is written by Alyssa, MonstersToyBox on Ravelry.

Alyssa is a student in Linguistics and Japanese, as well as a very talented knitter and crocheter. Who better to tell us what ‘amigurumi’ means?

What does the word ‘amigurumi’ mean?

You probably know that amigurumi are incredible cute toys made from yarn. And you probably know that amigurumi was originally Japanese.

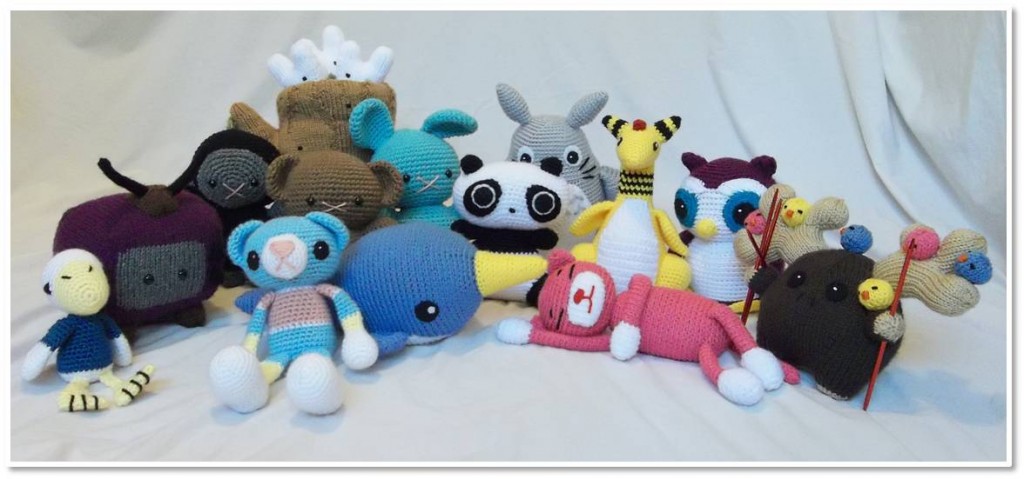
A collection of amigurumi knit & crocheted by Alyssa
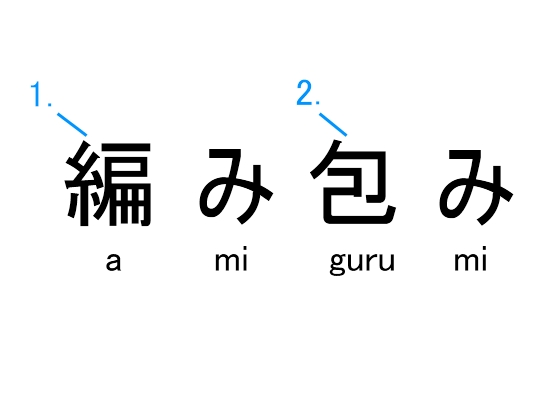
But what exactly is amigurumi? There are a couple different answers for that, and one of them is looking at what it originally meant in its native Japanese:

The first kanji (Japanese symbol of writing) is the character for “knit”; it can also mean several other things, but the knitting is what is important here.

And it is not just knitting; this character can apply to both knitting and crocheting. Japanese does not have two different words for knitting and crochet like English does. In fact, to crochet in Japanese is actually “to knit with a hook”.

So now we have the “knitted and crocheted” part of amigurumi. However, the second kanji is a bit trickier. One of its meanings is “wrapped”. At first, it doesn’t seem to have a lot to do with toys, however, “wrapped” implies that there is something being put inside. What is put inside amigurumi? Stuffing, of course! So perhaps a better meaning for this part, at least as it applies to amigurumi, is “stuffed”, although a native Japanese speaker told me that it is not limited to just stuffing. All sorts of things could be put inside amigurumi to give them shape, rubber balls, for example. The toy part here is assumed… what other knitting or crocheting is stuffed?

Does it have to be worked in the round?

Almost all translations will say that amigurumi means “knit or crocheted stuffed toy”, however, the majority of amigurumi (and especially Japanese amigurumi) is crocheted. That doesn’t exclude knitting as a valid form of amigurumi nor does amigurumi have to be worked in a particular style. I have found that many Japanese amigurumi are worked in joined rounds, but not all amigurumi has to be worked that way, and it certainly does not make it any less of an amigurumi!

Ready to start looking for Japanese amigurumi?

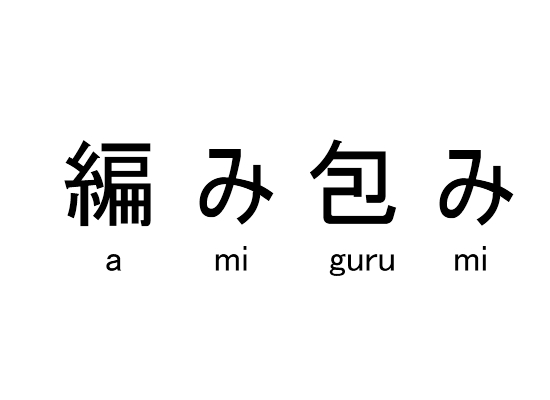
In Japanese, amigurumi is rarely written using the kanji anymore. Instead, it is written using the much simpler, syllabic hiragana (a phonetic alphabet):

If you are interested in looking for amigurumi in the original Japanese, this is what you are most likely to see.

Highlight this piece of text: あみぐるみ and pop it into Google… it’s your trick to finding oodles of images and even Japanese amigurumi books. Most Japanese books are charted, so they’re accessible to you even if you don’t speak Japanese!

5 Surprising Reasons Your Handmade Biz isn’t Making Money

I’ve talked before about pricing and selling handmade items, but the same principles apply to handmade businesses of all varieties. Because you may have missed it, I’ll summarize some key points here.

Here’s the kicker: whether you make items for sale, sell instructions/patterns for handmade items or are a teacher of a crafting skill, there are a few common roadblocks to earning the money you deserve. Warning: they may surprise you!

Reason #1: Your prices are too low

Counter-intuitive, isn’t it?

Here’s the thing: people often their perception of quality on what they pay. Think about it: if you were given the option of having a steak dinner at a restaurant for $3, what would be your first thoughts about the dinner? The restaurant?

You’re not assuming that you’re getting a lovely meal, are you? And why not? Because your alarm bells are telling you that the price is too low for a high-quality product. Not only are you going to assume the food is crappy, but you’re probably going to walk away from the entire restaurant. Who wants to go somewhere that serves (potentially unsafe) food?

Solution: Evaluate your prices

I’m not saying that you should to raise your prices just for the sake of it. But, you should ensure that you’re charging the correct amount… and not selling yourself short.

Do a market analysis. See what others who are selling comparable products are charging. This goes for teachers, too… do a little sleuthing to discover the going rate. You don’t want to be the cheapest one, around!

Reason #2: Your customer doesn’t know why they should pay for your product

I hate to break it to you: you can’t expect your customer to know why your product is valuable. Let’s say you charge $8 for a very detailed knitting pattern, which is slightly higher than average and seems very pricey in a sea of free patterns. Does your customer know that it’s full of step-by-step photos? That purchasing the pattern comes with unlimited email help? That the pattern has been tech-edited and is error-free?

How would they know unless you tell them?

Solution: Be clear about the value of what you offer in a concrete way

Maybe you think it’s obvious that any knitting pattern worth it’s salt would have clear instructions with photos. Maybe you’ve even attempted to convey this to the customer by saying “it’s a quality pattern”. But words like ‘quality’ mean different things to different people. So it’s up to you to concretely explain why your product rocks and is worth what you’re charging.

If you make products, do you make clear the materials and workmanship that go into your pieces? If you’re a teacher, is your skill at targeting in on student’s concerns apparent? I’m not saying this is easy to do… you may need to come up with creative ways of demonstrating what you bring to the table. But it’s worth doing.

Reason #3: Your customers don’t know what you do

Oy… this is even worse than the last one!

Let’s think about dinner, again. You really want a nice steak. Are you going to go to a restaurant with a reputation for being the best steakhouse in the area? Or one that serves lots of food… and sometimes it’s steak?

I think we both know you’d choose the one with a great reputation. And you’d probably be willing to pay more, too!

Are you heading towards being a person who sews dog hats, crochets baby booties and silkscreens onsies? Is that the best place for you to be headed? What if you could be the person who sews the BEST dog hats?

Solution: Make a niche

Who am I? I’m the chick who sells the most well-written crochet stuffed animal patterns. And… they even come with amazing customer service. I’m constantly writing tips and posting videos on the blog, and I take great care to answer questions that come in via email. That’s what I do.


Why don’t I design knitting patterns? It’s not because I can’t… because I can! But, customer service is my number one priority, and I know that I couldn’t provide the level of tips, videos and tutorials for both knitting and crochet (at least, not right now). So I don’t.

Can you find a niche? Don’t worry… you can still crochet baby booties on the side. But maybe just not for your business!

Reason #4: You’re not interacting with your customers

What’s the difference between you and a big company? YOU are a person. YOU make each item (or teach each class, or write each pattern) with your own little hands. YOU are a crafter with passions and ambitions that your customers want to hear about! In fact, the average customer is willing to pay more/more likely to buy from a crafter that they feel a connection with.

How do you build this connection? Maybe by sharing photos on Facebook. Or by posting stories about your work on your blog. Or even by putting a little bit of you in your item descriptions.

Solution: Share!

I know it’s hard. We all have a limited amount of time. As a small-business owner, you’re handling shipping and accounting in addition to the actual making of your product.

So, start with one way customers can connect with you. Begin with the medium that makes you most comfortable. And begin sharing your story!

Reason #5: You’re giving away your work for free

As crafters, we love what we do. It can be easy to forget that you should be getting paid.

I’ve heard it happen so many times: teachers who are roped into teaching a group of school kids to knit. Designers who add a new size in the pattern at a customer’s request. Crafters who put too much time doing modifications of a custom design without charging for the overtime.

Stop it! How are you going to earn a fair wage if you’re giving it away for free?

Solution: Set boundaries

I’m not gonna fib. Almost everything about running a business is hard. Especially setting boundaries. But you have to do it.

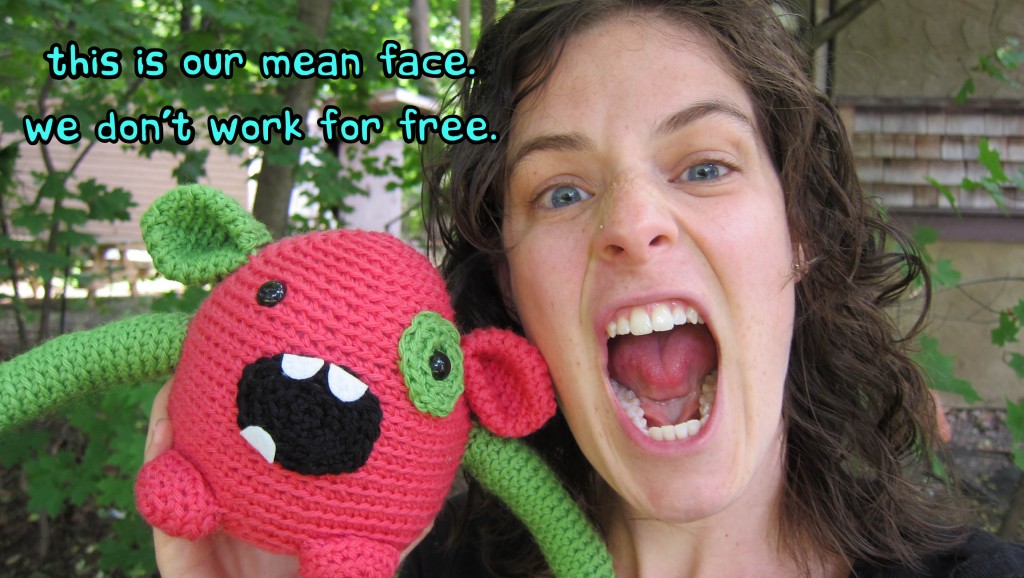
(I’m half kidding: don’t actually be mean. But, I’m serious about not working for free.) Don’t hesitate to quote a price for what is being asked of you. Watch, I’ll show you how it’s done:

Customer: Stacey, I LOVE the owl in your Etsy shop! I was wondering: can I order one with horns and pigtails (my husband is a Vikings fan), and about 24″ tall (he’s a big guy!)?

me, option 1: I’m sorry, but those modifications are pretty serious, and that’s not something I’m able to do. Thanks for thinking of me, though! When you need a just-plain-cute owl, I’m your girl!

me, option 2: Ooh! Sounds like so much fun! My rate for custom work is $xx per hour, and I estimate that those modifications will take about 2 hours, plus require $xx in additional materials fees.”

See? Either way, I’m not doing work that I’m not getting paid for.

Any of these reasons give you ideas for changing how you do business?

Are crochet hooks allowed on planes?

This question came up recently, and I since I have a lot to say on the topic (because I travel oodles), I thought it’d make a good blog post!

The short answer- in US and Australia

The quick and easy answer is “Yes, crochet hooks are allowed as carry-on items in planes in the US, Australia and lots of other countries”.

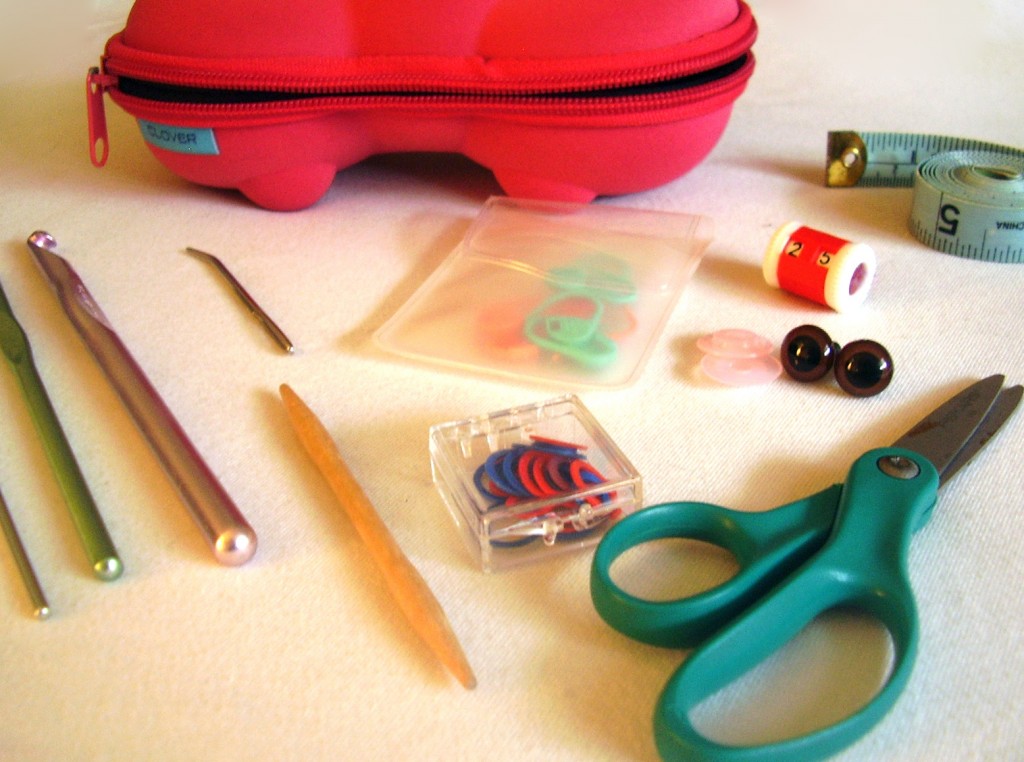
In my personal experience, I’ve carried crochet hooks on board planes in the US, England, France, Switzerland and Australia without any problems. The photo below is of my ‘hippo’, the case I carry around with me at all times while traveling.

Yes, I travel with metal crochet hooks (as pictured), and I have even brought steel crochet hooks (the tiny, pointy ones) with me. (For the tiny crochet hooks, I was questioned in Paris about what they were, but they weren’t taken away). I often hear people say that ‘wood is allowed, but metal isn’t’, and as far as I know- at least in countries that permit crochet hooks- there’s no difference between the materials.

And (at least in the US), child-safe scissors (that is, blunt-tipped and with blades shorter than 4 inches) are allowed on board as well (and is stated so in the TSA Regulations).

The Caveat

Of course the disclaimer is this: any TSA agent (or their analog in another country) may confiscate something if they feel it is a threat. Ultimately, the agents are permitted to make judgement calls- and of course, you’ll hear stories about someone who had their hook taken away.

Also, there are countries where crochet hooks aren’t permitted on board (in fact, Australia was one of them until 2009). So, when you travel, always check the local regulations.

Tips for traveling with hooks

I’ve said that hooks are allowed… but that a guard could take them away from you if they are deemed dangerous. So, how can you feel confident bringing your hooks? Here are some tips:

  • Bring yarn along with your crochet hooks. Better yet, be in the middle of a project. It’s much easier to explain what you’re doing (and that it’s a handicraft and not harmful) if there’s evidence of what you’re working on.
  • Use a pencil case. If you’re not in the middle of a project, throw your hooks in with some pencils and pens in a pencil case. Especially if your hooks are wood, they’re unlikely to be noticed.
  • Don’t bring anything irreplaceable. Actually, this rule applies to more than just crochet hooks! There’s always a tiny chance your hook can be taken away, so don’t bring your grandmother’s ivory hook- it’s just a risk you don’t need to take!

I’m not trying to help you sneak on anything that’s not allowed… crochet hooks are permitted on planes. But the truth is that sometimes you’ll run across an agent who either doesn’t know what a crochet hook is or doesn’t know that they’re allowed. And, it really makes for a nicer plane ride if you can have your hooks with you!

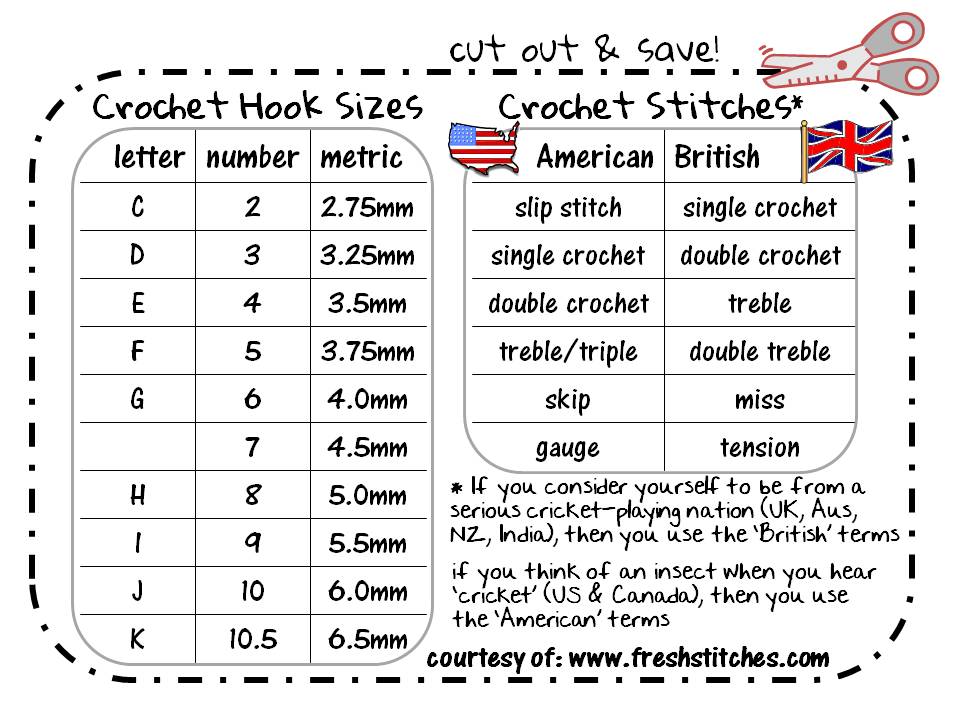
American/British Conversion chart: cut out & save!

American British crochet terms conversion - printable chart

Do you need a handy dandy refernce for converting between American and British crochet terms and hook sizes?

I’ve got you covered.

As I am about to enter my 3rd year of spending 1/15th of my year in the Land Down Under, I am becoming increasingly aware of the differences between the US and Australia. Forget about vegemite vs. peanut butter… the real issue is sorting out your crochet patterns!

The worst part about it is that the two countries use the exact same terms – but for different stitches! Talk about confusing!

I made a handy-dandy guide that you can print out and carry along with you. You don’t even need to travel much to use it: chances are, you’ve run across a great pattern from another country, and you have to translate the terms. No longer a problem! You can even hide this chart in your pocket and impress your friends!

Right-click the image to save it to your computer for easy printing and handy reference.

Want more conversion charts? This post has an even more detailed printable chart. It doesn’t include American and British crochet terms, but it lists all the different yarn sizes, the various names they have in lots of different countries, and the recommended crochet hook size for each yarn weight.

Happy stitching!

Here are handy links to all the posts about working with crochet patterns. . .

Return to the main table of contents for Let’s Learn to Crochet Amigurumi.

Move on to the lessons for working the first round of your crochet pattern.

Happy stitching!