How to sew on a button

doll crochet a long

Sewing on a button is a super-cute (and easy) decoration that you can add to your doll.

button sewn on crochet bootie

Check out this adorable button on Mia‘s shoe!
Attaching a button isn’t hard!

Types of buttons

Buttons come in all different shapes and sizes…

types of buttons

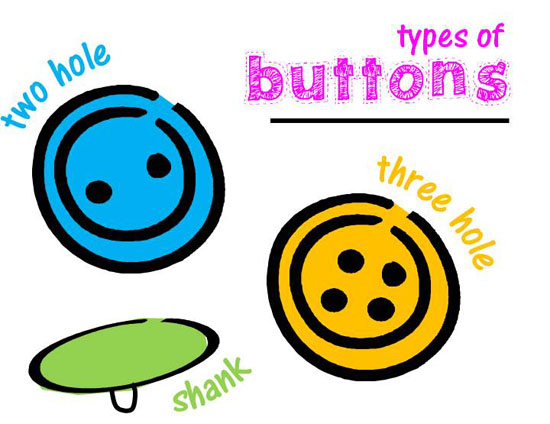
You can even find shaped buttons (like a little duck or fruits)! Use your imagination about which button would make your doll shine!

Start your thread

I begin by attaching my thread to the button. If you’re unfamiliar with sewing, watch the video in my blanket stitch tutorial to see how to get started. Instead of sewing on felt eyes (as shown in the tutorial), you’re sewing on a button!
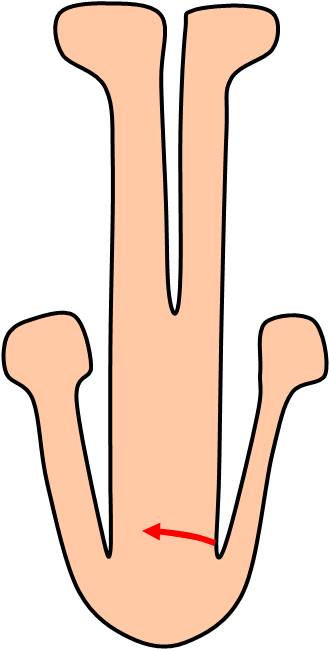
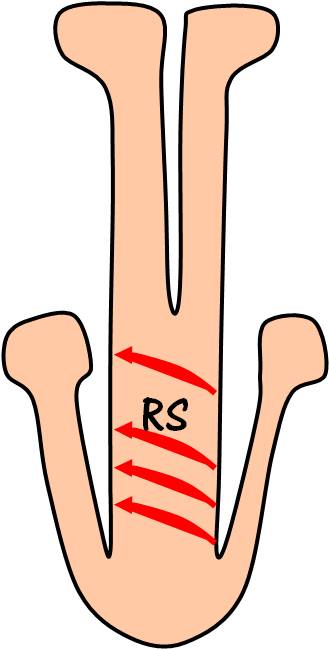
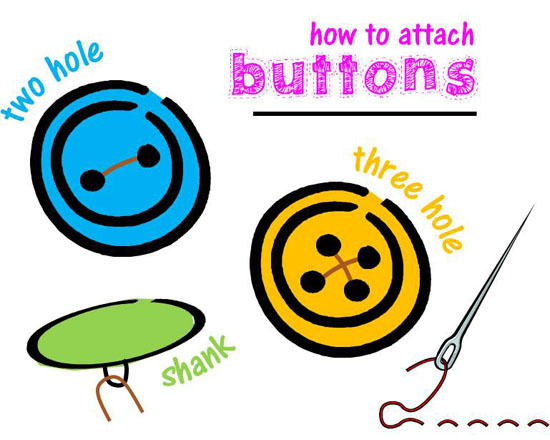
Sew a nice pattern

How you place your stitches depends on the type of button you have. Check out my suggested stitch patterns (shown in brown thread):

how to sew on a button

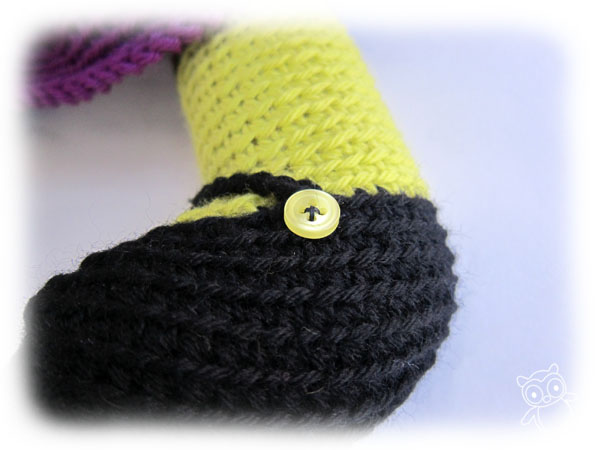
Once you’ve finished firmly attaching the button, tie a knot! Ta da!

Where will you add buttons?

They’d be cute on shoes, on dress straps or even as hem decorations! Go crazy!

Happy Father’s Day!

In the crafting world, moms get a lot of credit. They’re usually the ones to pass down the actual skill of sewing, crocheting or knitting.

I think, especially on Father’s Day, it’s important to reflect on the skills that fathers pass on to their children. Even though the men in my life didn’t teach me any craft skills, they instilled in me a do-it-yourself (and entrepreneurial) spirit, and passed on the value of quality workmanship.

Read my tribute (written last year) to the great guys I have!

And give your dad a hug!

Best,
Stacey

Tips for attaching a dress to your doll

Tips for Attaching a Dress to Your Crochet Doll - from FreshStitches and Shiny Happy World

How’s your doll coming along?

doll crochet a long

I’ve been seeing some fabulous works-in-progress and finished dolls in the Ravelry Doll-a-long thread… have I seen yours?

Today, I’m going to share some tips for crocheting on the dress/skirt/tutu for your doll!

Tip 1: Start without a head

The dress can be added after your doll has been stuffed and assembled, and many people prefer doing this because they can ‘envision’ what clothing will look best.

However, it’s actually easiest to crochet clothing on before the doll has been stuffed.

Legs of a doll, body

In doing it this way, you can crochet on the dress (and easily maneuver the body) without the bulk of stuffing or the head getting in the way.

Tip 2: Join the new yarn with a sc, in the back

Okay, so this ‘tip’ is written in the pattern, but I thought it was worth repeating!

It may look like the doll’s body doesn’t have a front/back… but take a look at the feet! The toes point forward to the front!

Attach your new yarn with a sc, at the center back of the body. This way, any jog in the rounds will be hidden at the back.

Tip 3: Hold your doll upside down

When attaching the dress, you want the right side of the dress fabric to face outwards.

This means holding the doll ‘upside down’ (head towards you, feet away) when you attach your new yarn.

attaching a dress to a doll

Notice how the right side of the dress is now facing outwards? That’s important! It will continue to do so as you crochet:

outline2

Tip 4: Weave in that end!

When you finish the dress/skirt, you’ll have an end that needs to be woven in. Whip out your tapestry needle, and zig-zag it through the wrong side of the fabric!

How’s your dress coming?

Well… if you’re doing one of the girls, that is! I know a number of you are crocheting Ethan, so you don’t need a skirt… but the same tips apply to attaching the sleeves!

Here’s how my Avery looks:

She’s almost done! Now to make choices about her eye color…

Want to make your own doll? Get the pattern here.

Here are handy links to all the posts about attaching parts. . .

Return to the main table of contents for Let’s Learn to Crochet Amigurumi.

Move on to the lessons about faces and details.

Happy stitching!

Tips for aligning your doll’s legs

Are you crocheting along with us for the doll-a-long?

doll crochet a long

If so, hooray! What part are you up to? Today I’m going to show you some tips for aligning and crocheting together your doll’s legs!

Not crocheting along? It’s not too late to join in! Grab a copy of the pattern and start crocheting!

How to align the legs

Once you’ve crocheted your legs, you’re going to crochet them together to continue her body. This method of construction is great… since it lets you skip doing any sewing! But it may be new to some of you, so don’t worry if it feels a little confusing.

You want your doll’s toes to be straight and facing forward, right?

Amigurumi crochet doll body

So, once you’ve crocheted your two legs, hold them together so that the toes face in the same direction:

how to align doll legs

Now, here’s the trick! Use a locking stitch marker to pin the legs together in the position you want them:

locking stitch marker

How to crochet the legs together

For details on the crocheting, you’ll want to check out this video.

crocheting legs for doll

Keep going!

Hooray! In my opinion, you’ve just finished the trickiest part of the whole pattern! (Well, besides picking the clothing colors… that’s a real pickle!)

Keep going, and don’t forget to share your progress in our Ravelry Group or on Facebook!

Best,
Stacey

Suggestions for skin color yarns!

It can be hard to find a nice skin-tone yarn. So, I’ve compiled a few suggestions for you!

sskin color yarn suggestions

Keep in mind that it’s going to be hard to find a yarn that’s exactly like a skin tone… remember you’re crocheting a toy, not painting an exact likeness! Keep your mind open, and you’ll find a yarn that’s at least close!

Doll Day is tomorrow!

Don’t forget, tomorrow is the release day for my new, super-exciting doll patterns! I think you’ll love them!

And… now I know you’ll be able to pick the perfect color for your doll!