


Happy Tip Tuesday! Last week, I talked about how to crochet with 2 colors of yarn, using a technique called stranding. This technique works wonderfully when there are only a few stitches between color changes.
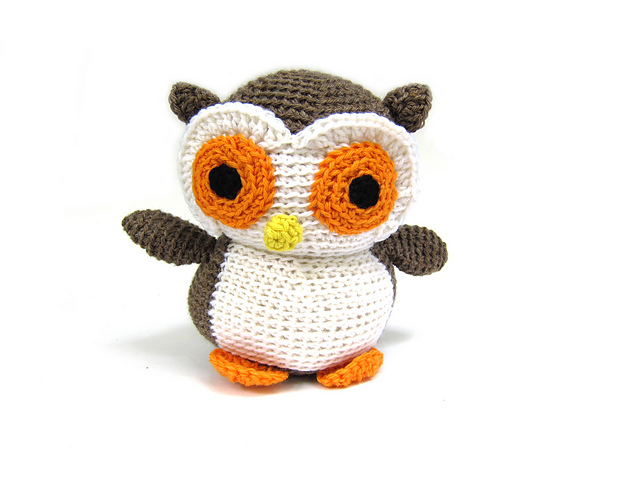
I get a lot of questions about how to handle the color changes for the body of Nelson the Owl. To crochet Nelson’s body and head, you crochet 20 stitches in one color, then 40 stitches in another color, meaning stranding doesn’t work too well. Today, I’ll show you what I do!
One option is to cut the yarn every time you change colors, and tie a knot. However, this is time consuming, and makes the process of crocheting this cutie owl a drag… so I skip it!
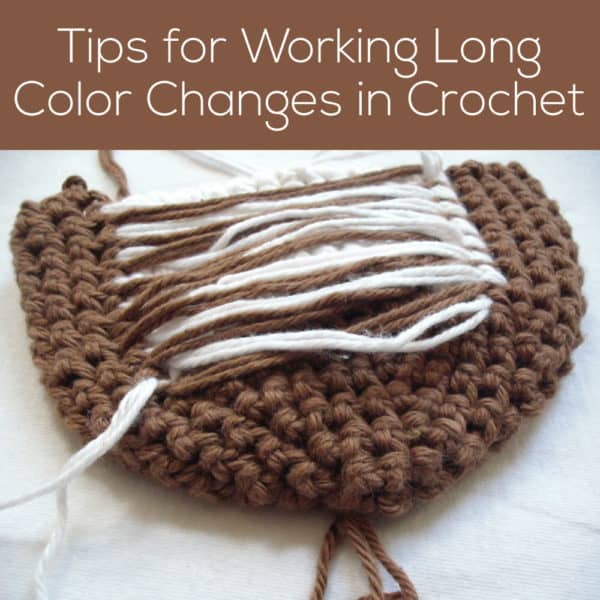
What I do is strand the yarn across the back while crocheting! Crochet just like you would with a short color change, leaving the yarn stranded across the 20 stitch color change, as pictured:

Now, you can’t just leave them like this, because of two reasons. One, the stranding won’t allow you to stuff the owl well. Two, all of that extra yarn with no tension on it will make the edge stitches uneven. So, what you need to do is cut down the center of the strand:

It will look like this when you’re finished:

Now, you need to tie these ends into knots to secure them. I start at the bottom of each side, and tie a square knot (you know, that boring kind of knot) with one strand of white and one strand of brown. (If you’re wondering why there looks like there are too many strands here, it’s because I crocheted this particular owl using two strands of yarn at once… try to ignore that if you can!)

Here’s how it will look:

Yay! With this technique, the knot tying happens all at once, which means it takes less time overall. I’ve gotten pretty speedy with my owls!
Hope you enjoyed this crochet tip!

Here are handy links to all the posts about changing yarn color in crochet. . .
- How to Change Colors in Single Crochet
- How to Crochet Stripes with Minimal Jog
- How to Crochet with Two Colors – Stranding
- How to Strand Short Color Changes
- Tips for Working Long Color Changes in Crochet
- How to Do Barbershop Striping in Crochet
- How to Crochet in Joined Rounds
Return to the main table of contents for Let’s Learn to Crochet Amigurumi.
Move on to the lessons about crocheting stuffed animals in different sizes.
Happy stitching!

OK, THIS is valuable information!! Thank you so much! I will definitely use this!!
Oh, good to know! Thank you for posting this. It looks so tidy! 🙂
Pingback: Link Love for Crochet Blogs. Great crochet news and information. — Crochet Concupiscence
Pingback: Mini sale and best of tumblr links «
Smart!
:O this is pretty life changing stuff Stacey!
Cannot wait to start making my Nelson and Dragon with this technique! 🙂
Pingback: Pin-tastic Friday | Little Bird Designs of Fredericksburg
Great idea cutting the wool and tying a knot. Thank you.
Do you have a pattern for your owl please. Marg
Yup! He’s at http://www.freshstitches.com/owl
Love this idea! Thank you for sharing!
I like how the colors line up (up and down). Usually each row slants to the right. Is there a special technique for this?
Stacey’s not doing anything special here – just following the pattern. I think the natural slant of crochet stitches (which you usually only notice when there’s a color change) isn’t as noticeable after stuffing.
Interesante y práctica esa información, gracias desde Venezuela
thanks so much for this info! Your craftsy class got me going on amigurumi, I never thought I could do it! Now everyone wants one, so I’m about to try my first Nelson owl! I really appreciate all the tips and details in your patterns, totally worth buying!